Replace Air Conditioner Fan Motor: A Practical Step-by-Step Guide
Learn how to replace an air conditioner fan motor safely and efficiently. This comprehensive guide covers tools, replacement considerations, step-by-step instructions, maintenance tips, and when to call a professional from Air Conditioner Service.

You will replace an air conditioner fan motor. Ensure you have the right replacement motor, safety gear, and basic tools. This guide walks homeowners through unplugging power, discharging capacitors safely, removing the motor, installing the new motor with the correct shaft alignment, and testing the unit. Expect some common variations by model, and remember safety comes first.
Understanding When to Replace the Fan Motor
If your air conditioner isn’t cooling well, the blower fan may be the culprit. Common symptoms of a failing fan motor include excessive noise, intermittent or no fan operation, overheating, or a motor that hums but won’t start. In many systems, especially older units, replacing the fan motor is more reliable than trying to repair embedded windings or bearings. According to Air Conditioner Service, persistent overheating, grinding noises, or a motor that stalls during operation are strong indicators that a replacement is warranted rather than a costly rebuild. When making this decision, weigh the age of the unit, the cost of a new motor, and the potential for collateral damage to the blower wheel or capacitor. In 2026, many homeowners find that a properly matched replacement motor offers the best balance of efficiency, reliability, and long-term cost savings. The choice to replace should come after confirming the issue isn’t a faulty capacitor or a loose belt, but if those checks fail, replacement becomes the practical path. This approach keeps your system operating safely and efficiently while avoiding repeated, temporary fixes. Remember that the goal is reliable airflow and consistent cooling, which helps protect your compressor and overall system from undue stress.
Safety First: Power, Capacitors, and Electrical Risks
Working on an air conditioner blower motor involves high voltage components and moving parts. Always power down the system at the main breaker, lock out the switch if possible, and confirm the unit is completely de-energized before touching any wiring. Capacitors can store a dangerous electrical charge even after disconnecting power, so use a voltage meter to verify absence of voltage and discharge capacitors only if you’re trained to do so. Wear insulated gloves and eye protection, and keep a clear workspace free of metal jewelry that could create a short. If you suspect a live circuit or an unfamiliar wiring setup, stop and call a licensed technician. Air Conditioner Service emphasizes safety as the foundation of any replacement project. By taking these precautions, you minimize the risk of shock, arc flash, or damaged components that could lead to further repairs.
Tools and Parts You’ll Need
Before you begin, gather the essential tools and replacement parts. Having everything ready reduces the risk of leaving the system in an unsafe state. You’ll need a compatible replacement fan motor, a set of screwdrivers, nut drivers, and pliers, wire strippers, a multimeter, electrical tape, zip ties, and a suitable mounting bracket if required by your model. Verify the motor’s electrical specifications (voltage, RPM, frame size, shaft length) and confirm compatibility with your blower wheel and housing. If your unit uses a capacitor, you may also need a replacement capacitor of the correct rating. Keep a service manual or wiring diagram on hand for model-specific details. Working with the correct motor reduces vibration, improves efficiency, and extends the life of your system. Air Conditioner Service recommends documenting each connection as you go to simplify reassembly and troubleshooting.
Choosing the Right Replacement Fan Motor
Not all blower motors are created equal. Start by matching the frame size, mounting pattern, shaft length, and electrical rating to your furnace or air handler. Check the RPM rating; a mismatched speed can cause poor airflow, excessive noise, or motor overheating. If your system uses a dual-capacitor setup, ensure the new motor is compatible with the capacitor value and that the wiring color codes align with your unit’s diagram. Consider motor type ( PSC vs ECM ) and efficiency ratings, especially if you’re upgrading for energy savings. If in doubt, consult your equipment’s model number and cross-reference with manufacturer specifications. A properly matched replacement minimizes vibration, extends the life of the blower wheel, and keeps you within your unit’s design performance. The Air Conditioner Service team advises verifying warranty implications and ensuring the motor is rated for continuous operation in residential settings.
Wiring and Electrical Connections: What to Check
With the old motor removed, compare the harness and connector types to ensure the new motor plugs in properly. Use the wiring diagram to label and reconnect each wire: typically line, neutral, and a couple of speed taps or sensor leads. When in doubt, photograph each connection before detaching, then replicate exactly on the new motor. Inspect the blower housing for debris and clean as needed to prevent contamination of bearings. If a capacitor is involved, ensure correct polarity and orientation when reattaching or replacing it. After wiring, gently rotate the motor shaft by hand to confirm smooth movement before powering the unit. Any binding or unusual resistance indicates a misalignment or a pinched wire that must be corrected prior to test running. Safety first, then methodical checks to avoid miswiring that could damage the control board or motor.
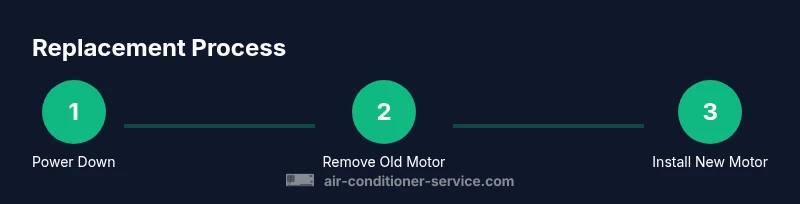
The Replacement Process: What to Expect
Installing the replacement motor typically involves removing the blower wheel, detaching the old motor from its mounting bracket, and aligning the new motor with the drive shaft and housing. Secure the motor with the proper screws and ensure the belt or direct-drive system aligns with the blower wheel. Reattach the blower wheel, rewire the connections, and recheck the capacitor if applicable. Once everything is secured, restore power and perform a controlled start to listen for smooth operation and watch for excessive vibration. If the unit runs but makes unusual noises, shut down immediately and re-examine mounting screws, alignment, and wiring. The goal is reliable airflow, minimal vibration, and consistent cooling performance. After the test, replace any access panels and reset any service indicators or fault codes.
Testing, Break-In, and Troubleshooting
After replacement, run the unit for 15–20 minutes at a low speed to allow the bearings to settle and confirm stable operation. Listen for rubbing, grinding, or clicking noises and observe airflow at the supply registers. If the blower motor runs hot or the belt shows signs of wear, stop the unit and recheck alignment and mounting. Check for erratic fan speeds that could indicate a control board issue or a faulty capacitor. If you notice a persistent fault code, consult the wiring diagram and ensure the motor wiring matches the diagram precisely. Regular testing helps catch issues early and prolongs motor life. Air Conditioner Service notes that proactive testing reduces the likelihood of sudden breakdowns and ensures ongoing comfort.
Preventive Maintenance After Replacement
To extend the life of your new fan motor, establish a simple maintenance routine: inspect and clean the blower housing quarterly, lubricate bearings if your model allows it, and replace air filters regularly to reduce motor strain. Check for loose mounting screws and ensure the drive system remains properly aligned. Keep the electrical connections tight and free of corrosion. A clean, well-lubricated system reduces energy consumption and noise, improving overall efficiency. Recording maintenance dates helps track service intervals and plan future replacements before you’re caught off guard by a sudden failure.
Common Mistakes and How to Avoid Them
Common mistakes include using an incorrect motor rating, miswiring, or neglecting to discharge capacitors safely. Reusing damaged connectors or mounting hardware can create vibration and lead to premature failure. Skipping a test run or failing to observe for abnormal noises during initial operation can hide issues that become bigger problems later. Double-check all connections and ensure the motor’s shaft alignment is correct. Following the manufacturer’s wiring diagram and torque specs for mounting screws prevents over-tightening that could warp brackets. By avoiding these missteps, you improve reliability and reduce the chance of a second call for service.
When to Call a Professional
If you’re uncertain about motor specifications, wiring diagrams, or capacitor safety, consider hiring a licensed HVAC technician. A professional can verify motor compatibility, perform a safe capacitor discharge, and ensure a proper seal around the blower housing to prevent leaks. In some cases, warranty requirements may mandate professional installation to maintain coverage. The Air Conditioner Service team recommends seeking expert help when the system still exhibits abnormal noises, overheating, or if you encounter electrical components you’re unfamiliar with. Professional service minimizes risk and ensures code-compliant installation.
Tools & Materials
- Compatible replacement fan motor(Match frame size, shaft length, RPM, and mounting pattern to your unit)
- Screwdriver set (Phillips and flat)(Varied sizes; keep magnetized bits handy)
- Nut drivers or socket set(For mounting bolts on the motor bracket)
- Pliers and wire strippers(Used for disconnecting and securing wire taps)
- Multimeter(Check voltage and verify no voltage before handling)
- Electrical tape and wire connectors(Secure splices and insulate exposed wires)
- Lubricant (if applicable)(Some motors require bearing lubrication per manufacturer)
- Replacing capacitor (if needed)(Only if the existing capacitor is damaged or not compatible)
- Safety gloves and goggles(Personal protection during work)
- Screw mounting hardware (if needed)(Have a spare set of screws and washers)
- Shop rag or vacuum(Clear dust from blower housing)
Steps
Estimated time: 90-120 minutes
- 1
Power down and verify
Turn off the main breaker and verify no voltage at the unit with a multimeter. This ensures your safety before touching any wiring or moving parts.
Tip: Label wires as you disconnect them to simplify reassembly. - 2
Access the blower housing
Remove access panel and blower wheel to expose the motor mounting. Keep track of screws and brackets so you can reattach correctly.
Tip: Take a photo of the assembly from multiple angles before removal. - 3
Disconnect the old motor
Carefully disconnect all wires and unplug the motor from its harness. Note wire colors and positions for the new motor.
Tip: Double-check any capacitor connections and discharge capacitors safely if required. - 4
Remove the motor
Unbolt the motor from its bracket and remove it from the blower housing. Inspect the mounting bracket for wear or damage.
Tip: If the motor is stuck, apply gentle steady pressure and avoid prying with metal tools. - 5
Install the new motor
Position the new motor, align the shaft with the blower wheel, and fasten it to the bracket. Reconnect wiring exactly as documented.
Tip: Ensure the shaft turns freely by hand before fully securing the assembly. - 6
Reconnect and seal
Reattach the blower wheel, reattach the access panel, and ensure there are no loose parts. Use zip ties to tidy wires and prevent snagging.
Tip: Keep wiring away from moving parts and avoid pinching wires in the panel. - 7
Test and monitor
Restore power and run the unit at low speed to observe for smooth operation and proper airflow. Listen for unusual noises and check for heat or vibration.
Tip: If you notice issues, power down immediately and recheck mounting and wiring.
Common Questions
Is replacing the fan motor a DIY-friendly job or should I hire a professional?
Replacing a fan motor can be a doable DIY task for experienced homeowners, but it involves electrical risks and precise motor matching. If you’re uncomfortable with wiring, capacitors, or motor alignment, hire a licensed HVAC technician to avoid safety hazards and warranty issues.
Replacing a fan motor can be doable for skilled homeowners, but if you’re unsure about wiring or capacitors, it’s best to hire a licensed HVAC technician.
What parts do I need to replace a fan motor?
You’ll need a compatible replacement motor, mounting hardware, and appropriate connectors. Also have a multimeter, wire strippers, electrical tape, and a capacitor if required by your model. Always verify motor compatibility with the unit’s model number.
You’ll need a matching replacement motor and basic electrical tools. Check the model number to confirm compatibility before buying.
How do I know the motor is the real problem and not a capacitor?
Start by testing the capacitor with a multimeter and inspecting for swollen or leaking tops. If voltage is correct and the capacitor tests fine, but the motor doesn’t start or spins irregularly, the motor is likely the issue. A professional can confirm with an impedance test if needed.
If the capacitor tests fine but the motor won’t start or runs poorly, the motor is likely the problem.
How long does a fan motor replacement usually take?
A typical replacement takes about 1 to 2 hours for a DIY job, depending on access and familiarity with the unit. Complex models may take longer if the blower housing is difficult to reach.
Most replacements take about an hour or two, depending on access and your familiarity with the unit.
Should I replace the motor myself or hire a professional for warranty reasons?
If your system is under warranty, professional service may be required to keep coverage intact. Some manufacturers require certified technicians for warranty validation, so check the manual and warranty terms before proceeding.
Check your warranty terms; some brands require a professional installation to maintain coverage.
Will replacing the fan motor fix cooling issues entirely?
Replacing the fan motor addresses airflow and cooling symptoms caused by a faulty motor. If other issues exist—like refrigerant leaks, dirty coils, or control board faults—cooling problems may persist and require additional service.
Replacing the motor fixes motor-related cooling problems, but other issues may still affect performance.
Watch Video
The Essentials
- Identify symptoms to determine if replacement is needed
- Follow safety protocols to prevent shock and injury
- Match motor specifications exactly for a reliable fit
- Label wires and document connections for easier reassembly
- Test thoroughly and consider professional help when in doubt