Air Conditioner Fan Motor Replacement: Step-by-Step Guide
Learn how to safely replace an air conditioner fan motor with a practical, step-by-step approach. Includes tools, safety tips, diagnostics, and common pitfalls to avoid.

You can safely replace an air conditioner fan motor by powering down, removing the blower access panel, testing with a multimeter, and installing a compatible motor with the correct shaft size and mounting. Gather a replacement motor, mounting screws, electrical connectors, a capacitor if required, and basic hand tools. Follow safety precautions and consult your model’s service manual for exact wiring.
Why You Might Need to Replace the Fan Motor
A malfunctioning blower or evaporator fan can compromise cooling performance and indoor comfort. According to Air Conditioner Service, common signs include reduced air movement, warm air at vents, unusual grinding or squealing noises, and the system cycling off due to electrical faults. The Air Conditioner Service team found that many homeowners try quick fixes that don’t address the underlying motor fault, leading to repeated problems. If the blower isn’t spinning or runs intermittently, the motor bearings or windings are often the root cause. Before you begin, verify you have a replacement motor that matches the original in shaft size, frame, and horsepower, and confirm the mounting orientation for your unit (horizontal vs vertical, upflow vs downflow).
This phase is essential because a mismatched motor can cause vibration, reduced efficiency, and accelerated wear on the blower wheel and belt (where applicable). By planning for exact specifications, you reduce the chance of wasted effort and avoid repeated service calls.
Understanding the Motor: Types and Compatibility
Residential air handlers typically use single-phase PSC (permanent split capacitor) or ECM (electronically commutated) blower motors. PSC motors are common in older or mid-range systems, while ECMs offer higher efficiency and variable-speed control in newer units. The motor’s frame size, shaft diameter, mounting type, and rotation direction must match the blower assembly. If the motor drives a belt-driven blower, the belt type and pulley ratio also matter. Always check the nameplate on the existing motor and the blower wheel for exact specs and compatibility notes. In many cases, the replacement motor should have the same horsepower and RPM as the original, and use the same capacitor or a compatible modern equivalent. Air Conditioner Service analysis shows that using an incorrectly matched motor can lead to excess heat, motor hard-start, and premature failure.
Safety First: Prepare for a Motor Replacement
Electrical work on HVAC equipment carries risk. Begin by turning off power at the main breaker and, if accessible, disconnecting any external disconnect. Use a multimeter to confirm there is no voltage present on the fan motor leads. Capacitors can store a dangerous charge even when power is off; discharge capacitors only with the correct tool and procedure outlined in the service manual. Wear safety glasses and gloves, and keep the workspace dry. If you’re unsure about your unit’s wiring or capacitor configuration, consider professional help to avoid shocks or equipment damage.
Diagnosing the Fault Before Replacement
Confirming that the motor is the fault rather than a capacitor, relay, or wiring issue is crucial. With power isolated, test the motor windings for continuity and resistance against the manufacturer’s specifications. Inspect the blower wheel for binding, rubbing, or excessive wear. Listen for grinding sounds when manually turning the shaft while the system is powered off. If the motor spins freely by hand but stalls or overheats in operation, it’s a strong indicator the motor windings or bearings are worn. Document any signs of overheating or unusual vibration, as these details help with selecting the correct replacement and avoiding future failures.
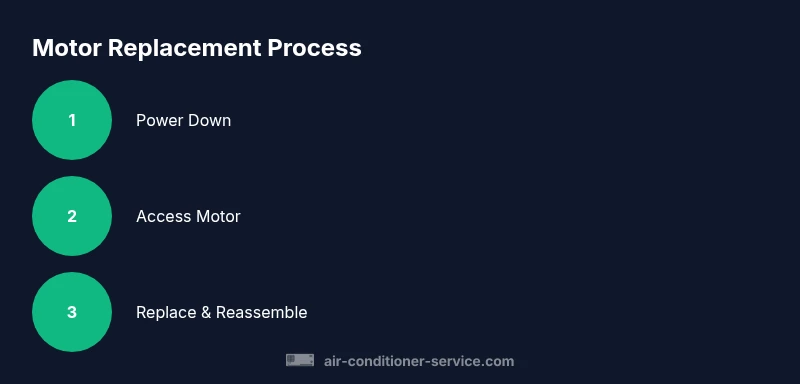
Replacement Process Overview
Replacing a fan motor involves clean removal of the old unit, careful mounting of the new motor, and accurate reconnection of electrical leads and the capacitor. Start by marking or photographing each wire connection, then disconnect and remove the old motor from its mount. Compare the new motor to the old one for frame size, shaft length, and shaft orientation. Mount the new motor firmly with the original hardware or compatible fasteners, align the shaft with the blower wheel or belt, and ensure proper clearance to avoid rubbing. Reconnect the capacitor and wiring, then reassemble the access panel and blower assembly. Finally, restore power and run a brief test to verify airflow, noise levels, and temperature output.
Common Pitfalls and How to Avoid Them
Common mistakes include using a motor with the wrong shaft size or frame, miswiring the capacitor leads, forgetting to discharge a charged capacitor, and not aligning the motor shaft with the blower wheel. Take time to recheck all electrical connections after installation and verify that the motor turns freely without contact with the housing. If you hear abnormal noises after startup or notice a strong odor or overheating, immediately shut down the unit and recheck connections. The goal is a silent, smooth-running motor that delivers consistent airflow.
Authority Sources
For further guidance and safety standards, consult these resources:
- https://www.energy.gov/eere/buildings/articles/air-conditioner-maintenance
- https://www.osha.gov/
- https://www.nrel.gov
These sources provide general safety practices and maintenance considerations relevant to air conditioning systems and motor replacements.
Tools & Materials
- Replacement fan motor (matched to original specs)(Same horsepower, frame size, shaft diameter, mounting type, and rotation direction)
- Screwdrivers (Phillips and flathead)(Varied sizes for panel and motor mounting)
- Multimeter(To verify continuity and voltage (with power off))
- Capacitor (if required)(Replace only if the old motor used one and the new motor requires it)
- Electrical connectors and crimp tools(For secure wiring and new connectors if needed)
- Wrench set / socket set(For mounting bolts and brackets)
- Pliers (needle-nose)(Wire handling and small fittings)
- Torque driver or wrench(Optional for precise mounting torque)
- Safety gear (gloves, safety glasses)(Personal protective equipment)
- Marker or camera/phone(Label wires or photograph connections for reassembly)
- Manual for model-specific guidance(Manufacturer instructions and wiring diagrams)
Steps
Estimated time: 60-120 minutes
- 1
Power down and verify safety
Turn off the main breaker and unplug the unit if accessible. Confirm no voltage on fan leads using a multimeter. This prevents shocks and accidental startup during replacement.
Tip: Lockout the breaker to avoid accidental restart. - 2
Access the motor compartment
Open the service panel and locate the blower motor and its mounting. Note how the motor is oriented and how the blower wheel attaches.
Tip: Take a photo before disconnecting anything. - 3
Label and disconnect wiring
Label every wire connection and disconnect the wires from the motor and capacitor if applicable. Keep track of color codes and terminal positions.
Tip: Use color-coded tags or tape for accuracy. - 4
Remove drive belt or blower wheel
Loosen tension or remove the belt if belt-driven. Remove any retaining screws holding the blower wheel or housing.
Tip: Keep fasteners organized for reassembly. - 5
Detach the old motor
Unscrew mounting bolts and carefully extract the motor from its bracket. Inspect the mounting area for damage or corrosion.
Tip: Support the motor during removal to avoid dropping it. - 6
Prepare the new motor
Compare the new motor to the old one for frame size, shaft length, and rotation. Install the mounting plate or brackets if required and attach any shields or couplings.
Tip: Confirm shaft alignment before wiring. - 7
Install the new motor
Position the motor, slide it into place, and secure mounting bolts. Reconnect the shaft to the blower wheel or drive assembly and verify alignment.
Tip: Hand-tighten bolts first, then torque to spec if available. - 8
Reconnect wiring and capacitor
Reconnect labeled wires to the new motor and capacitor leads as per the service manual. Ensure tight, clean connections and no stray strands.
Tip: Double-check capacitor orientation and wiring diagram. - 9
Test and reassemble
Restore power and run the system briefly to check for proper operation, airflow, and noise. Reassemble the access panel and any covers once stable.
Tip: Listen for smooth operation and feel for consistent airflow.
Common Questions
What are signs the fan motor is failing?
Common signs include reduced airflow, unusual noises, blower not turning, or the system cycling off. If you notice these, inspect the motor and bearings before replacing any components.
Look for weak airflow, odd noises, or the blower failing to start. If you see these, check the motor and bearings; replacement may be needed.
Can I replace the fan motor myself?
Yes, if you have basic electrical skills and follow safety rules. Always power down, discharge capacitors, and refer to the service manual for wiring diagrams and torque specs.
You can try it yourself if you’re comfortable with electrical work and follow the manual closely.
Is it necessary to replace the capacitor during motor replacement?
Not always, but if the old capacitor shows signs of wear or you’re upgrading to a motor that requires a new capacitor, replace it with the correct rating.
Only replace the capacitor if the old one is faulty or if your new motor needs a different capacitor.
What if the motor size is wrong?
If the motor doesn’t match the mounting, shaft, or rotation direction, don’t force it. Return or reorder a motor that matches the original specs to avoid vibration and damage.
If the size doesn’t match, don’t force it; get the correct motor to prevent problem later.
How long does replacement take?
Typical replacement takes about an hour or two, depending on accessibility and whether belt-driven components are involved. Plan for extra time if you need to disassemble more of the cabinet.
Most replacements take around an hour or two, depending on access and setup.
Should I replace the blower wheel if it’s damaged?
Yes. If the wheel is worn, cracked, or rubbing against housing, replace it to regain proper balance and airflow and prevent motor wear.
If the blower wheel is damaged, replace it to restore proper airflow and protect the motor.
Watch Video
The Essentials
- Identify motor type and specs before purchasing replacements.
- Safety first: disconnect power and discharge capacitors properly.
- Accurate wiring and alignment are essential for quiet, efficient operation.
- Verify compatibility with the blower assembly to prevent later failures.