Change Air Conditioner Capacitor: Step-by-Step Guide
Learn how to safely identify, test, and replace a faulty air conditioner capacitor. This practical guide covers tools, steps, safety tips, testing, and maintenance to restore reliable cooling.

Today you will learn how to safely change an air conditioner capacitor. You’ll identify symptoms, confirm the correct capacitor rating, discharge the system, remove the old capacitor, install a replacement, and retest the circuit. This guide emphasizes safety, correct wiring, and using insulated tools. The steps apply to standard residential split systems and dual-run capacitors.
What the capacitor does in an air conditioner
Capacitors in residential air conditioners store electrical energy to help start and run the motors for the compressor and condenser fan. In most homes you’ll find a run capacitor, and some systems use a dual-run capacitor that handles both the compressor and the fan. The capacitor delivers a brief jolt of electricity to energize motor windings, creating a rotating magnetic field that starts the motor and keeps it spinning. When the capacitor weakens or fails, the compressor may struggle to start, the system may run intermittently, or cooling performance can drop. Replacing a bad capacitor often restores reliable operation and reduces excess current that can overheat components. Always confirm the exact capacitor rating by referencing the unit’s nameplate or the old capacitor itself. Using an incorrect rating can damage the motor or create safety hazards. This guide focuses on the standard patterns found in typical residential systems and explains how Air Conditioner Service approaches capacitor replacement.
Symptoms of a failing capacitor
- Not starting or the outdoor unit humming without engagement
- Weak cooling or the fan running slowly
- Frequent tripping of breakers or a sudden reset of the thermostat
- Visible bulging, leaking, or damaged capacitor housing
- Odd noises when the unit tries to start
If you notice any of these signs, plan a safety-first inspection and identify the correct replacement capacitor before proceeding. Air Conditioner Service notes that many service calls stem from faulty capacitors, making correct identification essential for a successful repair.
Safety-first guidelines for changing a capacitor
Power down the system at the main breaker and unplug any external controls. Wear PPE including insulated gloves and safety glasses. Keep the area dry and clear of moisture to avoid shock. Do not touch live wires, and use insulated tools designed for electrical work. If you’re unsure about the wiring or the capacitor type, stop and consult a professional. Air Conditioner Service emphasizes that safety is a prerequisite to any capacitor replacement.
How to identify the correct replacement capacitor
Read the label on the existing capacitor or the unit’s electrical panel to determine the correct microfarad (uF) rating and voltage. If you have a dual-run capacitor, it will have three terminals and different labeled leads. Always match the exact rating and physical size to fit the existing mount and terminals. If you cannot find the rating, photograph the old part and consult the manufacturer’s schematic before ordering a replacement. Choosing the wrong capacitor can cause motor damage or unsafe operation and should be avoided.
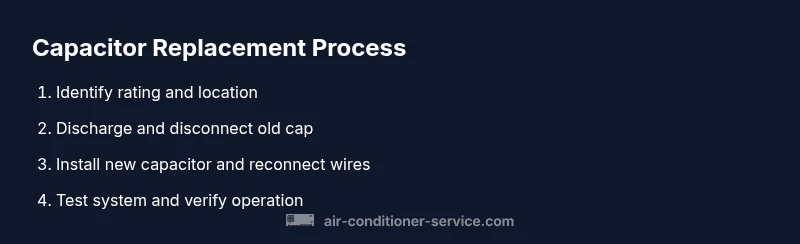
Step-by-step overview (high-level) for planning the replacement
Plan to work in a well-lit area and keep screws and parts organized. Label wires before disconnecting them so you can reconnect correctly. Ensure you have the right replacement capacitor on hand, along with insulated tools and a means of safely discharging any stored energy. After installation, recheck all connections for tightness and proper seating. Only test the system after you are sure all tools and protective covers are in place.
Testing the system after replacement
With power restored, listen for a normal start and steady running of both the compressor and fan. If available, use a multimeter to verify the capacitor reads within the expected range when the unit is running. Check for proper voltage across terminals and confirm that the unit maintains comfortable indoor temperatures. If the system hesitates to start again, or you hear capacitive buzzing, power down again and recheck the connections. Air Conditioner Service recommends a cautious, step-by-step test approach to avoid reintroducing issues.
Common mistakes and troubleshooting tips
- Replacing without verifying the rating or label
- Mixing up wire terminals or incorrectly reconnecting leads
- Not discharging the capacitor before handling
- Skipping a re-test after installation
- For dual-run capacitors, treating both sections the same when they’re not identical
Pro tips: take a photo of the old wiring before disconnecting, use zip ties to keep wires organized, and label each connector. Warnings: capacitors can store charge even after power is removed; never short the terminals to test energy release.
Tools & Materials
- Insulated gloves(ANSI-rated electricians gloves for electrical work)
- Safety glasses(Impact-resistant splash protection)
- Multimeter or capacitor tester(To verify readings before and after replacement)
- Screwdriver set (insulated)(Varies by unit panel screws)
- Replacement capacitor (matching rating)(Exact microfarad value and voltage; for dual-run, three-terminal type)
- Wire cutters/strippers(For clean wire tails and terminal cleanups)
- Electrical tape or terminal blocks(Secure and insulate connections)
- Zip ties and label material(Organize wires and label before disconnecting)
- Marker or tape(Label wires for accurate reconnection)
Steps
Estimated time: 45-60 minutes
- 1
Identify the capacitor type and rating
Locate the capacitor on the outdoor unit or inside the air handler. Read the label to confirm the microfarad rating (uF) and voltage. If it’s a dual-run capacitor, note the three terminals and their labels. This step ensures you buy the correct replacement and avoid motor damage.
Tip: Take a clear photo of the capacitor and the wiring before disconnecting anything. - 2
Power down and discharge
Turn off the main breaker and switch off the thermostat. Wait several minutes to allow stored energy to dissipate. Use a voltage tester to confirm no voltage is present before touching any wiring.
Tip: Do not rely on the thermostat alone to cut power; verify the breaker is off. - 3
Disconnect the old capacitor
Carefully loosen the terminal screws and detach the wires from the capacitor terminals. Note or label which wire goes to which terminal, especially on dual-run units. Gently remove the capacitor from its mounting.
Tip: Avoid yanking on wires; use proper wire strippers to break any corrosion on terminals. - 4
Inspect and prep the replacement
Compare the new capacitor against the old one to ensure the same microfarad rating and voltage. If replacing a dual-run capacitor, verify the capacitance values for both sections. Clean any oxidation from the terminals and prepare the mounting area.
Tip: Use the same orientation and keep the terminals clean for a solid connection. - 5
Install the new capacitor
Mount the new capacitor in its bracket and reconnect wires to the correct terminals. Tighten screws firmly but avoid over-tightening. For dual-run capacitors, ensure each lead is on its proper terminal. Re-seat the cover and ensure no wires are pinched.
Tip: Double-check terminal labels before plugging in wiring to prevent miswiring. - 6
Test basic operation
Restore power and set the thermostat. Listen for a clean start and steady operation of the compressor and fan. If the unit fails to start, power down again and recheck connections. Confirm normal temperature rise and airflow.
Tip: If the unit does not start, power down and test voltage at the capacitor with the meter to verify wiring.
Common Questions
Is it safe to replace an AC capacitor yourself?
Replacing a capacitor can be safe if you have knowledge of electrical work, the unit is de-energized, and you follow proper safety steps. If you’re unsure, hire a licensed technician.
Yes, it can be safe if you de-energize the system and follow all safety steps. If not, call a professional.
How do I know which capacitor to buy?
Read the label on the existing capacitor or the unit’s schematic to identify the correct microfarad rating and voltage. If you have a dual-run capacitor, confirm the ratings for both sections.
Check the old capacitor label or the unit's schematic to match the right rating.
Can a capacitor tester measure capacitance accurately?
A dedicated capacitor tester or a multimeter with capacitance measurement can verify readings. For dual-run capacitors, ensure you measure each section correctly.
A capacitor tester helps verify the rating, especially on dual-run capacitors.
What if the unit still won’t cool after replacement?
Capacitor replacement fixes start-up issues but not all cooling problems. If cooling remains inadequate, the issue could be the compressor, refrigerant, or airflow problems requiring a broader inspection.
If cooling remains poor after replacement, other components may be at fault and require further evaluation.
Should I replace both run and start capacitors at once?
If your system has separate run and start capacitors, replace only the capacitor(s) that are failing or show signs of wear. In some cases, a dual-run capacitor replacement covers both needs, but confirm ratings for each section.
Only replace what’s faulty or worn; a dual-run cap may cover both, but verify the ratings.
Do I need professional service for a dual-run capacitor?
A dual-run capacitor replacement can be done by a confident DIYer, but it involves higher risk due to three terminals and higher voltage. If you’re uncomfortable, hire a technician.
It’s doable for a skilled DIYer, but consider hiring a pro if you’re unsure.
Watch Video
The Essentials
- Identify the correct capacitor rating before purchasing.
- Power down and discharge safely to prevent shock.
- Reconnect wires to the correct terminals to avoid motor damage.
- Test the system and confirm proper operation after replacement.