Replace air conditioner capacitor: a practical DIY guide
A practical, step-by-step approach to safely replace an air conditioner capacitor. Learn to identify, source, and install the right replacement with safety tips, tools, and troubleshooting.

By the end of this guide, you will safely identify a bad capacitor, source the correct replacement, and install it to restore your air conditioner’s startup and cooling. You’ll learn how to verify ratings, discharge the capacitor safely, and reconnect wires correctly. This process helps homeowners and renters fix a common failure without unnecessary parts or calls, while knowing when to seek a pro.
What a capacitor does in an air conditioner
A capacitor in an air conditioner is a small electrical component that provides a surge of energy to start the compressor and fan motors. There are two common types in residential units: single-run capacitors (supporting one motor) and dual-run capacitors (supporting both the compressor and the fan). The capacitance, measured in microfarads (µF), and the voltage rating determine how much current the device can deliver. When a capacitor loses its ability to store charge, the motor may struggle to start, run weakly, or fail to start altogether. Replacing a failed capacitor can restore reliable operation and cooling efficiency, but it must be done safely and with the correct replacement to avoid further damage.
Air Conditioner Service emphasizes that while many capacitor failures are straightforward to fix, improper handling can cause shocks or equipment damage. Always treat capacitors as charged objects until proven otherwise, and verify the system is de-energized before touching any wires.
Symptoms of a failing capacitor
A beginning homeowner can spot several telltale signs of a bad capacitor. Common symptoms include the outdoor unit failing to start, a clicking or humming noise from the condenser, or a breaker tripping repeatedly when the thermostat calls for cooling. You may also notice the fan or compressor running intermittently or not at all. Visibly, a swollen or leaking capacitor is a clear sign that replacement is needed.
If the unit starts but runs poorly or overheats quickly, the capacitor could be fatigued. In some cases, the problem is intermittent and appears only during warm days or high demand. In all cases, do not assume a capacitor is at fault without confirming other components, such as the contactor, relays, and wiring, are intact.
How to identify the right replacement capacitor
First, locate the capacitor within the outdoor unit and read the label. The label will show the capacitance (in µF) and the voltage rating. The replacement must match these ratings exactly and should be the same type (single-run or dual-run). If you’re unsure, remove the old capacitor and photograph its terminals and labeling before shopping for a replacement. When shopping, avoid generic substitutes that don’t specify the same µF rating or voltage. A mismatch can cause overheating, motor damage, or immediate failure.
If you have a dual-run capacitor, you’ll see three terminals labeled C (common), FAN, and HERM. Make sure the replacement has the same terminal layout and that you will connect the wires to the same terminals on the new part.
Safety first: power off and discharge
Electrical work on an air conditioner carries the risk of electric shock or damage to the system. Always switch off power at the main disconnect and verify with a voltmeter that no voltage is present on the unit before beginning. Capacitors can hold a charge even after power is removed, so proper discharge is essential. Use a discharge tool or follow the manufacturer’s guidance for safe discharge. Wear protective gloves and eye protection, and avoid touching metal parts until you’re sure the circuit is de-energized.
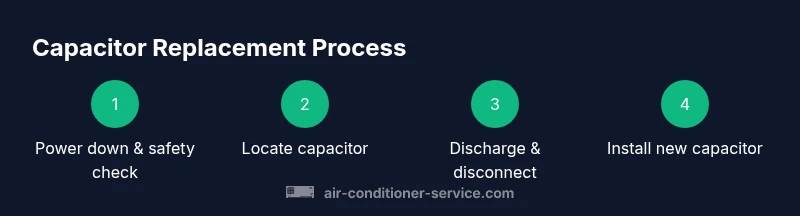
Step-by-step overview (context for the upcoming steps)
The following steps provide a practical, safe sequence to replace the capacitor. They assume you’ve confirmed the unit matches a standard residential capacitor and you have the right tools on hand. If you’re uncertain at any point, stop and seek help from a qualified HVAC technician. This process is designed to minimize downtime while protecting you and the equipment.
Common mistakes to avoid
- Not de-energizing the circuit, which can cause a severe shock.
- Reusing an old capacitor that shows signs of swelling or leakage.
- Mixing up wires or terminals when connecting the new capacitor.
- For dual-run capacitors, mismatching the C, FAN, and HERM terminals.
- Failing to secure the capacitor within its housing, which can lead to vibration or contact with metal parts.
Post-replacement checks and ongoing maintenance
After wiring and securing the new capacitor, restore power and run the unit for about 10–15 minutes in cool mode to verify startup and airflow. Listen for smooth starting, steady compressor operation, and absence of unusual noises. If you notice abnormal behavior, shut down the unit and re-check the connections. A successful test should show consistent cooling without tripping breakers.
What to do if it doesn’t fix the issue
If replacing the capacitor does not restore function, the problem may be with the contactor, motor windings, or refrigerant charge. In such cases, consider scheduling a professional inspection. Air Conditioner Service recommends seeking professional diagnosis for persistent cooling problems, as improper repairs can lead to more expensive damage.
Tools & Materials
- Voltage tester or multimeter(Verify power is off and test for residual voltage.)
- Insulated screwdriver or capacitor discharge tool(Discharge the capacitor safely before handling wires.)
- Replacement capacitor (matching µF and voltage)(Same type: single-run or dual-run as the original.)
- Electrical gloves(Protect hands from shocks and sharp edges.)
- Safety goggles(Eye protection against sparks or debris.)
- Labeling tape and marker(Helpful for recording wire positions.)
- Wire stripper/crimper(Useful if wires need trimming or re-termination.)
- Digital camera or phone(Take photos of wiring before disconnecting.)
Steps
Estimated time: 30-60 minutes
- 1
Power down and verify no voltage
Go to the main service disconnect for the outdoor unit. Switch it to the OFF position and confirm with a voltmeter that there is no live voltage at the capacitor terminals.
Tip: Always assume a capacitor is charged until verified. - 2
Open the access panel and locate the capacitor
Remove the panel screws and locate the run capacitor inside the control box. Identify whether it is a single-run or dual-run capacitor by the number of terminals.
Tip: If the label is faded, rely on terminal layout (3 terminals = dual-run). - 3
Discharge the capacitor safely
Use your discharge tool or an approved method to safely drain any stored energy before touching wires.
Tip: Do not short the terminals with a metal tool; use a proper discharge method. - 4
Take photos and label wires
Before disconnecting, photograph each connection and label wires to ensure correct reattachment.
Tip: Clear photos save you from second-guessing the wiring order. - 5
Disconnect wires from the capacitor
Loosen the terminal screws and gently pull the wires away. Do not pull on the wires themselves; grip the terminal ends.
Tip: Keep wires organized so you don’t mix up terminals. - 6
Remove the old capacitor
Take the capacitor out of its housing, inspecting for bulging, leakage, or physical damage.
Tip: If bulging or leaking is visible, replace with a new unit and dispose of the old one properly. - 7
Match and install the new capacitor
Compare the µF rating and voltage with the old unit. Install the new capacitor in the same orientation and ensure the C, FAN, and HERM terminals align if dual-run.
Tip: Ensure the new capacitor sits firmly to avoid movement. - 8
Reconnect wires to the new capacitor
Attach wires to the correct terminals as labeled/photographed. Tighten screws snugly but do not overtighten.
Tip: Double-check your wiring before closing the housing. - 9
Restore power and test the system
Replace the access panel, restore power at the disconnect, and run the unit for 10–15 minutes in cool mode to verify proper startup and cooling.
Tip: If you hear buzzing, stop the unit and inspect connections again.
Common Questions
Can I replace an air conditioner capacitor myself?
Yes, if you’re comfortable with basic electrical work, the power is off, and you can identify the correct capacitance and voltage. If you’re unsure, hire a licensed technician.
You can replace it yourself if you’re comfortable with basic electrical work and you’ve turned off power, but call a pro if you’re unsure.
How do I tell if a capacitor is bad?
Look for signs like the outside unit not starting, repeated tripping of the breaker, a buzzing sound from the unit, or a swollen/leaking capacitor body.
Common signs are not starting, buzzing, or a bulging capacitor.
What is the difference between single-run and dual-run capacitors?
A single-run capacitor serves one motor; a dual-run capacitor serves both the compressor and the fan. Use the same type and matching µF rating.
Single-run serves one motor, dual-run serves two; match the type and rating.
Do I need refrigerant handling to replace the capacitor?
Capacitor replacement does not involve refrigerant handling. Refrigerant work is restricted to licensed technicians for larger repairs.
Capacitor replacement doesn’t involve refrigerant handling.
How long does capacitor replacement take?
With proper safety steps, most homeowners complete a replacement in under an hour.
Usually under an hour if you follow safety steps.
Will replacing the capacitor fix not-cooling problems?
Not always. If the problem is due to refrigerant leaks, a damaged compressor, or a faulty contactor, you’ll need additional repairs.
If not cooling, other issues may be involved; replacement isn’t guaranteed to fix everything.
Watch Video
The Essentials
- Power down and verify no voltage before touching capacitors.
- Match the capacitor’s µF rating and voltage to the original.
- Secure connections and test the system after replacement.
- When in doubt, hire a professional.