Replacing an air conditioner: A practical step-by-step guide
A practical, safety-focused guide to replacing an air conditioner, covering sizing, planning, installation, and post-install checks to ensure comfort, efficiency, and code compliance.

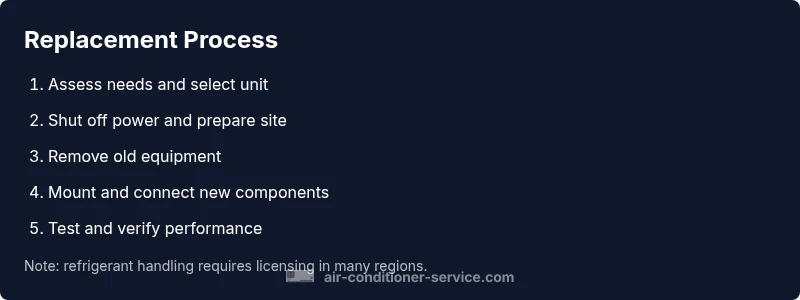
Replacing an air conditioner involves selecting a properly sized unit and installing the new components with correct controls. Refrigerant handling and electrical work are regulated in many areas; for safety and compliance, hire a licensed technician for those steps. See our full guide.
What replacing an air conditioner involves
Replacing an air conditioner means removing an existing cooling system and installing a new one that fits your home’s needs, budget, and ductwork. The core goal is to deliver reliable cooling, energy efficiency, and proper air distribution without creating new comfort gaps. A complete replacement typically includes an outdoor condenser unit, an indoor air handler (or evaporator coil), matched refrigerant lines and suction line insulation, electrical connections, and thermostat integration. In many homes, this is not a single component swap but a system upgrade that touches the electrical panel, ductwork, and control strategies.
When to consider replacement vs repair depends on the age of the current unit, its efficiency, and ongoing repair costs. If a unit is older than about 10-15 years and requires frequent service, replacement becomes cost-effective and improves energy performance. Modern units offer better SEER ratings, quieter operation, and compatibility with smart thermostats and home automation. This guide focuses on practical, safety-first steps and emphasizes that some steps require licensed professionals for compliance and refrigerant handling.
Sizing and selecting the right replacement
Choosing the right replacement begins with accurate sizing. An undersized unit struggles to meet demand on hot days, while an oversized model cycles on and off, wasting energy and reducing comfort. Perform or request a load calculation (often a Manual J calculation) to determine the proper cooling capacity for your home, considering square footage, insulation, window orientation, and climate. Efficiency matters; look for units with high SEER ratings and reliable performance across typical summer conditions. Also check compatibility with existing ductwork, refrigerant type, and the controls you prefer, such as programmable or smart thermostats. While price matters, the long-term energy cost and system reliability matter more for comfort and value. Budget for additional upgrades if needed, like improved air filtration or enhanced zoning.
Sizing is not just about cooling capacity; you must confirm that the new unit matches your duct layout and air distribution goals. If you have unusual spaces or high humidity, discuss options with a professional to avoid comfort gaps. Consider future upgrades, such as smart controls or improved filtration, which can influence your overall installation cost and energy savings.
Planning, permits, and timing considerations
Replacement projects often touch electrical panels, refrigerant lines, and structural elements. Before starting, check local regulations to see if a permit is required and whether an inspector must review the work after completion. Create a realistic schedule that accounts for equipment delivery, contractor availability, and weather or access constraints. If you’re doing part of the work yourself, be mindful of warranty implications and the need for proper refrigerant handling by licensed technicians. It’s wise to obtain written quotes and verify that installers are insured and licensed. Plan for potential upgrades to duct sealing, insulation, and attic or crawlspace access so the new system performs as designed.
Tools, safety gear, and preparation
Prepare a well-lit, ventilated workspace with clear access to the outdoor unit and the indoor plenum. Gather essential tools and safety gear, including insulated gloves, safety glasses, a hard hat if overhead work is involved, a voltage tester, a set of screwdrivers, a socket wrench, a cordless drill, and a manometer or HVAC gauge set if refrigerant work will occur. Have a sturdy ladder, chalk line, sealant, and duct tape for air-tight connections. Create a plan with labeled wiring diagrams and manufacturer installation manuals. If you’re unsure about any step, pause and reassess before proceeding. Safety is the primary driver of all replacement activities.
Disconnecting and removing the old system
Begin by turning off power at the main service disconnect and at the outdoor unit's disconnect switch. Confirm there is no voltage present using a tester. Then, carefully disconnect electrical wiring from the outdoor condenser and indoor air handler. If refrigerant lines are being broken, note that refrigerant handling is tightly regulated; do not vent or release refrigerant. Remove the old condenser and air handler, and mark or preserve any existing duct connections for reuse. Label all wires and refrigerant lines to aid reassembly. Store fasteners and mounting hardware for the new installation.
Installing the new outdoor condenser and indoor air handler
Position the new outdoor condenser on a level, solid pad with adequate clearance from walls and vegetation. Mount the indoor air handler in its designated plenum or closet with proper supports. Connect the refrigerant lines using the manufacturer’s recommended fittings and ensure adequate insulation. Run the condensate drainage line and verify slope to prevent backflow. Install the thermostat wiring and ensure compatibility with the new control system. Keep detailed notes or photos of each connection to simplify future servicing.
Electrical and refrigerant considerations
Electrical connections must be sized for the new unit and protected by appropriate breakers; incorrect sizing can cause nuisance trips or fires. Use the exact gauge of wire and matching terminals as specified by the manufacturer and local codes. For refrigerant, a licensed technician should perform evacuation, refrigerant charge, and leak checks; attempting this without credentials is dangerous and often illegal. Confirm that condensate drainage, refrigerant lines, and electrical clearances meet code requirements. If you see oil stains, refrigerant smells, or unusual noises, stop and call a professional.
Ductwork and airflow considerations
Even with a new unit, loose or leaky ducts can undermine efficiency. Inspect ducts for tears or loose connections, especially in attic or crawlspace runs. Seal leaks using appropriate mastic or foil tape and seal joints where air might escape. If your home uses zones, ensure zone dampers and thermostats are properly coordinated. Consider upgrading duct insulation where needed. Finally, test airflow at supply registers and balance as needed to deliver even cooling across rooms.
Start-up, testing, and commissioning
After installation, run the unit through a full start-up sequence. Check outdoor fan operation, indoor blower speed, thermostat response, and system timing. Verify that airflow, temperatures, and humidity move toward comfortable levels within the expected range. Listen for unusual noises or vibrations and inspect for refrigerant leaks using manufacturer-provided tools. Record system temperatures and pressures if you have access to compliant equipment and follow the manufacturer’s commissioning checklist. A professional should perform the final validation when refrigerant is involved.
Common mistakes and maintenance after replacement
Common mistakes include skipping professional load calculations, improper duct sealing, and neglecting condensate drainage. Maintenance tips: replace or clean filters regularly, keep outdoor coils clean, schedule seasonal inspections, and monitor system performance after the first hot days. Keep a service log and note any unusual readings to help with future service calls. With proper care, a replaced air conditioner can deliver reliable comfort and energy savings for years.
Tools & Materials
- Safety glasses(Protect eyes from debris and refrigerant exposure during handling.)
- Insulated gloves(Protect hands from sharp edges and electrical components.)
- Voltage tester(Verify power is fully isolated before work.)
- Screwdriver set (Phillips & flathead)(Used for removing panels and fasteners.)
- Socket wrench set(For removing mounting bolts and fittings.)
- Cordless drill(Drill pilot holes and drive screws with proper bits.)
- Wrenches and pliers(Reconnect refrigerant lines and electrical components.)
- Manometer or HVAC gauge set(Useful for testing pressure if refrigerant work occurs.)
- Refrigerant recovery machine (if handling refrigerant)(Required by law in many areas to evacuate/recover refrigerant.)
- Sealant and duct tape(Air-tight connections; prevents leaks.)
- Ductwork materials (sealant, mastic, insulation)**(Seal and insulate ducts as needed.)
- Level and pad materials(Ensure outdoor condenser sits on a level, solid pad.)
- Electrical supplies (wire, connectors, fuses)(Match manufacturer and code requirements.)
- Ladder(Safe access to high installation areas.)
- Manufacturer installation manuals(Follow specific unit instructions for torque, clearances, and wiring.)
Steps
Estimated time: 2-8 hours
- 1
Verify replacement compatibility
Confirm the new unit’s cooling capacity matches the home load and that ductwork and space can accommodate the unit. Review the Manufacturer’s specs and any load calculations to ensure a proper match. This step reduces the risk of overheating and comfort gaps after installation.
Tip: Use the load calculation result and manufacturer data sheets to guide the selection. - 2
Shut off power and isolate the system
Turn off power at the main service disconnect and at the outdoor unit’s disconnect. Use lockout/tagout if available, and verify there is no voltage present with a tester before touching any wiring.
Tip: Label the disconnects for easy identification during reassembly. - 3
Document refrigerant lines and disconnects
Carefully document and label refrigerant line routes and electrical connections. Do not release refrigerant; if lines must be disconnected, coordinate with a licensed technician for recovery.
Tip: Take photos from multiple angles for reference. - 4
Remove old components
Detatch and remove the old outdoor condenser and indoor air handler, taking care with duct connections and mounting hardware. Plan for safe lifting and have a helper if needed.
Tip: Reuse or label mounting pads and duct connections for the new setup. - 5
Prepare mounting surfaces and space
Ensure the new condenser will sit on a level pad with proper clearance from walls and obstructions. Verify duct access and check for any structural modifications needed for the indoor unit.
Tip: Clear the area of debris to avoid interference with airflow. - 6
Install the new outdoor condenser
Position the condenser on its pad, secure it firmly, and start routing refrigerant lines and condensate drain. Confirm that line sets have proper insulation and that electrical connections will be accessible.
Tip: Follow manufacturer torque specs and avoid bending lines sharply. - 7
Install the indoor air handler and ductwork
Mount the indoor unit according to the manufacturer’s guidelines and reconnect the ductwork with tight seals to prevent leaks. Install any dampers or zoning components if applicable.
Tip: Ensure the plenum is sealed and balanced for even air distribution. - 8
Connect electrical and controls
Run power and control wiring to the new units. Install or update the thermostat wiring and verify that safety switches and condensate pumps (if present) are functioning.
Tip: Double-check polarity, ground connections, and control wiring path. - 9
Coordinate refrigerant work and testing
If refrigerant work is required, coordinate evacuation, charging, and leak testing with a licensed HVAC technician. Perform a factory-recommended leak test and confirm proper operation before handover.
Tip: Do not attempt refrigerant charging without proper credentials. - 10
Start-up, test, and document
Power up the system, run a full cycle, and verify cooling performance, airflow, and thermostat response. Record test results and operation notes for maintenance and future service.
Tip: Provide the homeowner with a basic maintenance plan and contact info for service.
Common Questions
Can I replace an air conditioner myself, or do I need a licensed professional?
Replacing an air conditioner often involves electrical work and refrigerant handling that is regulated in many areas. For safety and compliance, it's usually best to hire a licensed HVAC technician for the critical steps.
It’s generally safer and often required by law to hire a licensed HVAC technician for refrigerant and electrical work.
How long does replacement typically take?
The process can vary widely depending on space, access, and system complexity, but plan for a full day or more when coordinating with a contractor.
Most replacement projects take a full day or more, depending on site conditions.
What permits or inspections are needed?
Local codes may require permits for new equipment and post-install inspections. Check with your city or county building department before starting.
Check your local codes to see if you need a permit or inspection after installation.
What should I check before selecting a replacement unit?
Ensure the new unit’s capacity matches your load calculation, that ductwork is compatible, and that controls (thermostats) will work with the new system.
Make sure the new unit fits your home and matches your ductwork and thermostat setup.
Is it worth upgrading for energy efficiency?
Upgrading to a higher SEER unit can reduce energy use over time, but factor in installation quality and potential duct or wiring upgrades.
Upgrading can save energy if the installation is done right and your ducts are in good shape.
What are common mistakes to avoid?
Skipping a proper load calculation, ignoring duct sealing, and neglecting condensate drainage can undermine performance.
Avoid skipping the load calculation and always seal ducts for best efficiency.
Watch Video
The Essentials
- Choose a unit sized for your home to avoid over- or under-cooling
- Plan permits and contractor qualifications before starting
- Coordinate refrigerant work with a licensed professional for safety and compliance
- Test and document the system after start-up to catch issues early