Why Would AC Not Be Working? An Urgent Troubleshooting Guide
Struggling with an air conditioner that won’t cool? This urgent troubleshooting guide from Air Conditioner Service walks homeowners through quick checks, common causes, a diagnostic flow, and safe DIY steps before calling a pro.

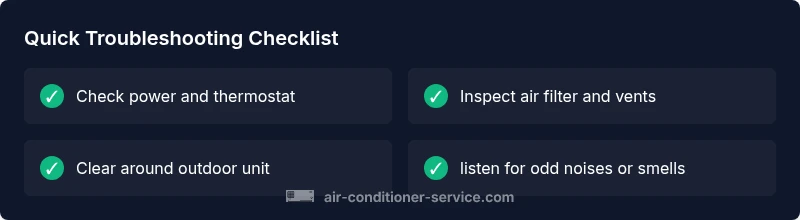
Most ACs stop cooling due to a simple power or control issue. Start by verifying the breaker is on, the thermostat is set to cooling, and the air filter is clean. If the unit still won’t run, follow the diagnostic flow and proceed to the step-by-step fixes. If you smell burnt electronics or hear unusual noises, shut off power and contact a professional immediately.
Why would ac not be working: quick starter checks
If you're asking why would ac not be working, start with the basics before you assume a major failure. The most common culprits are simple control or power issues that homeowners can verify in minutes. Begin by confirming the breaker isn’t tripped, the outdoor unit isn’t blocked, and the thermostat is set to cool with a comfortable temperature. A clean, unobstructed filter is essential for proper airflow. Airflow restrictions or a paused circuit can prevent cooling even if the compressor is healthy. This quick triage saves time and often resolves the problem without tools.
Next, inspect the indoor unit for warning lights or error codes on the display. If the system shows a code, consult your owner’s manual or Air Conditioner Service’s troubleshooting guide to interpret it accurately. Keep in mind that unusual noise, a burning smell, or warmth at the vents may indicate electrical faults or refrigerant issues that require professional attention. Remember: safety comes first, so do not touch live wires or attempt refrigerant work yourself. By starting with these simple checks, you may not only identify the root cause but also prevent minor issues from escalating into costly repairs.
Common failure points and how to identify them
Not every AC problem is dramatic. In many cases, a unit that won’t cool is signaling one of several predictable failure points. Thermostat miscalibration, for example, can cause the system to run excessively without cooling to a comfortable temperature. Check that the thermostat is on the correct mode (cool) and that the setpoint is lower than the current room temperature. A faulty contactor, capacitor, or relay in the outdoor unit can also fail silently and prevent startup. If the outdoor fan is not spinning or makes a hum when the compressor starts, that’s often a sign of an electrical component nearing failure.
Dirty air filters restrict airflow, causing the compressor to run longer and less effectively. Even if the fan is working, clogged filters hamper cooling and can trigger protective shutdowns. Leaks in the refrigerant circuit are less common in newer models but can cause a loss of cooling power and ice on the evaporator coil. In many homes, the drain line becomes blocked, triggering a safety switch that stops the system to prevent water damage. Each of these factors can be diagnosed with a few simple checks and, in some cases, a modest replacement part.
Safety, codes, and when to involve a professional
Working with electrical components and refrigerant requires caution. If you notice a burning smell, humming that increases with load, buzzing from the control board, or if the outdoor unit is warm to the touch but not cooling, shut off power at the breaker and call a licensed technician. Never attempt refrigerant handling, welding, or capacitor replacement if you’re not trained; high voltage and refrigerants pose serious safety risks. In many jurisdictions, improper handling can violate codes and void warranties. When in doubt, contact Air Conditioner Service for a professional evaluation. While some repairs can be DIY-friendly, others—like a refrigerant leak or a failed compressor—should be left to pros.
Reading indicators: thermostat, breakers, capacitors, and filters
A systematic check involves several indicators. Start with the basics: ensure the thermostat is communicating with the air handler and the outdoor condenser. If the thermostat is new or recently relocated, re-pairing or reconfiguring the device may restore function. Next, inspect the electrical panel for a tripped breaker or blown fuse; reset the breaker fully and listen for the click that signals a full reset. In the outdoor unit, examine the capacitor and contactor; a swollen capacitor or a pitted contactor is a telltale sign of impending failure. Finally, examine the indoor filter and coils for cleanliness; clogged filters can cause icing on the evaporator coil, reducing efficiency and cooling output. If any indicators point to a component failure, you’ll know whether a part replacement is warranted or if a professional should intervene.
Diagnostic flow explained: symptom to diagnosis to solution
To maintain a clear path from symptom to solution, use a simple diagnostic flow. Start with the most common, least invasive checks: power, thermostat, airflow. If these checks pass, observe how the system behaves during a call for cooling. Does the outdoor unit turn on? Is there ice on the evaporator coil? Any error codes on the air handler display provide valuable clues. If you cannot identify the root cause from these cues, proceed to progressively more involved checks, such as testing refrigerant lines (only if you’re trained) or measuring voltage across contactors. The flow emphasizes documentation: write down what you observe, what you tested, and the exact conditions when the issue occurs. Air Conditioner Service analyses show that the majority of non-cooling issues can be traced to electrical faults or airflow restrictions rather than mechanical failures, which helps guide you toward fast, effective fixes.
Prevention tips and a practical at-a-glance checklist
Prevention is the best cure for not cooling. Schedule regular maintenance every spring and summer, including filter changes, coil cleaning, and a quick electrical check. Use a high-quality disposable or electrostatic filter to keep airflow clean and avoid blockages. Install a smart thermostat if you don’t already have one—these devices can detect system faults early and alert you before the unit fails completely. Keep the area around the outdoor unit clear of debris, plants, and snow, and verify that the condensate drain line is free of obstructions. Finally, create a simple disaster plan: if the system trips the breaker or exhibits unusual odors or noises, shut it down and call a professional rather than attempting risky repairs yourself.
Steps
Estimated time: 60-90 minutes
- 1
Power down safely
Shut off power at the main breaker before inspecting any components. This prevents shocks and protects sensitive electronics. Use a non-contact tester to confirm no voltage is present at the panel or condensate pump circuit if accessible.
Tip: Label the circuit and keep a mental note of any observed indicators before power restoration. - 2
Check breakers and fuses
Look for a tripped breaker or blown fuse in both the main panel and the indoor air handler panel. Fully reset a tripped breaker by flipping it off and on again, and replace fuses only with the same amperage rating.
Tip: If the breaker trips again after reset, there may be an underlying fault; stop and call a pro. - 3
Verify thermostat settings
Ensure the thermostat is set to Cool, with a target temperature below room temperature. If it’s a programmable model, verify schedules aren’t overriding your manual settings. Re-pair smart thermostats if needed.
Tip: Try a manual thermostat on the wall unit to rule out a smart device issue. - 4
Inspect the air filter and airflow
Remove and inspect the air filter; replace if dirty or damaged. Check supply vents for obstruction and confirm that the indoor blower is running properly. Poor airflow is a common cause of poor cooling.
Tip: Use a high-quality filter and avoid oversized or undersized replacements. - 5
Examine the outdoor unit
Clear leaves, debris, and snow from around the condenser. Listen for the outdoor fan and check the capacitor for swelling or signs of wear. A faulty contactor can prevent the unit from starting.
Tip: Do not pressure-wash electrical components; let a pro handle the internals. - 6
Check for ice and refrigerant signs
Inspect the evaporator coil for ice buildup; ice can indicate airflow issues or refrigerant problems. A hissing sound or oily residue may point to a refrigerant leak, which requires licensed service.
Tip: If you see ice, turn off the system and let it thaw before rechecking. - 7
Reset and test run
After completing checks, restore power and run the cooling cycle for 5–10 minutes. Observe whether the compressor engages, the outdoor fan turns, and if air eventually cools the space.
Tip: Document the sequence of events to share with a technician if needed. - 8
Decide on next steps
If basic checks pass but cooling is still weak, you likely need a part replacement or advanced diagnostics. If you smell burning, notice refrigerant issues, or hear abnormal noises, stop and call a professional immediately.
Tip: When in doubt, opt for professional assessment to avoid safety risks.
Diagnosis: AC won't turn on or won't cool
Possible Causes
- highPower issue (tripped breaker or blown fuse)
- highThermostat misconfiguration or communication failure
- mediumDirty air filter causing airflow restriction
- mediumElectrical fault in outdoor unit (capacitor/relay/contactor)
- lowRefrigerant leak or coil icing
Fixes
- easyReset breakers and ensure the outdoor unit is free of debris
- easyCorrect thermostat mode/setpoint and re-sync with the air handler
- easyReplace/clean the air filter; check for airflow at vents
- mediumInspect capacitors/relays and contactors for signs of wear (only if trained)
- hardIf refrigerant issues suspected, call a licensed professional (refrigerant handling required)
Common Questions
What is the first thing I should check when my AC won't turn on?
Check the breaker and thermostat settings first. Confirm the outdoor unit has airflow and that the indoor filter is clean. These simple checks resolve many non-cooling issues.
Start with power and thermostat checks to rule out common causes.
Can a dirty filter prevent cooling even when the unit runs?
Yes. A dirty filter restricts airflow, causing reduced cooling and potential system shutdowns or ice formation on coils.
A clogged filter reduces airflow and cooling efficiency.
When should I replace rather than repair a failed component?
Consider age, repair cost, and warranty. If multiple components fail or the unit is old, replacement may be more cost-effective than repeated repairs.
If several parts are failing or the unit is old, replacement might be best.
Is it safe to touch electrical components myself?
No. Do not touch live components or refrigerant. Use caution and contact a licensed technician for electrical or refrigerant work.
Do not handle electrical parts yourself; call a pro.
What are the signs of a refrigerant leak?
Look for hissing sounds, oily residue near connections, and reduced cooling efficiency. If you suspect a leak, evacuate and call a professional immediately.
If you notice a leak, stop and call a licensed technician.
Watch Video
The Essentials
- Start with power, thermostat, and filter checks
- Electrical and airflow issues are the most common culprits
- If you suspect refrigerant or burning smells, call a pro
- Document observations to speed up professional diagnostics