Why Is Your Air Conditioner Leaking Water Inside? A Practical Troubleshooting Guide
Urgent guide to diagnose and fix indoor AC water leaks. Learn common causes, safe DIY checks, step-by-step fixes, and when to call a pro for a lasting solution.

The most likely reason your AC is leaking water inside is a blocked condensate drain line or a damaged drain pan. Start by clearing the drain line and inspecting the pan for cracks. If water keeps pooling, check the evaporator coil, filter, and condensate pump. If DIY fixes don’t stop the leak, contact a licensed professional immediately.
Understanding why is air conditioner leaking water inside and what homeowners should know
Water leaking from an air conditioner is a common problem that signals the system is trying to remove excess humidity or that drainage is blocked. In many homes, the phrase "why is air conditioner leaking water inside" becomes urgent when the leak appears on carpet, flooring, or near electrical outlets. Air Conditioner Service emphasizes that most indoor leaks stem from drainage issues rather than a refrigerant problem. Understanding the basics helps you triage quickly, reduce damage, and decide whether a DIY fix is appropriate or if you should call a pro. Common warning signs include water pooling near the air handler, a constantly running condensate pump, or a visible crack in the condensate pan. Taking proactive steps now can prevent mold growth and structural damage, and protect your family’s health. This guide uses practical, non-technical language so homeowners and renters can act confidently while maintaining safety.
Common causes of indoor water leaks and how to spot them
A leak inside your home almost always points to drainage or condensation issues. The condensate drain line carries water away from the evaporator coil. If the line is clogged, water will back up and spill indoors. A cracked or rusted drain pan can also leak, especially in older units. A dirty evaporator coil reduces airflow, causing the coil to ice up and then melt, which can result in water on the floor. A poorly sloped drain line or a faulty condensate pump in some setups can trigger leaks as well. Finally, a clogged air filter forces the system to work harder and can contribute to condensate buildup. Each cause has a distinct fix path, and identifying the right one is key to a lasting solution.
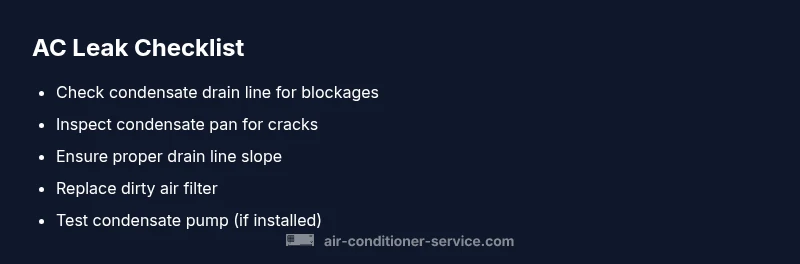
Practical DIY checks you can perform safely (do these before calling a pro)
- Turn off the unit and unplug it before inspecting any accessible parts. - Check the condensate drain line outside or near the unit for visible blockages, algae, or debris. - Inspect the condensate pan for cracks or rust; look for areas where water may be seeping. - Check the air filter; a dirty filter reduces airflow and can contribute to condensation. - Ensure the unit is level and that the drain line slope directs water away from the home. If you notice ice on the evaporator coil, turn the system off and allow it to thaw before inspecting the coil and airflow. - If you have a condensate pump, listen for a hum or run state indicating it’s pumping correctly.
Diagnostic flow: symptom → diagnosis → solution (short overview)
When you see water pooling, start with the simplest checks: filter, drain line, and pan. If these pass, you may have a more complex issue like a frozen evaporator coil or installation-related drainage problems. The flow below translates user symptoms into probable causes and fixes so you know what to try next. Always prioritize safety and avoid opening sealed refrigerant lines. If the fix sequence does not resolve the leak, proceed to professional service.
Step-by-step fixes for the most common indoor leak (clogged condensate line) – detailed guide
- Locate the condensate drain line.2) Clear the blockage from the line using a shop vac or flexible cable.3) Flush the line with a small amount of distilled water mixed with a mild household cleaner or bleach solution.4) Reconnect and test the system by running a cooling cycle and watching the drain.5) Inspect the condensate pan for cracks and replace if damaged.6) Recheck the line slope and ensure proper drainage. Safety reminder: de-energize the unit before you start, avoid harsh chemicals near electrical components, and never run the unit with a damaged line.
Tips & warnings to prevent future leaks
- Regularly replace or clean the air filter to maintain proper airflow. - Schedule professional maintenance biannually for older systems. - Use a condensate overflow switch if your unit lacks one. - Do not ignore signs of clogged drainage; early action reduces water damage risk. - Safety note: If you hear buzzing, smell burning plastic, or see exposed wiring, shut off power and seek professional help immediately.
Prevention and when to call a professional (what to expect)
Regular maintenance is the best defense against indoor leaks. If your DIY checks do not locate or fix the issue, it is time to call a professional. A licensed technician will inspect the condensate drainage system, cooling coil, and refrigerant lines, verify proper airflow and slope, and test the condensate pump (if installed). Expect them to clean the condensate pan, check for corrosion, and confirm there are no refrigerant leaks. Air Conditioner Service recommends prompt professional help when leaks persist to prevent water damage and mold growth.
Steps
Estimated time: 60-90 minutes
- 1
Safety first and access
Power down the unit at the thermostat and disconnect the power supply. Wear gloves and eye protection before inspecting the condensate components. This avoids electrical hazards and water exposure.
Tip: Always start with safety – power off before touching any wiring. - 2
Locate the condensate drain line
Find where the drain line exits the unit and trace it to the termination point. Look for kinks, blockages, or visible algae buildup that could block flow.
Tip: Have a bucket ready to catch any residual condensate when you access the line. - 3
Clear a simple blockage
Use a wet/dry vacuum or flexible plumbing snake to clear the line from the cleanout point. Do not force material through; remove what you can and flush with water.
Tip: Work slowly and check for a steady flow afterward. - 4
Flush and sanitize the line
Flush the line with a mild bleach solution or vinegar rinse to kill mold. Rinse with water afterward to prevent residue. Reconnect the line securely.
Tip: Never mix bleach with ammonia or other cleaners. - 5
Inspect the drain pan
Look for cracks, holes, or rust. If damaged, replace the pan or seal cracks with an appropriate sealant designed for metal and humidity.
Tip: A damaged pan can reintroduce leaks after a fix. - 6
Test the system
Restore power and run the cooling cycle. Watch the drain for a full minute to ensure proper drainage and confirm there are no leaks around the pan.
Tip: If you see continued leakage, stop and contact a professional.
Diagnosis: Water pooling inside near the air handler or along the floor after running the AC
Possible Causes
- highClogged condensate drain line
- mediumDamaged condensate pan
- lowEvaporator coil freezing and melting
- lowImproper installation or drainage slope
Fixes
- easyClear the condensate drain line and replace damaged sections as needed
- mediumReplace the condensate pan if cracked or corroded
- hardThaw and inspect the evaporator coil, restore airflow, and address refrigerant or duct issues if coil is frozen
- mediumCorrect drainage slope or re-install drainage components for proper water flow
Common Questions
What causes water to leak inside an air conditioner?
Most interior leaks come from drainage problems: a clogged condensate line, a damaged drain pan, or improper drainage slope. Less frequently, a frozen evaporator coil can melt and drip water inside once thawed. Inspecting the drainage path is the quickest way to identify the culprit.
Leaks inside are usually due to drainage problems like a clogged line or damaged pan. Check the drain path first, then coils if needed.
Can a dirty air filter cause leaking water inside?
A dirty filter restricts airflow and can contribute to coil freezing, which may later leak water when it melts. Replacing the filter and ensuring proper airflow helps prevent this issue.
Yes, a clogged filter can lead to coil freezing and later water leaks; replace the filter and ensure good airflow.
Should I run the AC to diagnose a leak?
Avoid running the AC if you suspect a major leak or damaged components. Run basic checks safely, and if you’re unsure, turn off the unit and consult a professional to avoid electrical or refrigerant hazards.
Don’t run the unit if you’re unsure about major leaks; do safe checks and call a pro if needed.
When is it time to call a professional?
If leaks persist after clearing lines, or if you detect a frozen coil, refrigerant smells, or visible corrosion, contact a licensed HVAC technician. They can diagnose drainage, refrigerant, and coil issues safely.
Call a professional if leaks stay after basic checks or you notice coil or refrigerant issues.
Can leaks cause mold or structural damage?
Yes. Prolonged leaks can lead to mold growth and structural damage. Address leaks quickly, especially in basements or areas with high humidity, and consider a moisture barrier or dehumidification if needed.
Yes, leaks can cause mold and damage; act fast and consider moisture control measures.
Watch Video
The Essentials
- Inspect the condensate drain line first
- Replace a damaged drain pan promptly
- Triage evaporator coil issues only after drainage checks
- Power off before any DIY work to ensure safety
- Call a professional if leaks persist after checks