Why Do Air Conditioners Leak Water? Practical Troubleshooting Guide
Quick, practical guide to diagnose and fix water leaks from your air conditioner. Learn common causes, safe checks, and when to call a pro for reliable, lasting results.

Leaking water from an AC is usually caused by a blocked condensate drain or a dirty filter that leads to overflow. Start with the simplest checks: power off the unit, inspect the condensate line for clogs, and replace a dirty filter. If the leak persists, the issue may be a frozen coil or a drainage problem requiring professional service.
What causes AC leaks: common culprits
Water leaking from an air conditioner is usually a sign that something is off with condensate management. In many homes, leaks come from simple, solvable issues rather than a refrigerant problem. According to Air Conditioner Service, the most frequent culprits are drainage and filtration problems that let condensate overflow or spill from the pan.
- Clogged condensate drain line, often due to algae, mold, or mineral buildup.
- Cracked or overflowing condensate pan.
- Dirty or blocked air filter that causes the evaporator coil to ice up and drip when it thaws.
- Improper installation, including a unit that is not level or correctly pitched to the drain.
Addressing these typically yields quick wins without tools beyond common household items. If you detect rust on the pan, persistent wet spots after cleaning the drain, or any sign of refrigerant odor, stop and call a pro.
Safe, quick checks you can do today
Before you call for help, run through these safe, simple checks. Always start by powering off the unit at the breaker to prevent electric shock. Then inspect the obvious drainage components and air filters:
- Check the condensate drain line for a clog by looking for standing water or a blockage at the access point.
- Inspect the drain pan under the evaporator for cracks or holes and replace if damaged.
- Remove and replace a dirty air filter; a clean filter improves airflow and reduces condensation.
- Look for any sign that the unit is not level; tilt can push condensate to overflow.
If you find a clog, clear it with a wet/dry shop vac or a small flexible brush. Do not flush harsh chemicals through the line. If these steps don’t stop the leak, move to the next checks or call a professional.
Drainage and tilt: the drain line, pan, and slope
Drainage problems are almost always the root cause of indoor leaks. A condensate line clogged with algae or mineral buildup can back up and spill water, while a damaged pan can overflow even if the line is clear. Improper tilt or a unit that sits unevenly on its pads worsens overflow. Regularly inspecting the line, pan, and mounting angle helps you catch problems before they become leaks.
A properly sloped, level installation ensures condensate flows to the drain without pooling. If you notice water pooling near the unit or running down walls, reevaluate mounting and tilt. In some cases, a small adjustment or resealing around the cabinet base is enough to stop the leak.
Frozen coils and water vs refrigerant leaks
A common misconception is that any water leak means a refrigerant problem. In most homes, leaks are condensate-related, not refrigerant leaks. A dirty filter or low airflow can cause the evaporator coil to freeze. When the coil thaws, it drips significant condensate, which can look like a leak. If you see frost on the coil or unusually weak cooling, address airflow first.
If you notice oily spots, hissing sounds, or a strong chemical odor, stop and call a pro. Refrigerant work is hazardous and should be performed only by licensed technicians.
When to call a professional
If basic checks don’t resolve the leak, it’s time to bring in a professional. Complex issues like a cracked drain pan, persistent frost on the evaporator coil, or suspected refrigerant problems require trained HVAC technicians. A professional can diagnose leaks, repair pans or coils, and verify proper refrigerant charge and system pressure. Safety should always come first when dealing with electrical components and refrigerants.
Prevention: Keep leaks at bay
Regular maintenance is the best defense against leaks. Make a simple maintenance routine part of your calendar:
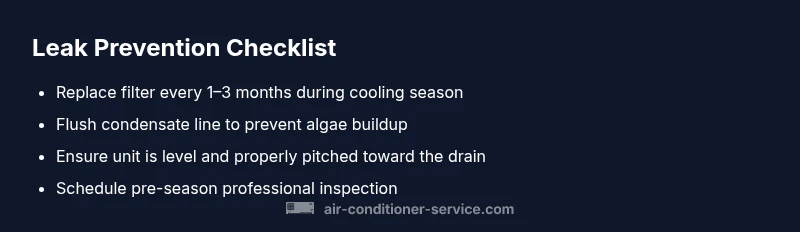
- Replace or clean the air filter every 1–3 months during peak season.
- Flush the condensate drain line annually or as needed to prevent algae growth.
- Ensure the unit is level and properly pitched toward the drain.
- Schedule a professional pre-season inspection to catch wear and corrosion before it leaks.
Troubleshooting flow at a glance
- Start with the drain line and pan inspection.
- Check the air filter and evaporator coil for frosting.
- Confirm the unit is level and correctly tilted.
- If leaks persist, contact a professional.
This flow helps you isolate drainage problems quickly while prioritizing safety and avoiding unnecessary disassembly.
Steps
Estimated time: 60-90 minutes
- 1
Power down and inspect for a source
Turn off the AC at the breaker and unplug if accessible. Look for visible signs of a malfunctioning condensate drain or obvious leaks around the cabinet. Document any puddles and their location to guide the next steps.
Tip: Always start with safety—disconnect power before reaching behind panels. - 2
Check drain line and pan
Trace the condensate drain to its exit. If you see a clog, clear it with a wet/dry vac or a flexible brush. Inspect the pan under the evaporator for cracks or holes and replace if damaged.
Tip: Avoid flushing chemicals through the line; they can damage components. - 3
Inspect air filter and coil
Remove and inspect the air filter; replace if dirty. Look at the evaporator coil for frost or ice formation. If you see frost, address airflow first by cleaning the filter, then run the system to see if the frost clears.
Tip: A clean filter improves airflow and reduces condensation risk. - 4
Check unit tilt and mounting
Ensure the outdoor and indoor components sit level and that the indoor cabinet is pitched toward the drain. Small adjustments can prevent overflow without parts replacement.
Tip: Use a level and shims to restore proper tilt if needed. - 5
Test run and observe
Power the unit back on and run it for 15–20 minutes while checking for leaks around the drain, pan, and connections. Note any new damp spots or changes in condensation flow.
Tip: Monitor for several cycles to confirm stability before trusting the fix. - 6
Know when to call a pro
If leaks persist after steps 1–5, or you suspect a broken pan, frozen coil that won’t thaw, or refrigerant issues, contact a licensed HVAC technician for diagnosis and repair.
Tip: Don’t attempt refrigerant work yourself—it's hazardous and regulated.
Diagnosis: AC is leaking water
Possible Causes
- highClogged condensate drain line or pan
- mediumDirty air filter causing evaporator coil to freeze
- lowTilted or improperly installed unit causing overflow
Fixes
- easyUnclog drain line and clear condensate pan; ensure pan isn't cracked
- easyReplace or clean the air filter; run system to clear frost and monitor
- mediumRelevel unit or adjust tilt; reseal as needed or call a professional for installation fixes
Common Questions
Why is my air conditioner leaking water inside the house?
Inside leaks are usually condensate drainage problems or overflow caused by a clogged line, pan, or blocked filter. Inspect accessible components and clear clogs.
Inside leaks usually come from drainage blocks or overflow. Check the drain line and filter, then call a pro if it keeps happening.
Can a dirty filter cause leaks?
Yes. A dirty filter can restrict airflow, causing the evaporator coil to freeze. When it thaws, excess condensate can overflow the pan.
Yes—blocked airflow can lead to coil freezing and extra condensation that leaks.
Is a refrigerant leak related to water dripping?
Not typically. Refrigerant leaks affect cooling performance and system pressure, while water leaks usually stem from condensate drainage.
A refrigerant leak won't usually cause condensate dripping; it affects cooling efficiency instead.
What should I do if I can't locate the leak source?
Turn off power, inspect visible drains and pan, and use a flashlight to check joints. If you still can't locate it, call a pro for a diagnostic.
Turn off power and inspect the obvious drains; if you can't find it, a pro can pinpoint the source.
When should I call a professional?
If basic checks don’t stop the leak, or you notice signs of refrigerant issues, smell, or damage to the drain, a licensed HVAC technician should inspect and repair.
Call a pro if leaks persist or you suspect refrigerant problems.
Watch Video
The Essentials
- Start with simple checks: drain line and filter.
- A clogged drain line is the most common cause of leaks.
- Coil freezing can mimic a leak—fix airflow first.
- If leaks persist, call a professional promptly.