Why Your Air Conditioner Won’t Turn On: A Practical Troubleshooting Guide
A practical, step-by-step guide to diagnose and fix why air conditioner won t turn on, with safety tips, diagnostic flow, and when to call a pro. Learn common causes and quick fixes to restore cooling fast.

If your AC won't turn on, start with safe, quick checks you can perform today. This concise guide highlights the most common culprits—power and breaker issues, thermostat signals, and safety switches—and offers an immediate path to restore cooling or to know when to call a pro. Keeping safety in mind, avoid touching live electrical parts, and contact a professional if you smell burning or see sparks.
Why the AC Won't Turn On — Common Culprits
If you’re wondering why air conditioner won t turn on, you’re not alone. Most not-turning-on issues are electrical or control-related, not a failed compressor. The good news is you can narrow the problem quickly by checking the basics first. In this section we cover the five most common culprits and how to spot them:
- Power supply issues: The unit needs a live, properly wired power source. A tripped breaker, a blown fuse, or a service disconnect switch that’s turned off will stop the system from starting.
- Thermostat or controls: A misread thermostat, dead batteries in the remote, or a faulty digital display can prevent the system from receiving the start signal.
- Safety switches: Condensate overflow switches or water sensors can shut the system down to protect the home; these are easy to test but require caution.
- Electrical connections: Loose wiring, corroded terminals, or a worn contactor can interrupt the control circuit.
- Overloads and fuses: An overloaded circuit or a blown fuse in the disconnect box can prevent the outdoor compressor from energizing.
Air Conditioner Service recommends starting with power-related checks before opening panels. If you’re not comfortable with electrical work, skip ahead to the safe checks and then contact a licensed HVAC technician if the issue persists.
Quick safety checks to perform
Before you start dismantling panels, perform these quick, non-contact checks to see if you can revive the system safely:
- Confirm power: Ensure both the indoor unit and outdoor disconnects have power; check for a tripped breaker or blown fuse at the service panel.
- Thermostat sanity check: Make sure it’s set to cool, at a temperature lower than the room, and that batteries aren’t dead in the remote.
- Reset and test: Turn the thermostat off, wait 30 seconds, then turn it back on; listen for any clicks from the outdoor unit after powering on.
- Visual check: Look at the outdoor unit for debris, ice, or obstructions; a blocked condenser can cause the system to shut down or fail to start.
- Safety caution: Do not touch live wires or capacitors; if you smell burning or see arcing, stop and call a pro immediately.
If any of these safe checks show visible issues, fix them if you can (e.g., reset a tripped breaker) or move to the diagnostic flow for deeper tests. If you’re unsure about electrical components or the service disconnect, contact a licensed HVAC technician.
Diagnostic flow: symptom to diagnosis
Symptoms: The unit won’t turn on; the indoor blower runs but the outdoor unit stays off; you notice no cooling. The diagnostic flow below guides you from observation to action:
- Symptom to suspected power issue: If no power is reaching the outdoor unit, check the main breaker, service disconnect, and fuses. Diagnosis: power problem. Fix: reset breaker if it’s tripped or replace blown fuse.
- Symptom to thermostat problem: If the thermostat display is dead or the unit won’t respond to the thermostat, test batteries and settings. Diagnosis: thermostat/control signal issue. Fix: replace batteries or reprogram settings.
- Symptom to safety switch: If the condensate overflow switch has tripped, the system will not start. Diagnosis: safety switch engaged. Fix: ensure drain line is clear and reset switch.
- Symptom to component fault: If power and controls are good but there’s no start signal, the capacitor or contactor may be failing. Diagnosis: electrical component fault. Fix: this requires professional testing.
If you’re unsure at any point, stop and call a licensed HVAC technician. Working with live electrical components can be dangerous, and diagnosing control boards or capacitors requires specialized tools.
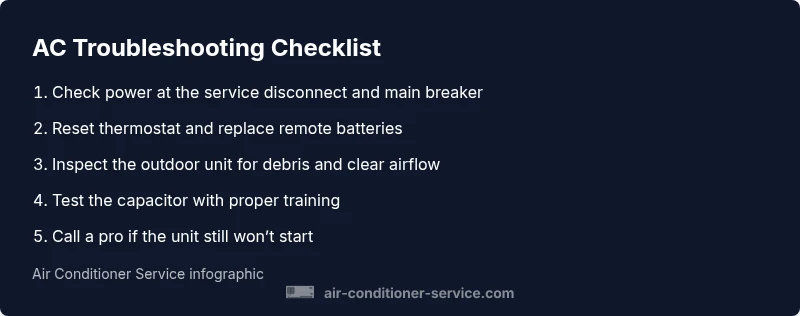
Step-by-step: fix the most common cause
- Power down safely at the main breaker and outdoor disconnect. Ensure all power sources are off before touching anything.
- Check the service panel for a tripped breaker or blown fuse and reset/replacement as needed.
- Verify thermostat is on, cool mode selected, and remote batteries are fresh. If using a smart thermostat, confirm connectivity and schedules.
- Inspect the outdoor unit for debris, ice, or obstructions. Clear debris and ensure sufficient airflow around the condenser.
- Inspect electrical connections at the outdoor contactor and wiring terminals. Look for loose connections, corrosion, or burned marks. If you see damage, stop and call a pro.
- If the unit still won’t start, do not attempt capacitor replacement unless you are trained. Schedule a service call with a licensed HVAC technician to test capacitors, relays, and the control board. Preventive maintenance is the best defense against future failures.
Estimated time: 60-90 minutes depending on access and safety conditions.
Prevention and when to call a pro
Prevention is the best cure for an AC that won t turn on. Routine maintenance can reduce the odds of a failure and keep your system running efficiently. Here are practical steps:
- Change or clean the air filter every 1-3 months during heavy use; a clogged filter reduces airflow and can trigger a system shutdown.
- Schedule annual professional tune-ups to inspect electrical connections, refrigerant levels, and condensate drainage.
- Keep the outdoor unit free of leaves and debris; trim nearby plants to maintain airflow and reduce blockages.
- Calibrate the thermostat and replace batteries as needed to ensure reliable signals.
- Maintain a simple troubleshooting log: note the symptoms, when they occur, and what you’ve tried. This helps a technician diagnose faster when you call.
When in doubt or if the problem involves wiring, the service disconnect, or the refrigerant system, contact a licensed HVAC technician. Safety-first is the rule.
Renters vs homeowners: constraints and options
Renters should document issues promptly and coordinate with building maintenance or the landlord for repairs that may require access to the building’s electrical panel or the outdoor unit. Homeowners have more control over parts like thermostats and accessible wiring, but should still avoid risky fixes. In all cases, if you observe burning smells, buzzing, or visible damage, stop and call a pro immediately.
Steps
Estimated time: 60-90 minutes
- 1
Power down safely
Turn off power at the main breaker and outdoor disconnect to prevent shocks while inspecting wiring and components.
Tip: Use a lockout device if available to prevent accidental re-energizing. - 2
Check the main breaker and disconnect
Look for a tripped breaker or blown fuse in the service panel and reset or replace as needed.
Tip: Take a photo of wiring before touching panels. - 3
Test thermostat and remote
Ensure the thermostat is in cooling mode and set below room temperature; replace remote batteries if applicable.
Tip: If a smart thermostat, verify app connectivity and recent changes. - 4
Inspect outdoor unit for airflow issues
Clear debris around the condenser and ensure the fan can rotate freely without obstruction.
Tip: Never spray water directly on electrical components; use a gentle brush instead. - 5
Check electrical connections at the outdoor unit
Look for loose wires, corrosion, or a damaged contactor; do not attempt repairs if unsure.
Tip: A loose contactor can cause no-start conditions; call a pro if you’re uncertain. - 6
Decide on next steps
If the unit still won’t start after these steps, contact a licensed HVAC technician for advanced diagnostics.
Tip: Document symptoms and tests to speed up service.
Diagnosis: AC won't turn on
Possible Causes
- highPower issue (tripped breaker, blown fuse, service disconnect off)
- highThermostat or control signal problem (dead battery, wrong settings)
- mediumSafety switch tripped (drain pan switch, float switch)
- lowElectrical component fault (capacitor, contactor, wiring)
Fixes
- easyReset the breaker or replace a blown fuse; verify service disconnect is on
- easyTest and correct thermostat settings; replace remote batteries if used
- easyCheck safety switches and drain line; reset switches if safe to do so
- mediumIf power and controls are solid but still no start, schedule a pro for capacitor/contactor or control board testing
Common Questions
What is the first thing I should check if my AC won't turn on?
Check for power at both the indoor and outdoor units, inspect the main breaker, and verify the thermostat is set to cooling. If power is present and the unit still won’t start, proceed with the diagnostic flow or contact a pro.
First, verify power to the unit and ensure the thermostat is set to cooling. If there’s no response, move through the diagnostic steps or call a pro.
Why does the indoor fan run but the outdoor unit stays off?
This usually signals a control signal issue or a faulty outdoor relay/contactor. Check the thermostat and the outdoor disconnect, and consider a professional test of the capacitor and contactor.
If the indoor fan runs but the outdoor unit stays off, it’s often a control or relay problem. Check the thermostat and call a pro for capacitor testing.
Can a dirty air filter prevent the AC from starting?
A very dirty filter can trigger safety shutoffs or reduce airflow enough to trigger protective limits. Replace the filter and see if the system responds. If not, continue with the diagnostic steps.
A dirty filter can cause safety shutoffs or poor airflow, leading to not turning on. Replace the filter and test again.
Is it safe to reset the circuit breaker myself?
Yes, if you follow basic safety rules: turn off power before touching components, use insulated tools, and reset proceedings carefully. If you smell burning or see arcing, stop and call a pro immediately.
Resetting a breaker is okay when power is off and you’re careful; if you notice burning smells or arcing, call a pro quickly.
How long does a capacitor replacement take on a typical unit?
Capacitor replacement is a specialized task that a licensed technician usually completes within an hour or two, depending on access and system layout. Do not attempt this replacement yourself if you’re not trained.
Capacitor replacement is quick for a pro but not a DIY job. Expect about an hour or two with proper safety.
When should I call a professional for an AC that won’t turn on?
If basic checks don’t restore function, if you hear sizzling or smell burning, or if you’re unsure about electrical testing, contact a licensed HVAC technician. They can diagnose capacitors, relays, and refrigerant issues safely.
Call a professional if simple checks don’t fix it or you hear burning sounds. A pro will test capacitors and control boards safely.
The Essentials
- Start with power and control checks before opening panels
- Thermostat issues are a frequent cause of not turning on
- Safety switches protect the home; don’t ignore them
- When in doubt, call a licensed HVAC technician