Why is My Air Conditioner Not Turning On? A Practical Troubleshooting Guide
Urgent troubleshooting guide to diagnose why your air conditioner won't turn on, with a practical diagnostic flow, step-by-step fixes, safety notes, and prevention tips from Air Conditioner Service.

Most often, your AC won’t turn on due to a simple power or control issue. Check the outlet, circuit breaker, and any fuses, then verify the thermostat is set to cool and the unit isn’t in a timer or sleep mode. If it still won’t start, follow the diagnostic flow below for a safe, systematic fix.
Why Your AC Won't Turn On: Common Causes
When the air conditioner refuses to start, it’s rarely due to a mysterious fault—more often it’s a straightforward power, control, or safety issue. The most common culprits are a tripped circuit breaker or blown fuse, a thermostat that isn’t set correctly, and a simple power interruption at the outlet or disconnect switch. Dirt and debris can also affect the unit indirectly by restricting airflow or triggering safety shutoffs. In these situations, homeowners can usually resolve the problem with basic checks and resets. According to Air Conditioner Service, the top three starting points are power supply, thermostat configuration, and ensuring the outdoor and indoor units have a clear electrical path to operate. By staying methodical, you can identify the root cause without risking harm to yourself or the equipment.
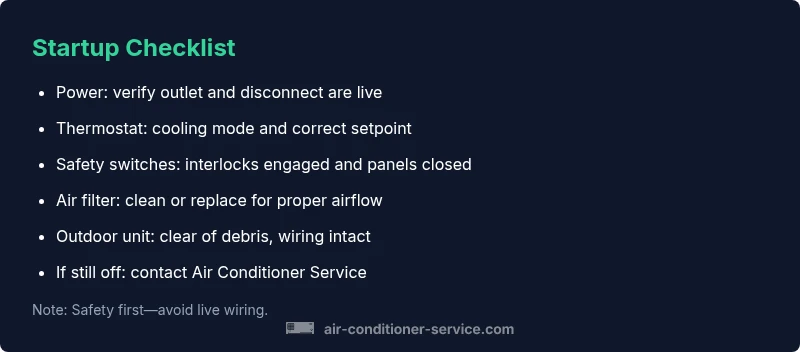
- Power supply: Confirm the unit is receiving power at the wall outlet or disconnect switch.
- Thermostat: Ensure it’s not in an off, heat, or fan-only mode; verify the temperature setting is appropriate and that any batteries are fresh if your thermostat uses them.
- Safety and access switches: Many units have safety switches on the access panel or door that must be engaged for operation.
- Breakers and fuses: A tripped breaker or blown fuse cuts power to the condenser or control board.
- Filters and airflow: A severely clogged filter or blocked airflow won’t stop the unit from turning on immediately, but it can cause protections to trigger after startup.
If you’re unsure about performing electrical checks, or if you notice burnt smells, buzzing noises, or signs of overheating, contact a licensed technician immediately.
Basic Checks You Should Do Before Calling a Technician
Before you pick up the phone, run through a few safety-focused checks that can save time and money:
- Power check: Look at the outlet or disconnect box feeding the AC; verify the switch is ON and the outlet is producing power (you can test with a small lamp).
- Thermostat sanity: Verify the thermostat is set to cooling and not in a delay or vacation mode. If you have a programmable model, confirm it isn’t stuck in a schedule.
- Breaker inspection: Check your main service panel for a tripped breaker or a blown fuse associated with the AC circuit. Reset the breaker firmly, and replace any blown fuses.
- Panel safety: If your unit has an access panel, ensure it’s properly closed after you inspect wiring and components.
If none of these steps restore operation, move to the diagnostic flow. Remember: if you smell burning, hear buzzing, or see smoke, power down at the main breaker and call a professional immediately.
Diagnostic Flow: From Symptom to Solution
A structured diagnostic flow helps you identify why the AC won’t turn on without guessing. Start with the simplest checks and progress to more technical fixes:
- Symptom confirmation: The unit does not start when the thermostat calls for cooling.
- Power pathway: Is there voltage at the unit’s control board? Are outdoor disconnects and indoor fuses intact?
- Control logic: Is the thermostat communicating with the outdoor unit? Check wiring at the thermostat and at the air handler/air conditioner.
- Safety interlocks: Ensure any doors or panels have their safety switches engaged.
- Mechanical components: Observe for a faulty contactor, faulty capacitor, or damaged relay if the control board appears powered but the compressor won’t engage.
- If still unresolved: Consider professional diagnosis for electrical components and refrigerant-related issues.
Safety note: Do not bypass safety switches or probe live circuitry beyond your competence. If you’re unsure, call Air Conditioner Service for a professional assessment.
Step-by-Step Fixes for the Most Common Cause
- Power check and reset
- Title: Restore power to the system
- Description: Locate the main disconnect and the interior breaker panel. Reset any tripped breakers and replace blown fuses. Confirm the outdoor unit disconnect is ON.
- Tip: Power down the entire system before touching any components.
- Thermostat verification
- Title: Confirm thermostat settings
- Description: Set to cooling mode, ensure the temperature is lower than current room temperature, and check for any programmable schedule that might keep the system off. Replace batteries if applicable.
- Tip: If your thermostat has a heat-cool option, ensure cooling is selected.
- Safety switches and panels
- Title: Engage safety interlocks
- Description: Ensure all access panels are closed and safety switches are active. A loose panel or misaligned switch can permanently disable startup.
- Tip: Do not open live electrical components without appropriate training.
- Outdoor unit sanity check
- Title: Inspect outdoor unit wiring and contactor
- Description: Look for loose wires, corrosion, or a stuck contactor. If you hear a humming sound but the compressor won’t start, the contactor or capacitor may be failing.
- Tip: Only handle electrical parts if you’re confident; otherwise seek a professional.
- Capacitor and relay tests
- Title: Check capacitors and relays
- Description: Faulty capacitors often cause startup failure; relay chatter can prevent engagement. Visual signs include a swollen capacitor or burnt smell.
- Tip: Capacitor testing requires a multimeter and knowledge of wiring; if in doubt, skip to professional help.
- When to call a pro
- Title: When to escalate
- Description: If power and control checks are solid but it still won’t start, the issue may involve the compressor, refrigerant, or a damaged control board.
- Tip: Early professional diagnosis can prevent further damage and costly repairs.
Safety, Warnings, and Prevention Tips
- Safety first: Always shut off power at the main breaker before inspecting any electrical components.
- Don’t bypass safety switches or operate the system with the access panel removed.
- Use the manufacturer’s manual for thermostat settings and air-handler wiring; incorrect configurations can cause further harm.
- Regular maintenance reduces startup issues: replace air filters, clean coils, and schedule professional inspections annually.
- If you smell burnt electronics or hear odd noises, stop and call a pro immediately to avoid fire or electrical shock.
Remember, some fixes require specialized tools and training. When in doubt, rely on an Air Conditioner Service professional for safe, reliable results.
Steps
Estimated time: 60-90 minutes
- 1
Power check and reset
Inspect the main breaker and the indoor/outdoor disconnect; reset any tripped breakers and replace blown fuses. Confirm the outdoor disconnect is ON and electricity is reaching the control board.
Tip: Cut power at the main breaker before opening any panels. - 2
Thermostat sanity check
Set the thermostat to cool, lower the temperature, and ensure it isn’t in a schedule or vacation mode. If the thermostat is digital, confirm the display is active and responsive.
Tip: If your thermostat uses batteries, replace them if signs of weak power appear. - 3
Safety interlocks and panels
Make sure all access panels are securely closed and safety switches engaged. An open panel can trip protections and prevent startup.
Tip: Do not bypass safety switches; risk of shock or fire is real. - 4
Outdoor unit and wiring check
Look for loose wires, burnt connections, or corrosion on the outdoor unit’s contactor. A humming contactor that doesn’t engage may indicate a failed relay.
Tip: Only handle live wires if you are qualified; otherwise skip to professional help. - 5
Capacitor and relay assessment
Capacitors provide the surge needed to start the compressor; a failing capacitor can prevent startup. Use proper tools and only test if you’re trained.
Tip: Capacitors can retain charge; discharge safely before handling. - 6
Call a professional if unresolved
If the unit still won’t start after power, thermostat, safety interlocks, and basic component checks, the issue may require advanced diagnostics for the compressor or refrigerant.
Tip: Professional diagnosis can prevent further damage and safety risks.
Diagnosis: AC won't turn on
Possible Causes
- highPower issue (outlet, disconnect, main breaker)
- highThermostat misconfiguration or off state
- mediumBlown fuse or faulty capacitor/contactor
- lowSafety switch or door panel not engaged
Fixes
- easyReset tripped breaker and replace blown fuses; ensure disconnect is ON
- easyVerify thermostat is set to cool and not in a sleep/timer mode; replace batteries if needed
- mediumInspect capacitor/contactor for signs of failure and replace if necessary
- easyCheck safety interlocks and ensure access panels are properly closed
- hardIf the issue persists, arrange professional service for electrical and refrigerant investigations
Common Questions
What is the first thing I should check if my AC won't turn on?
Start with power at the outlet or disconnect and verify the thermostat is set to cool. If the unit still won’t start, proceed through the diagnostic flow to identify the specific fault.
First, check power and thermostat settings, then follow the diagnostic flow if needed.
Could a blown fuse or tripped breaker be the cause?
Yes. A tripped breaker or blown fuse cuts power to the AC. Reset the breaker or replace the fuse, and then re-test the system.
A breaker or fuse issue is a common culprit; reset or replace as needed and test again.
Is it safe to reset the thermostat or circuit breaker myself?
Resetting the thermostat and circuit breaker is generally safe if you follow the manufacturer’s guidance and keep a safe distance from live components. If you’re unsure, contact a technician.
It's usually safe to reset, but if in doubt, call a professional.
What should I do if the outdoor unit won’t start after basic checks?
If the outdoor unit won’t engage, inspect the disconnect switch and contactor for signs of wear. Electrical faults or a failed capacitor require professional testing.
If the outdoor unit won’t start, check the disconnect and contactor, and call a pro for capacitor or relay checks.
Can a dirty filter stop the AC from turning on?
A dirty filter can cause the system to overheat or trigger safety shutoffs; it usually doesn’t prevent turning on, but it can hinder proper operation and cooling if left unchecked.
A dirty filter can cause poor performance and safety shutoffs, so replace or clean it regularly.
When should I replace the AC instead of repairing it?
If the system is old, inefficient, or requires frequent diagnostics and major component replacements, replacement may be more cost-effective in the long run.
If repairs pile up and efficiency declines, consider replacement.
The Essentials
- Start with power and thermostat checks
- Engage all safety switches before inspecting internals
- If unresolved, call a pro early to avoid further damage
- Regular maintenance prevents startup failures