What to Do When Your AC Doesn't Work
Urgent troubleshooting guide for when your AC won't work. Learn safe quick checks, a diagnostic flow, step-by-step fixes, safety tips, and when to call a pro.

Most non-work issues start with power or simple maintenance. Begin with safe checks: confirm power at the outlet, reset the circuit breaker, and replace a dirty air filter. Check thermostat settings, then test the unit again. If it still refuses to run, contact a licensed technician for further diagnosis.
what to do when your ac doesn't work
What to do when your ac doesn't work is an urgent problem, but approaching it methodically can restore comfort quickly. This guide follows a practical, safety-first approach that homeowners and renters can apply before scheduling a service call. According to Air Conditioner Service, many failures are caused by easy fixes or simple maintenance items rather than major mechanical faults. In this guide you’ll find quick checks, a clear diagnostic path, step-by-step repairs for common issues, safety considerations, and prevention tips to reduce future outages. Remember: if you encounter high voltage, refrigerant handling, or unfamiliar wiring, stop and call a professional. This article uses the keyword what to do when your ac doesn't work to frame the steps you’ll take and to keep you focused on fast, safe resolutions.
Safe quick checks you can perform before calling a pro
Before you reach for tools or call a technician, perform a few basic, non-invasive checks. These steps are designed to be quick, low-risk, and often resolve the problem without professional intervention. First, verify that the system has power: inspect the circuit breaker or the disconnect switch near the outdoor unit and reset if it has tripped. Next, confirm thermostat settings: ensure it is set to cool, the temperature is reasonable, and the batteries (if any) are functioning. Then inspect the air filter; a dirty filter can restrict airflow and make the system appear dead. Finally, look at the outdoor unit for debris, leaves, or snow and ensure there is at least a couple of feet of clearance for proper airflow. If you hear buzzing, sparking, or smell burning, turn off power immediately and call a pro.
Common failure modes and symptoms
AC problems come in a few recognizable flavors. Not turning on at all usually points to a power or control issue. Not cooling adequately or at the right temperature often means airflow problems, refrigerant restrictions, or a malfunctioning compressor. Odd noises such as grinding, squealing, or banging can indicate motor or bearing problems, while ice forming on the coils signals a refrigerant or airflow imbalance. Water pooling around the indoor unit can indicate a condensate drainage problem. Each symptom narrows down the likely causes and guides your next steps. By being familiar with these patterns, you can communicate clearly with a technician and reduce diagnostic time. Air Conditioner Service notes that most calls begin with a simple symptom check and a few basic maintenance actions.
Diagnostic flow: symptom → diagnosis → solutions
A clear path helps you avoid chasing the wrong issue. Start with the symptom: not turning on, not cooling, noise, or water. For not turning on or no cooling, the first likely causes are power issues, thermostat problems, or a clogged air filter. If power is solid and the thermostat is functioning, inspect airflow and outdoor unit clearance. For noisy units, inspect bearings and fan blades. If you identify a refrigerant leak or a defective compressor, stop DIY work and call a licensed technician. Each diagnosis leads to a predefined set of solutions, minimizing wasted time and confusion. As Air Conditioner Service emphasizes, following this diagnostic flow improves outcomes and safety for homeowners.
Step-by-step: Fixes for the most common cause
- Power check and reset: Turn off power at the breaker, wait 30 seconds, and restore power. This can reset the control board when minor faults occur. 2) Filter replacement: Remove the existing filter, replace it with a correctly rated one, and reinstall securely. A clogged filter is a frequent culprit. 3) Thermostat verification: Confirm cooling mode, correct setpoints, and ensure wiring is intact. If the thermostat moodily misreports temperatures, consider replacing it. 4) Outdoor unit check: Clear debris and ensure at least 2 feet of clearance all around the condenser. Clean coils gently if needed. 5) Condensate drain: Inspect the drip pan and drain line for blockages; clear with a thin brush or recommended cleaner. 6) System test: Run a short cycle and observe airflow, temperature differential, and any unusual sounds. If issues persist after these steps, schedule a professional inspection.
Safety tips & warnings
Electricity is dangerous. Always shut off power at the breaker before handling electrical components or wiring. Never attempt refrigerant work unless you are licensed; refrigerants require specialized equipment and training. Avoid using improvised tools or bypassing safety devices. If you see exposed wiring, a burnt smell, or burning sensation when handling components, stop immediately and contact a pro. Proper PPE (gloves, eye protection) and dry surroundings reduce the risk of shocks or injuries. Regular maintenance reduces risk, but it does not replace professional service for refrigerant or high-voltage issues.
Maintenance to prevent future problems
Create a simple routine to keep your AC reliable. Schedule seasonal filter changes every 1-3 months depending on usage and environment, and clean the outdoor unit's surrounding area at least twice a year. Keep condensate drains clear, and inspect the thermostat and wiring annually. A proactive approach to maintenance reduces emergency repairs and extends system life. Air Conditioner Service recommends documenting service dates and maintaining a replacement schedule for critical components like capacitors or contactors to avoid sudden failures.
When to call a pro and how to choose one
If your checks do not restore cooling, or you hear unusual noises, smell burning, or notice a refrigerant odor, call a licensed HVAC technician. Ask about a fixed-price diagnostic visit, see if they provide a written inspection report, and request a clear estimate for required repairs. Check for current licenses, warranties, and customer reviews. For complex issues like refrigerant leaks or compressor failures, professional service is not optional but essential for safety and compliance. Air Conditioner Service suggests getting at least three quotes and confirming that the technician tests electrical connections and refrigerant systems to code before work begins.
Steps
Estimated time: 30-60 minutes
- 1
Power check & reset
Turn off power at the main breaker, wait 30 seconds, then turn it back on. If the unit doesn’t respond, check for a blown fuse or a tripped breaker in the panel. After resetting, test the thermostat and blower to see if cooling resumes.
Tip: Always cut power before touching electrical components to avoid shocks. - 2
Inspect and replace air filter
Locate the air filter in the return air path, remove it, and assess its texture and color. If it’s clogged or dirty, replace it with a filter of the same size and efficiency rating. A fresh filter improves airflow and can restore cooling in many cases.
Tip: Note the filter size printed on the existing frame for an exact replacement. - 3
Thermostat verification
Ensure the thermostat is in cooling mode, with a setting comfortable enough to trigger the system. Check for a dead battery if it uses a wireless or programmable thermostat, and replace it if needed. If a smart thermostat shows errors, consult the manual or app for troubleshooting steps.
Tip: Sometimes a simple reboot of the thermostat fixes communication issues with the HVAC system. - 4
Outdoor unit clearance
Visually inspect the outdoor condenser. Remove leaves, grass, or debris that may impede airflow. Ensure at least 2 feet of clearance around the unit and clean exposed condenser fins gently with a soft brush. A clean outdoor unit runs more efficiently and cools faster.
Tip: Keep a small distance from plants or shelving that could obstruct airflow. - 5
Drains and condensate
Check the indoor condensate drain line for blockages or kinks. A blocked drain can trigger overflow and shut down the system to prevent water damage. Use a thin, flexible brush or recommended cleaner to loosen any buildup.
Tip: Don’t pour liquids down the drain line that could back up into the unit. - 6
Test run and evaluation
Turn the system back on and observe airflow, temperature drop, and any unusual noises. If cooling returns and remains stable for 10-15 minutes, you’ve likely resolved the issue. If not, document what you observed and prepare to call a professional.
Tip: Take note of model and any error codes to share with the technician.
Diagnosis: AC won't turn on or not cooling
Possible Causes
- highPower issue (tripped breaker or blown fuse)
- mediumThermostat or control wiring problem
- mediumClogged or dirty air filter causing low airflow
- lowOutdoor unit blocked or insufficient clearance
Fixes
- easyReset the circuit breaker or replace blown fuse, then test the unit
- easyReplace the air filter and clean surrounding area
- easyVerify thermostat is set correctly and wiring is intact
- easyEnsure outdoor unit is clear of debris and has proper clearance
- mediumIf the problem persists, call a licensed technician for refrigerant and electrical checks
Common Questions
What should I check first if my AC won't start?
Start with power checks at the breaker, then inspect the thermostat and filter. Small, quick checks resolve many startup issues without a service call.
First check the breaker and thermostat, then replace the filter if dirty; most startup issues are resolved with these quick steps.
Can a dirty filter really stop cooling?
Yes. A clogged filter restricts airflow, causing the system to run inefficiently or shut down on safety features. Replacing the filter often restores cooling.
A dirty filter can block airflow and cause the system to shut down or not cool well; replacing it usually fixes this.
Is it safe to reset the breaker myself?
Resetting a breaker is generally safe if you follow proper procedure and nothing smells burnt or looks damaged. If you’re unsure, call a pro.
Reset the breaker with the power off, and if you notice burning smells or damage, stop and call a technician.
Should I recharge refrigerant myself?
No. Refrigerant handling requires licenses and equipment. A leak or improper charge can cause harm and waste energy.
No, refrigerant work should be left to a licensed technician to avoid hazards and environmental impact.
How often should I service my AC to prevent problems?
Annual professional inspection and seasonal filter changes are recommended to prevent common failures and extend system life.
Having a yearly check plus seasonal filter changes keeps the system running smoothly.
What if I hear grinding noises from the unit?
Unusual noises warrant immediate attention. They can indicate motor or bearing wear and may require professional diagnosis.
Grinding or banging noises usually mean a part needs inspection by a pro.
Watch Video
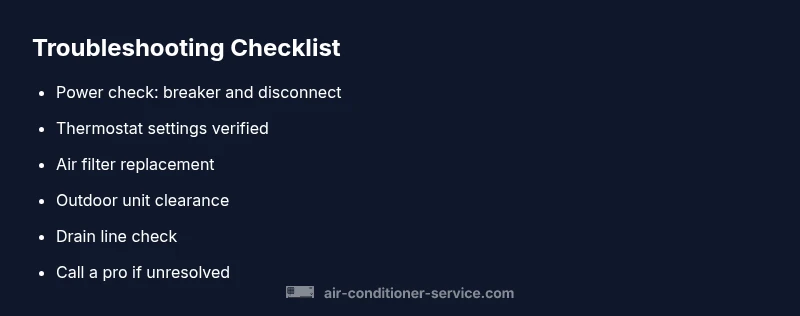
The Essentials
- Run through power checks first and reset breakers.
- Replace dirty filters promptly to restore airflow.
- Verify thermostat settings and control wiring.
- Clear outdoor unit debris for optimal performance.
- If unresolved, call a licensed HVAC tech for refrigerant/electrical diagnostics.