Why is My Air Conditioner Not Working? A Practical Troubleshooting Guide
Urgent, practical troubleshooting steps for when your AC won't work. Follow these checks, safety tips, and prevention strategies from Air Conditioner Service to restore cooling fast.

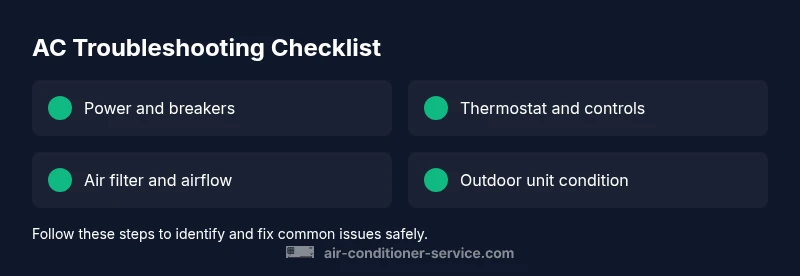
If your AC won’t start or cool, begin with power, filter, and thermostat checks, then inspect the outdoor unit for ice or debris. These are the most common culprits. If nothing fixes it, contact a licensed HVAC pro. This quick path helps you confirm the likely causes and decide on the best next step.
Why this happens and what to check first
If you're wondering why is my air conditioner not working, you're not alone. In most homes, the problem stems from simple, fixable causes: a tripped breaker or blown fuse, a dirty air filter restricting airflow, a thermostat that isn’t reading accurately, or an outdoor unit that’s iced over or blocked. This guidance comes from Air Conditioner Service, which emphasizes starting with the basics before diving into complex diagnostics. For safety, switch off power at the thermostat, then at the main breaker if you’ll be inspecting electrical components.
Common causes explained:
- Power issues: A tripped breaker, blown fuse, or a disconnected service cord can prevent the unit from starting.
- Airflow restrictions: A clogged filter or blocked return vents reduces cooling and may cause the system to shut down on safety.
- Thermostat and controls: A mis-set thermostat, dead batteries, or a sensor fault can fool the system into not cooling.
- Outdoor unit problems: Ice buildup, debris, or severe dirt on the condenser can limit heat exchange and freeze the coil.
- Refrigerant leaks: Low refrigerant is less common in older, well-maintained systems but can cause poor cooling or no cooling.
If you own a newer, high-efficiency system, there may be additional controls or smart features; however, the same principles apply: verify power, airflow, sensing, and outdoor unit condition before escalating.
Quick checks you can perform right now
Before calling for service, run through these fast checks. They require no tools and can be done safely if you follow the safety guidance.
- Power: Confirm the outdoor unit and indoor air handler are receiving power. Check the circuit breaker or fuses; reset or replace as needed.
- Thermostat: Ensure it’s set to Cool, with a comfortable target temperature. Replace thermostat batteries if applicable; verify the schedule or smart features aren’t overriding.
- Air filter: Inspect the filter; replace if dirty or clogged. A clean filter helps airflow and cooling efficiency.
- Outdoor unit: Look for ice, debris, or leaves that block airflow. Gently remove debris and allow any ice to melt before testing again.
- Noise and indicators: Note any unusual sounds or blinking LEDs, which can signal component failure or control issues.
Safety reminder: If you notice burning smells, exposed wiring, or you must forcefully jump-start the unit, stop and call a licensed technician.
Diagnostic flow: symptom to solution
When the symptom is not cooling or not turning on, follow a simple diagnostic flow to avoid unnecessary repairs. Air Conditioner Service analysis shows that most problems fall into four categories: power/control, airflow, outdoor unit, and refrigerant/containment. Start with the symptom, then test the most likely causes, and progress to more involved checks only if earlier steps pass.
- Symptom: AC won’t start
- Check power, breaker, and fuse
- Confirm thermostat is reachable and correctly programmed
- Inspect the air filter and return ducts
- Examine the outdoor unit for ice, debris or obstruction
- If none apply, consider refrigerant issues or internal control faults
- Symptom: AC runs but doesn’t cool
- Airflow problems, refrigerant leaks, or indoor sensor misreadings
- Prioritize filter replacement and thermostat verification
- Check outdoor unit for ice and clear obstructions
- If cooling remains weak, call a pro for refrigerant diagnosis
This structured approach keeps you focused on practical, solvable steps while ensuring safety.
Step-by-step: Fixes for the most common cause (Power and Controls)
If the first checks point to power or control issues, follow these steps to restore operation in the safest order.
- Turn off the power at the thermostat and main breaker to avoid shock.
- Reset breakers and replace any blown fuses; wait 60 seconds before restoring power.
- Inspect the disconnect switch near the outdoor unit and re-seat any loose connections.
- Ensure wiring is secure and there’s no visible damage to the line set or condensers.
- Power the system back on and test a cooling cycle for 5-10 minutes.
- If the unit still won’t start or cycles abnormally, prepare for professional service to check for control board, capacitor, or wiring faults.
Tip: Use a non-contact voltage tester to quickly verify power at breakers and disconnects before touching wires. If you’re uncomfortable with electrical work, skip ahead to Step 6 and call a licensed HVAC technician.
Safety tips and when to call a pro
Electrical systems involve real hazards. Always isolate power and wear gloves when inspecting metal parts. If you smell burning, hear buzzing, see arcing, or notice melted insulation, stop immediately and call a pro. For refrigerant leaks or suspected motor or compressor faults, do not attempt to repair yourself; specialists have the tools to handle refrigerants and high-voltage components safely.
To prevent future failures:
- Schedule regular maintenance with a trusted HVAC pro
- Change filters every 1-3 months
- Keep outdoor unit clear of leaves and debris
- Check ductwork for leaks and seal as needed
- Monitor for ice buildup and address quickly
Prevention tips to keep your AC running smoothly
Proactive maintenance is cheaper than emergency repairs. Commit to a quarterly check of airflow, refrigerant, and electrical components. Use a smart thermostat with leakage warnings and ensure proper insulation to reduce load. Organize a simple seasonal service plan and keep a maintenance log so nothing slips through the cracks.
This approach reduces the risk of sudden failures and helps you plan for any repairs before the hot season begins. Remember: small, regular checks reduce the chance of bigger problems later.
Steps
Estimated time: 1-2 hours
- 1
Safety first: power down
Turn off power at the thermostat, then at the main service panel to prevent shocks while you inspect.
Tip: Always verify power before touching electrical components. - 2
Check breakers and fuses
Look for a tripped breaker or blown fuse and reset/replace as needed.
Tip: If you must reset, do it with dry hands and dry surroundings. - 3
Inspect thermostat and wiring
Make sure the thermostat is set to Cool and that wires are snug; replace batteries if applicable.
Tip: Consider temporarily bypassing smart features to test manual control. - 4
Assess the air filter
Remove and inspect the filter; replace if dirty; a clean filter improves airflow.
Tip: Set a maintenance reminder for regular replacements. - 5
Examine the outdoor unit
Check for ice buildup, debris, or obstructions; clear and allow ice to melt before retesting.
Tip: Never hit a frozen coil with a hammer or hot water. - 6
Test system operation
Power the unit back on and run a short cooling cycle; listen for abnormal noises or cycling patterns.
Tip: If it still won’t start, prepare for professional troubleshooting.
Diagnosis: AC not working or not cooling
Possible Causes
- highPower issue (tripped breaker or blown fuse)
- highAirflow restriction (dirty filter or blocked vents)
- mediumThermostat or control fault
- mediumOutdoor unit ice or debris
- lowLow refrigerant or leak
Fixes
- easyReset breaker or replace fuse; restore power
- easyReplace dirty filter and clear vents
- easyVerify thermostat settings and replace batteries if needed
- easyClear ice/debris from outdoor unit and allow thaw; test
- mediumCall a pro for refrigerant leak or internal component faults
Common Questions
Why won't my air conditioner turn on even though the thermostat is set to cool?
First check power at the outdoor unit and the thermostat. Ensure the breaker is on and batteries are fresh if applicable. If it still won’t start, there may be a contactor or control board issue that requires a professional.
Check power and thermostat settings; if it still won’t start, a technician may be needed.
My AC runs but doesn’t cool. What’s wrong?
Common causes are restricted airflow from a dirty filter, a blocked return, or outdoor unit ice. Check the filter, vents, and the outdoor unit; if cooling remains weak, a pro should diagnose refrigerant or compressor issues.
Check airflow and outdoor unit; if still not cooling, call a pro.
What does a blinking outdoor unit LED mean?
A blinking LED often signals a fault in the outdoor unit’s safety switch or control circuit. Note the pattern and consult the service manual or a technician for a precise diagnosis.
Blinking LED usually indicates a fault; get a professional check.
Can a dirty air filter really stop cooling?
Yes. A dirty filter reduces airflow, which can cause the system to run inefficiently or shut down to protect itself. Replacing the filter and cleaning ducts can restore performance.
Yes, a dirty filter can stop or limit cooling. Replace it and recheck.
When should I replace my AC rather than repair it?
If frequent breakdowns continue, efficiency loss, or repair costs approach the price of a new unit, replacement is often the wiser long-term choice. A professional can provide a cost-benefit estimate.
Frequent repairs or low efficiency suggest replacement is best.
Watch Video
The Essentials
- Start with power and air flow checks.
- Use the diagnostic flow to identify root causes.
- Call a pro for refrigerant or major electrical issues.
- Prevent future problems with regular maintenance.