Home Air Conditioner Not Working: Quick Troubleshooting Guide
Urgent, practical troubleshooting for a home air conditioner not working. Learn quick checks, diagnostic flow, step-by-step fixes, safety tips, and when to call a pro.

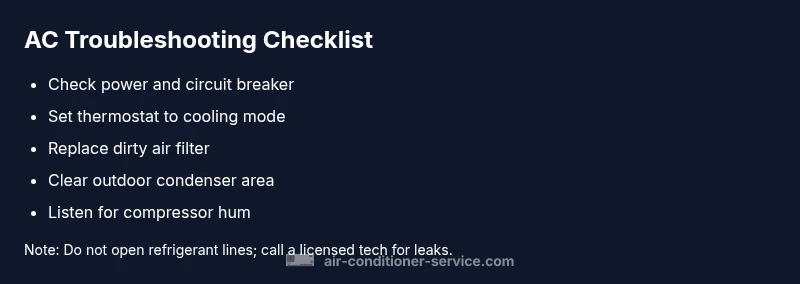
Most issues with a home air conditioner not working stem from simple causes you can check in minutes. Common suspects include power or thermostat problems, a dirty filter, blocked outdoor unit, low refrigerant, or a failed capacitor. Quick fixes: confirm cooling mode, reset the breaker, replace a dirty filter, clear debris around the condenser, and listen for compressor hum. If it won’t start, call a pro.
Why your home air conditioner not working: quick triage
According to Air Conditioner Service, the first step in diagnosing a home air conditioner not working is to perform a quick triage that covers power, thermostat configuration, and airflow. In many homes, the problem isn’t the compressor but a simple oversight or blockage. This section explains the triage process, how to identify the most likely culprits, and how to decide whether you can safely proceed or should call a professional. When your system fails, the range of possibilities can seem daunting, but a systematic approach keeps you in control and reduces the risk of mistaken repairs. By the end of this quick triage, you should have a clear sense of what you can fix safely and what requires expert service.
Key questions to answer include: Is the unit getting power? Is the thermostat calling for cooling? Is airflow unobstructed? Are the air filters clean? Is the outdoor condenser free of debris? Addressing these can often restore operation or guide you to the next best step.
For homeowners dealing with a home air conditioner not working, this upfront assessment saves time and reduces the risk of unnecessary repairs. Remember: if the unit is still not functioning after basic checks, professional assessment is recommended to prevent further damage and ensure safe refrigerant handling.
wordCountCommentsOnlyAfterThisBlockNoteToSelfForLengthIfNeeded
Steps
Estimated time: 60-90 minutes
- 1
Check power and breakers
Start by inspecting the main power supply. Ensure the unit’s disconnect switch near the outdoor condenser is ON and the home’s circuit breaker for the AC is not tripped. If the breaker is tripped, reset it and test the unit again.
Tip: If the breaker trips again, there may be a more serious electrical issue. - 2
Test the thermostat and cooling mode
Confirm the thermostat is set to COOL and that the temperature is below the current room temperature. If the thermostat has batteries, replace them. Some thermostats can fail after a power surge, so re-pairing or resetting may help.
Tip: If you use a programmable thermostat, try holding the hold or run mode for a few minutes to see if it initiates cooling. - 3
Inspect and replace the air filter
A dirty filter reduces airflow and can trigger safety shutoffs. Remove and inspect the filter; replace if visibly dirty or if it’s been more than 1–3 months since last replacement. After replacement, run the system for 15–20 minutes to evaluate performance.
Tip: Choose a filter with the right MERV rating for your system; avoid filters that restrict airflow too much. - 4
Check outdoor condenser area
Look for leaves, dirt, and debris around the outdoor unit. Clear at least 2 feet of clearance around the sides and top. Gently clean the fins if accessible with a soft brush and avoid bending the fins.
Tip: Power off the unit before cleaning to avoid shock or injury. - 5
Listen for the compressor and outdoor fan
When power is restored, listen for a steady hum from the compressor and a spinning outdoor fan. If you hear clicks but no fan, or no sound at all, the issue may be a failed capacitor or a faulty relay.
Tip: Unusual noises are a sign to pause and call a pro rather than continuing with DIY fixes. - 6
Decide on next steps
If basic checks don’t restore operation, contact a licensed HVAC technician. Refrigerant handling and electrical diagnoses require professional training and tools. Record what you tested and observed to share with the tech.
Tip: Documenting symptoms speeds up diagnosis and repair.
Diagnosis: AC not turning on or not cooling
Possible Causes
- highPower issue (tripped breaker, unplugged unit)
- highThermostat misconfiguration or dead batteries
- mediumClogged air filter restricting airflow
- mediumOutdoor condenser blocked by debris or vegetation
- lowLow refrigerant due to undetected leak
Fixes
- easyCheck electrical outlet and circuit breaker; reset if tripped
- easyVerify thermostat settings; replace batteries; ensure cooling mode is selected
- easyReplace a dirty air filter and clean return/grille areas
- easyClear debris and ensure at least 2 feet of clearance around the outdoor condenser
- mediumIf refrigerant leak is suspected, contact a licensed technician; do not attempt recharge
Common Questions
Why won't my home air conditioner start even when the thermostat is set to cool?
Common causes include a tripped breaker, a dead thermostat battery, or a non-cooled compressor. Start with power, thermostat settings, and air filter checks. If these don’t resolve the issue, professional service is advised.
A common start issue is a tripped breaker or dead thermostat battery. Check power, thermostat settings, and replace the air filter before calling a pro.
Can a dirty filter cause the AC not to cool?
Yes. A clogged filter restricts airflow, causing cooling to be inefficient or the system to shut down to protect itself. Replace the filter and observe performance after 15–20 minutes.
A dirty filter can seriously limit airflow and cooling—replace it and test the system again.
Is it safe to reset the thermostat or breaker by myself?
Resetting the thermostat or breaker is generally safe if you follow manufacturer instructions and power is off before touching any wiring. If you’re unsure, avoid opening components and call a pro.
You can reset the thermostat or breaker if you follow the manual, but avoid touching wires if you’re not sure.
When should I call a professional for home AC not working?
Call a professional if basic checks don’t restore operation, if you hear unusual noises, or if you suspect refrigerant leaks or electrical faults. Professional service ensures safe handling and proper refrigerant levels.
If basic checks fail or you suspect leaks or electrical problems, it’s time to call a professional.
What maintenance helps prevent future AC failures?
Regularly replace filters, clear debris, schedule annual professional inspections, and keep coils clean. This reduces strain on components and improves efficiency over time.
Regular filter changes and yearly checkups prevent many common problems.
How long does an AC repair typically take?
Repair times vary; simple fixes can take a few hours, while complex issues like refrigerant service may require a full day with parts. Your technician will provide an estimate after diagnosis.
Most common repairs can be completed in a few hours; major refrigerant work may take longer.
The Essentials
- Identify power/thermostat issues first
- Replace dirty air filters to restore airflow
- Clear outdoor condenser area regularly
- Do not vent refrigerant or operate with suspected leaks
- Call a licensed pro for refrigerant or major electrical problems