What Causes Air Conditioner Coils to Freeze: Troubleshooting Guide
Discover the common causes of frozen AC coils, how to diagnose them safely, and practical, step-by-step fixes. Air Conditioner Service provides homeowner-friendly troubleshooting guidance.

According to Air Conditioner Service, the most common cause of frozen evaporator coils is restricted airflow from a dirty air filter or blocked supply vents. Clearing obstructions and replacing a dirty filter usually resolves the problem within hours. If the issue persists, it may indicate more serious causes that require professional help.
What causes air conditioner coils to freeze
A freezing evaporator coil is a warning sign that your air conditioner isn’t moving air or refrigerant as intended. The phrase what causes air conditioner coils to freeze captures the most common culprits. According to Air Conditioner Service, the leading factor is restricted airflow across the evaporator, which allows the coil to drop below freezing and collect ice. In many homes, this happens when a dirty filter, a blocked return duct, or closed supply vents impede airflow. When air can’t circulate, the coil becomes extremely cold while the blower struggles, and moisture from the air condenses and freezes on contact.
Other frequent causes include low refrigerant due to leaks, a dirty evaporator coil outside the air handler, or a malfunctioning blower motor. Low refrigerant reduces pressure and cooling capacity, causing the temperature to plummet at the evaporator. Dirty coils also trap heat, reducing efficiency and encouraging ice formation. Finally, thermostat or control issues can put the system into long on cycles, freezing the coil. This block should educate readers to inspect for visible obstructions, test airflow, and recognize the difference between a simple filter change and a sign of a leak.
As you troubleshoot, remember that some causes require professional service. The Air Conditioner Service team emphasizes safety: powering down the system before inspecting electrical connections and refrigerant lines is essential. A coordinated approach that starts with airflow and air quality will resolve most freezing incidents without costly repairs.
The guidance in this section aligns with Air Conditioner Service analysis, which highlights airflow as the easiest, most impactful starting point for any frost issue. Owning a few basic troubleshooting habits can save time and reduce unnecessary service calls, especially during peak cooling season.
Common Causes in Everyday Homes
Many frost events start with something simple. In homes across the country, the top three offenders are a dirty air filter, blocked return air ducts, and closed or blocked supply vents. When filters get clogged, the system can’t pull enough air across the evaporator coil, causing ice to form as moisture condenses on the cold surface. Blocked vents or closed dampers have the same effect, bottlenecking airflow and encouraging freezing.
Beyond airflow, low refrigerant is a frequent culprit that homeowners mistake for a purely mechanical problem. A refrigerant leak reduces pressure and cooling capacity, so the coil can freeze from lack of heat exchange. It's important to note that refrigerant work must be performed by a licensed technician; attempting to “top off” refrigerant yourself can be dangerous and illegal in many areas.
Dirty evaporator coils—often due to dust, pet hair, and general grime—also impede heat absorption. When the coil can’t absorb heat effectively, it becomes colder, attracting moisture that freezes. The outdoor condenser unit matters too: if leaves, grass, or snow block airflow around the condenser or if the fan isn’t spinning properly, the system can’t reject heat efficiently and the indoor coil may freeze as a consequence.
Thermostat issues, such as incorrect temperature settings, defective sensors, or controls that cause the system to run in cooling mode longer than needed, can also contribute. Finally, oversizing or undersizing the system relative to your home can produce abnormal cycling and frost formation. If you’re facing persistent frost, run through these causes in order and verify airflow first, since it’s the most actionable and often fixes the problem quickly.
Air Conditioner Service emphasizes keeping up with routine maintenance to prevent these issues. Regular filter changes, annual coil cleaning, and a yearly professional check of refrigerant and electrical components go a long way toward preventing freezing episodes and maintaining comfort.
Diagnostic Flow: From Frost to Fix
This flow helps homeowners translate frost on the evaporator coil into a concrete plan. Start with the symptom: frost or ice on the evaporator coil. Next, test for airflow restrictions by inspecting the air filter, vents, and return air pathways. If airflow is clear, the next likely cause is a refrigerant issue or a malfunctioning blower. Check whether the outdoor unit is free of debris and whether the fan runs smoothly. If airflow and outdoor conditions check out, a refrigerant leak or a faulty metering device could be at fault, which requires a professional diagnosis.
Document the sequence of observations: filter condition, vent blockages, outdoor airflow, signs of ice on the coil, and any unusual noises. Use this information when speaking with a technician. Finally, decide on the action: clear blockages and replace filters first; if frost returns after those steps, call a qualified HVAC technician for a refrigerant inspection and system test. This flow is designed to be safe and practical for homeowners who want to reduce downtime and avoid unnecessary service calls.
Step-by-Step: Fixes for the Most Common Cause
Most freezing incidents begin with restricted airflow, so this step-by-step focuses on restoring airflow safely. Step 1: Power off the system at the thermostat and, if possible, at the service panel to avoid electrical hazards. Step 2: Locate and replace the air filter with a clean replacement appropriate for your system. Choose a filter with a suitable MERV rating for your home and ensure it seats properly. Step 3: Inspect all air supply and return vents; remove any obstructions and ensure at least 6-12 inches of clearance around vents and registers. Step 4: Check the blower motor and fan; listen for unusual noises and verify the blower wheel spins freely without rubbing. Step 5: Inspect the evaporator coil for visible dirt or ice; if dirty, follow your manufacturer’s recommended cleaning method (gentle brushing or using approved coil cleaners). Step 6: Reassemble and power the system back on; run a short cooling cycle and monitor the coil temperature and ice formation. Step 7: If frost returns, do not continue to operate in cooling mode; this suggests a refrigerant leak or a more serious fault requiring a licensed professional. Always call for professional help if you notice prolonged ice buildup. Tip: keep a log of filter changes and maintenance visits to identify patterns and avoid future freezes.
Estimated time for this fix: about 30-60 minutes for initial airflow restoration, plus possible follow-up service if frost recurs.
Safety Tips and Warnings
Safety should guide every troubleshooting step. Always shut off power to the AC unit before inspecting electrical connections or reaching near the compressor and refrigerant lines. Never attempt to “top off” refrigerant or seal a suspected leak yourself; refrigerant handling requires certification in many jurisdictions. If you smell chemical fumes, see ice around the outdoor unit, or notice hissing noises, evacuate the area and call a professional immediately. Do not ignore frost on the evaporator coil, as prolonged icing can damage the compressor and reduce system efficiency. Keep doors and windows closed while testing and avoid standing on wet surfaces near electrical components. Use proper PPE such as gloves and eye protection if you are inspecting parts exposed to cold surfaces. Remember: when in doubt, contact a qualified HVAC technician rather than proceeding with risky DIY repairs.
Air Conditioner Service notes that most safety incidents stem from electrical hazards or improper refrigerant handling. By respecting safety guidelines and following a logical flow from simplest to more complex checks, you can minimize risk while addressing the root cause of freezing.
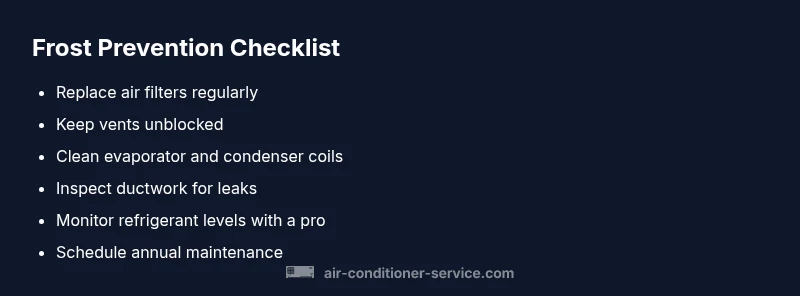
Prevention and Maintenance to Avoid Freezing
Prevention is the best cure for frozen coils. Start with a proactive maintenance plan that includes regular air filter changes every 1-3 months, depending on usage and household dust levels. Schedule an annual professional inspection to check refrigerant charge, ductwork integrity, and coil cleanliness. Maintain good airflow by keeping bedroom and living room vents unblocked, and ensure outdoor unit has at least 2 feet of clearance on all sides to promote adequate airflow and heat rejection.
Humidity control also matters; in humid climates, consider a programmable thermostat or a whole-house dehumidifier to reduce moisture that can contribute to frost formation on cooling coils. Using correctly sized equipment for your home reduces cycling, which in turn minimizes frost events. If you notice frost forming at the same time every year, this may indicate a systemic issue like duct leaks or improper refrigerant charge, which should be addressed by a qualified technician. Finally, maintain duct cleanliness and inspect for leaks or punctures in the system’s duct network to prevent restricted airflow and moisture buildup that contribute to freezing.
Quick Recap and Next Steps
By following a structured approach—from validating airflow to inspecting refrigerant systems—you can effectively resolve most frozen-coil scenarios without excessive downtime. The most important step is to restore proper airflow, which often eliminates ice formation. If frost persists after improving airflow, contact a professional to check refrigerant levels and perform a thorough system inspection. With regular maintenance and attentive operation, you can minimize future freezing problems and enjoy consistent cooling throughout the season.
Steps
Estimated time: 30-60 minutes for initial checks; additional time may be needed for professional service
- 1
Power off the system and prep area
Turn off the thermostat and disconnect power at the outdoor disconnect or breaker panel to prevent electrical shocks while you inspect. Remove any rain covers only if you are sure you can do so safely. This pause gives you a safe baseline to begin troubleshooting.
Tip: Double-check the breaker label to avoid cutting power to unrelated circuits. - 2
Replace the air filter
Remove the old filter and replace it with a new one of the correct size and MERV rating for your system. Ensure the airflow arrows point in the right direction toward the blower. A properly seated filter reduces resistance and improves airflow across the evaporator coil.
Tip: Keep a spare filter on hand for quick changes during peak season. - 3
Clear vents and ducts
Inspect all supply and return vents for blockages such as furniture, curtains, or dust buildup. Remove obstructions and vacuum ducts if accessible. Consider scheduling professional duct cleaning if you notice persistent debris buildup.
Tip: Never seal or close vents permanently in occupied rooms to avoid imbalanced airflow. - 4
Inspect the blower and evaporator coil
Listen for the blower motor to ensure it runs smoothly and doesn't hum or rub. If you can access the evaporator coil safely, look for visible dirt and ice. Do not attempt aggressive scraping; use approved cleaners or contact a pro for coil cleaning.
Tip: Avoid using sharp tools that could puncture the coil fins. - 5
Restart and observe
Restore power and run a short cooling cycle. Observe whether frost recurs on the coil within 15-20 minutes. If ice forms again, this signals a deeper issue such as a refrigerant leak or a faulty metering device.
Tip: Keep an eye on the outdoor unit for unusual noises during startup. - 6
Call a professional if needed
If frost returns after performing these checks, or if you suspect a refrigerant issue, contact a licensed HVAC technician for a thorough diagnosis and refrigerant recharge. Do not continue to operate the unit in cooling mode with ice present.
Tip: Document the symptoms and steps you’ve taken to expedite service.
Diagnosis: AC coils frost/freeze (evaporator coil iced over)
Possible Causes
- highRestricted airflow due to dirty filter or blocked ducts
- mediumLow refrigerant from leaks or improper charge
- mediumDirty evaporator coil or dirty outdoor condenser coil
- lowBlower motor or fan not running properly
- lowThermostat or control issues causing overcooling
Fixes
- easyReplace dirty air filter and remove vent obstructions to restore airflow
- easyCheck and correct duct blockages; ensure return ducts are clean and open
- easyInspect outdoor unit for debris and ensure the fan operates freely
- mediumIf airflow is restored but frost returns, schedule a refrigerant inspection by a licensed tech
- easyTest thermostat settings and sensors; recalibrate or replace if inaccurate
Common Questions
Can low refrigerant cause coils to freeze?
Yes. A refrigerant leak or low charge reduces heat absorption, causing the evaporator coil to freeze. A professional should locate the leak, repair it, and correctly recharge the system. Do not ignore persistent ice, as it can damage the compressor.
Yes. Low refrigerant can cause the coil to freeze; a professional must locate leaks and recharge the system.
Why do dirty air filters cause freezing?
Dirty filters restrict airflow across the evaporator coil, making it cold enough to ice over. Replacing the filter and clearing obstructions usually resolves the issue. If frost returns after replacement, there may be deeper problems to investigate.
Dirty filters restrict airflow and can lead to ice on the coil; replace the filter and check for obstructions.
Is a frozen evaporator coil dangerous?
A frozen coil can signal underlying problems such as refrigerant leaks or restricted airflow. Frost can damage the compressor and reduce cooling efficiency if ignored. Addressing the root cause promptly helps protect the system.
Yes, a frozen coil can be dangerous for the system if not addressed quickly.
Can I thaw the coil myself?
You can thaw by turning off cooling and allowing ice to melt, then rechecking airflow. Do not run the unit with ice present, and avoid jumping to refrigerant fixes without a check. If frost returns, call a professional.
You can melt the ice by turning off cooling and restoring airflow, but call a pro if it reappears.
When should I call a professional?
If you notice persistent frost after basic checks, hear refrigerant smells, see ice forming repeatedly, or suspect leaks, stop using the system and contact a licensed HVAC technician. A professional can diagnose leaks, test refrigerant charge, and repair components safely.
Call a pro if frost persists or you suspect a refrigerant leak.
How can I prevent freezing regularly?
Maintain clean filters, keep ducts unobstructed, schedule annual professional maintenance, and ensure correct thermostat settings. Regular checks minimize improper airflow and refrigerant-related issues that lead to freezing.
Regular maintenance and clean filters prevent most freezes.
Watch Video
The Essentials
- Restore airflow first to fix most freezes
- Do not ignore frost on the evaporator coil
- Refrigerant issues require a licensed pro
- Adopt a regular maintenance routine to prevent future freezes