Samsung AC Repair: A Practical How-To Guide for Homeowners
Learn practical, safe steps to troubleshoot and repair Samsung air conditioners at home. From common issues to when to call a pro, this guide keeps you informed and ready to act.

This practical guide helps homeowners troubleshoot and safely repair common Samsung air conditioner issues, with step-by-step actions, safety reminders, and when to seek professional help. You’ll learn to identify symptoms, perform basic inspections, and decide whether a repair is feasible or if replacement is a wiser choice.
Why Samsung AC Repair Matters
Understanding how a Samsung air conditioner works helps homeowners avoid unnecessary service calls and prevent minor problems from becoming major ones. According to Air Conditioner Service, regular troubleshooting and timely maintenance can extend unit life and reduce energy waste. In practice, a thoughtful repair approach targets the most common failure points—electrical components, airflow, and drainage—without assuming expert-level skills. This guide focuses on practical, safe steps you can take to diagnose and repair many everyday issues, using clear checklists and conservative expectations about what you can fix yourself. By tackling issues early, you can save time and keep your Samsung AC running efficiently, especially during peak cooling season.
Common Samsung AC Issues and Quick Fixes
Many Samsung AC problems share familiar patterns. If the unit won’t cool, start by ensuring airflow is clear and the filter is clean. Ice on the coils often signals restricted refrigerant flow or low refrigerant charge, which should be handled by a licensed pro. Unusual noises or a fan that won’t spin can point to a faulty capacitor or loose fan belt. Leaks around the condensate line or a whistling noise near electrical components may indicate more complex failures. This section outlines practical, non-destructive checks you can perform safely, with clear signs that tell you when to call a technician.
Safety First: When to DIY and When to Call a Pro
Electrical components, refrigerant handling, and high-voltage parts pose real risks. Always power down the system and unplug the unit before inspecting indoor or outdoor components. If you observe burning smells, discolored wiring, refrigerant hissing, or oil around the compressor, stop and contact a qualified technician. The aim is safe, incremental troubleshooting; if you’re unsure at any point, pause and seek professional help. Air Conditioner Service recommends treating refrigerant work as a licensed activity to avoid hazardous exposure and environmental harm.
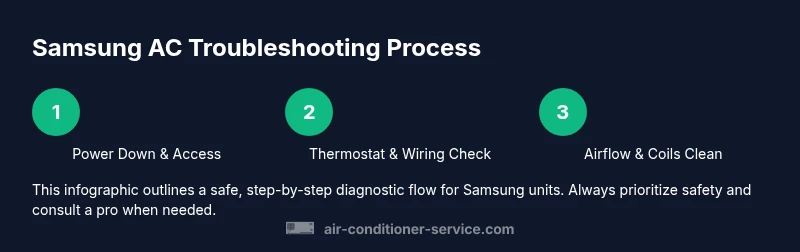
Step-by-Step Troubleshooting Checklist (High-Level Overview)
This section complements the hands-on steps that follow. Begin with a quick visual survey: listen for odd noises, check for heat on the outdoor unit, and verify that the thermostat is communicating correctly. Next, confirm basic power, reset the breaker if needed, and inspect air filters and coils for dirt or ice buildup. By following a logical diagnostic flow—from power and signals to airflow and refrigerant behavior—you’ll reduce guesswork and identify the most likely root cause. Remember: if your checks don’t point to a simple fix, or if refrigerant, wiring, or compressor issues are involved, enlist a professional.
Maintenance Practices to Extend Samsung AC Life
Preventive care is cheaper than repeated repairs. Schedule regular filter changes, keep outdoor coils clean, and ensure the condensate line stays clear. During periods of high usage, clean the refrigerant coil and fan blades every season to maintain efficiency. For Samsung units, using manufacturer-approved accessories and keeping software/thermostat firmware up to date can improve performance. Document any recurring symptoms so you can share them with a technician if needed, and consider a professional tune-up at least once a year to catch wear before it causes bigger problems.
Tools & Materials
- Safety glasses(Protect eyes from debris and refrigerant exposure.)
- Insulated gloves(Electrical safety when handling live components.)
- Screwdriver set (Phillips & flathead)(Access panels and internal components.)
- Digital multimeter(Test voltage, resistance, and continuity.)
- Vacuum or canned air(Clear dust from coils and vents.)
- Soft brush or microfiber cloth(Gently wipe grime from fins and surfaces.)
Steps
Estimated time: 45-90 minutes
- 1
Power down and access the unit
Begin by unplugging the system or turning off the dedicated breaker. Remove the service panel to access indoor components, taking care not to touch live wires. This step reduces the risk of shock and helps you inspect the basic layout before deeper checks.
Tip: Always verify the power source with a multimeter before touching any wiring. - 2
Check thermostat signals and wiring
Confirm the thermostat is communicating with the outdoor unit. Look for loose wires or corroded terminals and tighten or replace connectors as needed. A miscommunication at the thermostat can prevent cooling even when other systems are functioning.
Tip: If cables look damaged, replace unlikely splicing; use a terminal block or proper crimp connectors. - 3
Inspect air filters, coils, and fan
Remove the air filter and clean or replace it if dirty. Check the outdoor condenser coils for dirt or obstruction and gently clear debris with a soft brush. Inspect the indoor fan for smooth operation and listen for rubbing or wobbling noises.
Tip: Dirty filters reduce airflow, increasing strain on the compressor. - 4
Test electrical components with a multimeter
With power still off, test basic components such as contactors, capacitors, and wiring for continuity and proper voltage using your multimeter. Note readings and compare to the unit’s specifications in the service manual. Replace any components that fail a nominal test.
Tip: Capacitors can fail without obvious signs; a subtle bulge or leakage is a red flag. - 5
Check condensate drain and refrigerant indicators
Inspect the condensate drain for blockages and ensure the line is clear to prevent water damage and mold growth. If you suspect a refrigerant issue (icing coils, persistent not-cooling) do not attempt a charge; refrigerant handling requires a licensed professional.
Tip: Never attempt to charge refrigerant yourself; it requires specialized tools and certification. - 6
Decide on repair vs. replacement and safety sign-off
If critical components show wear (compressor, major refrigerant issues, persistent electrical faults), weigh repair feasibility against unit age and efficiency. Document findings and make a safe, informed decision, or contact a pro for a formal assessment.
Tip: Keep a log of symptoms and fixes to guide future maintenance.
Common Questions
What are the most common Samsung AC issues homeowners notice?
Common signs include poor cooling, ice on coils, unusual noises, and condensate leaks. Start with simple checks like filters and airflow before assessing electrical components.
Common issues are not cooling, icy coils, strange noises, and leaks. Start with easy checks like filters and airflow.
Can I safely perform DIY repairs on a Samsung AC myself?
Basic maintenance and safe inspections are possible, but avoid refrigerant handling or electrical work beyond your comfort level. When in doubt, consult a professional.
You can do basic checks, but don’t handle refrigerant or risky electrical work yourself.
When should I replace vs repair a Samsung AC unit?
Consider repair if the unit is relatively new and the issues are limited to components like filters or capacitors. Replacement may be wiser if the unit is old or has frequent major failures.
Repair if it’s relatively new and mostly fixable; replacement is better for old, frequently failing units.
Where can I find authorized Samsung service centers near me?
Check Samsung’s official support site or contact local HVAC technicians who are certified to service Samsung models. Look for authorized service providers for parts and warranty compatibility.
Visit Samsung’s support site or ask local certified HVAC pros for authorized service options.
How long does a typical Samsung AC repair take?
Repair duration varies with the issue and parts availability. Plan for a window that allows for diagnosis and the necessary component replacements.
Repair times vary, depending on the problem and parts required.
Is refrigerant charging safe for DIY repair?
No. Refrigerant charging requires licensed technicians and proper safety equipment. Attempting it can be illegal and hazardous.
Refrigerant charging should be done only by a licensed technician.
Watch Video
The Essentials
- Identify the issue through a structured diagnostic flow
- Prioritize safety and when in doubt call a pro
- Regular maintenance extends Samsung AC life
- Document symptoms to guide future fixes