How to Repair Air Conditioner: A Practical Home Guide
Learn practical, safe steps to diagnose and repair common air conditioner problems at home. This guide covers basic maintenance, common fixes, and when to hire a pro.

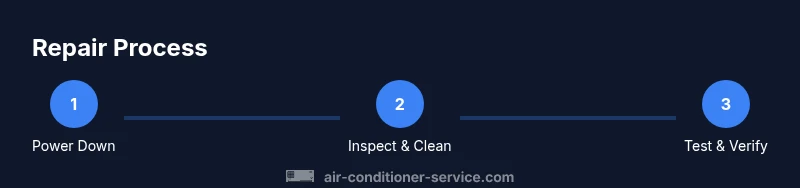
According to Air Conditioner Service, this guide helps you learn how to repair air conditioner safely. You’ll start with basic troubleshooting and finish with guidance on when to hire a professional. Gather the essential tools first, then follow the step-by-step process to diagnose and address common issues. This approach emphasizes safety and practical, incremental fixes.
Why Repairing Your Air Conditioner Matters
A properly functioning air conditioner (AC) keeps your home comfortable during hot months, helps maintain indoor air quality, and can prevent small problems from turning into expensive failures. Repairing your AC when it’s practical extends the life of the unit and avoids unnecessary waste. The Air Conditioner Service team emphasizes building a routine of inspection and basic maintenance as a first line of defense against sudden outages. Small problems like a dirty filter, a loose wire, or a clogged condensate line are often the root causes of inefficiency and poor cooling. Addressing these issues promptly saves energy, reduces wear, and improves overall comfort.
When homeowners take a methodical approach to repair, they gain confidence in identifying what they can safely fix and when to call a professional. This guide provides practical, safe steps you can perform with common household tools, and it explains how to recognize signs that require licensed electrical or refrigerant service. By following the guidance, you’ll understand the difference between routine maintenance and urgent repairs, and you’ll be better prepared to discuss options with a technician.
Safety First: DIY vs Professional
Repairing an air conditioner involves electrical components, refrigerant systems, and working around potentially wet environments. Before you touch anything, turn off power at the breaker and outdoor disconnect, and confirm power is off using a non-contact tester. If you’re uncomfortable with any step, or if you encounter signs of a refrigerant leak, refrigerant smells, or buzzing that seems abnormal, stop and call a licensed technician. The safety rules are non-negotiable: do not bypass fuses, do not charge the system yourself, and never work on a live circuit. The Air Conditioner Service team highlights that professionals carry the right tools and certifications to handle electrical and refrigerant work safely.
Common Issues and Quick Checks
Most problems fall into a few predictable categories. Not cooling or weak cooling is often caused by a dirty filter, blocked condensate drain, or dirty evaporator coils. A unit that won’t turn on at all can be traced to a tripped breaker, blown fuse, or a thermostat wiring issue. Odd noises may point to loose components, a failing capacitor, or a worn belt in older equipment. Start with the simplest checks: verify the thermostat settings, inspect and replace a dirty air filter, ensure outdoor unit is free of debris, and look for ice buildup on the evaporator coil. These quick checks can save time and money and often restore comfort without a service call.
Tools and Diagnostic Approach
To diagnose effectively, assemble a small set of common tools: a screwdriver set, a multimeter or voltage tester, a flashlight, gloves, and safety glasses. A soft brush or nylon brush helps clean coils without bending fins. A basic condensate drain clearance tool or a gentle garden hose can clear minor clogs. The diagnostic approach is systematic: power down, verify settings, inspect physical components, test electrical connections, and observe how the system behaves after each step. If the problem remains unclear, record symptoms and times of failure to help a technician pinpoint the root cause. It’s essential to document any refrigerant concerns for the pro; refrigerant work requires licensing and specialized equipment.
Maintenance Tips to Prevent Future Problems
Prevention is cheaper than repair. Replace disposable air filters every 1–3 months depending on household factors, seal ductwork to prevent leaks, and keep the outdoor unit free from leaves, weeds, and debris. Schedule seasonal checks to clean coils, inspect wiring, and test safety switches. Use a programmable thermostat to optimize cooling cycles and reduce energy use. Regular maintenance improves efficiency, lowers operating costs, and extends equipment life. The Air Conditioner Service guidance emphasizes building a simple maintenance routine you can perform without specialized tools, plus knowing when to call a professional for more complex tasks. Here are some practical reminders:
- Check filters monthly and replace when dirty.
- Keep the outdoor unit clear of 2–3 feet of clearance.
- Listen for unusual noises and address them early.
- Schedule professional service at least once a year for a more thorough inspection.
Authority Sources and References
For further reading on safe, reliable cooling and energy-efficient operation, consult these authorities:
- Energy.gov – Energy Star and efficiency guidelines for home cooling systems
- EPA.gov – Indoor air quality and refrigerant safety information
- NIST.gov – Standards and best practices in home energy systems
Tools & Materials
- Screwdriver set (Phillips and flat-head)(Varied sizes; include a stubby screwdriver for tight spaces)
- Non-contact voltage tester(Used to confirm power is off before touching electrical components)
- Multimeter or voltage tester(Checks electrical connections and capacitor surge risk)
- Flashlight or headlamp(Illuminates dark corners inside equipment cabinets)
- Safety glasses and gloves(Personal protection while handling electrical components)
- Soft brush or nylon brush(Cleans coils without bending fins)
- Condensate drain tool or garden hose(Clear minor blockages in the drain line)
- Rags and a small bucket(Handle condensation or minor spills easily)
Steps
Estimated time: 60-90 minutes
- 1
Power down and secure the area
Locate the main breaker for the AC and the disconnect switch near the outdoor unit. Turn off both and verify there is no voltage present using a non-contact tester. This grounding step protects you from shocks and prevents damage to components while you inspect.
Tip: Always confirm power is off at both the indoor and outdoor units before touching any wires. - 2
Check thermostat settings and basic operation
Ensure the thermostat is set to cooling mode and the desired temperature is lower than the current room temperature. If the thermostat is programmable, verify it has a current schedule and is communicating with the AC blower. A misconfigured thermostat is a common cause of non-functional cooling.
Tip: If you use a smart thermostat, try cycling it off and on to reestablish communication with the system. - 3
Inspect and replace the air filter
Remove the filter and check for heavy dust or discoloration. Replace with a filter of the correct size and MERV rating recommended for your system. A clogged filter reduces airflow, causing reduced cooling efficiency and increased wear on the compressor.
Tip: Keep a spare filter on hand and mark the replacement interval on a calendar. - 4
Check electrical protections and breakers
Look at the indoor and outdoor breakers; a tripped breaker will interrupt power to the compressor or blower. Reset if safe and observe if it trips again. Recurrent trips may indicate an underlying fault such as a short or overload.
Tip: If the breaker keeps tripping, there is a fault in wiring or components; stop and call a professional. Do not keep resetting indefinitely. - 5
Inspect capacitor and contactor visually
Look for signs of a swollen or leaking capacitor or a pitted contactor. Do not touch a swollen capacitor with bare hands. If you see obvious damage, replace the part and avoid discharging it manually.
Tip: Capacitors are charged; if you’re unsure, schedule professional service for capacitor replacement. - 6
Clean coils and check the fins
Gently remove debris from the condenser coils (outdoor unit) and evaporator fins (inside). Use a soft brush to loosen dust and a hose with light spray to rinse, avoiding bending the fins. Clean coils improve heat transfer and efficiency.
Tip: Do not use high-pressure water; it can bend fins and damage the coil. - 7
Check the condensate drain and lines
Inspect the drain line for clogs and clear any blockages with an appropriate pull or flush. A blocked condensate line can cause water damage and trigger safety switches that shut down the system.
Tip: If you see standing water around the indoor unit, address it immediately to prevent water damage. - 8
Evaluate refrigerant concerns and escalation
If you suspect a refrigerant leak, do not attempt to repair the refrigerant circuit yourself. Refrigerant handling requires licenses and specialized equipment. Document symptoms and contact a licensed tech for a precise diagnosis and safe recharge if needed.
Tip: Never attempt to recharge refrigerant yourself; mischarging can cause equipment damage and health risks.
Common Questions
Why won't my air conditioner turn on?
Common reasons include a tripped breaker, blown fuse, thermostat wiring issues, or a faulty contactor. Start by checking the breaker and thermostat settings, then inspect accessible wiring for obvious damage. If the problem persists, schedule professional service to diagnose electrical or refrigerant faults.
If your AC won’t turn on, check the breaker and thermostat first. If it still won’t start, call a professional to check for electrical or refrigerant faults.
Why is my AC not cooling effectively?
Poor cooling is often due to a dirty filter, blocked condensate drain, or dirty condenser/evaporator coils. Ensure unobstructed airflow, replace the filter, and clean the coils. If cooling doesn’t improve, a professional should inspect refrigerant levels and compressor performance.
If it’s not cooling well, start with the filter and airflow, then check the coils. If it remains weak, a pro should check refrigerant and compressor.
Can I repair a refrigerant leak myself?
No. Handling refrigerants requires licensing and specialized equipment. A leak should be addressed by a trained technician who can locate the source, perform a safe refrigerant recharge, and ensure the system is sealed correctly.
Refrigerant leaks require licensed technicians and proper equipment; don’t attempt a DIY recharge.
When should I service my air conditioner?
Aim for an annual professional inspection, ideally before peak cooling season. Regular filter changes and coil cleaning can be done by homeowners to extend unit life and efficiency.
Get a yearly check, plus regular filter changes to keep efficiency high.
What do common AC noises indicate?
Rattling can mean loose components, squealing often points to bearings or a belt, and buzzing may indicate electrical issues. If noises occur, shut down and inspect or call a technician to avoid further damage.
Unusual noises usually signal loose parts or electrical issues—it's best to have them checked.
Is it cheaper to repair or replace my AC?
This depends on age, repair cost, and anticipated remaining life. If the repair is frequent or the unit is approaching the end of its life, replacement may be more economical in the long run.
Consider the unit’s age and repair costs to decide between repair and replacement.
Watch Video
The Essentials
- Identify common failure points and address them safely
- Always power down before inspecting electrical components
- Regularly replace filters and keep coils clean for efficiency
- Know when to call a professional for refrigerant or electrical faults