How to Fix Air Conditioner in House: A Homeowner's Guide
A homeowner-friendly, educational guide to diagnosing and repairing common home AC problems. Safe at-home fixes, maintenance routines, and when to call a professional.

By following this step-by-step guide, you can diagnose and fix common cooling issues in a typical home air conditioner. You’ll learn safe troubleshooting practices, when to clean or replace components, and how to decide whether to call a licensed tech. This guide emphasizes practical maintenance you can perform with basic tools and good safety habits.
The Value of Proactive Maintenance
Maintaining an air conditioner in good condition isn't glamorous, but it's essential for comfort and energy bills. Regular checks catch problems early and reduce emergency repairs. This how to fix air conditioner in house guide focuses on practical steps you can take without professional gear. According to Air Conditioner Service, many common cooling issues are preventable with routine maintenance and timely cleaning. By starting with the simplest tasks, homeowners and renters can extend equipment life and keep energy costs predictable. In this section, you’ll learn the mindset of DIY diagnostics: observe symptoms, verify simple components, and decide when to escalate. Always respect safety: disconnect power before touching any wiring, and never work on a live unit. The remainder of this article expands on those ideas with concrete steps you can follow.
Key Causes of Home AC Problems
Understanding why an air conditioner stops cooling helps you troubleshoot more quickly. The most frequent culprits are simple and reversible with a bit of elbow grease or basic tools. Air Conditioner Service analysis shows that neglecting routine maintenance, such as dirty air filters, blocked condensate drains, and dirty evaporator coils, is a common recipe for reduced performance. Loose or corroded electrical connections can also cause intermittent operation or sudden shutdowns. When you approach a problem, start with the easy fixes and work your way toward components that require careful testing. This mindset minimizes wasted time and helps protect your equipment from avoidable wear. Remember: many issues are symptoms, not root causes, so record what you observe for more precise troubleshooting.
Diagnostic Wins You Can Try First
Before you reach for tools, adopt a simple diagnostic checklist. Start with safety: shut off the power at the disconnect switch or breaker. Listen for unusual noises, look for ice on the evaporator, and feel for air at the vents to gauge airflow. If you notice frost, reduced airflow, or warm air, you may have a dirty filter, a blocked drain line, or a stuck thermostat. Keep notes on what you observe, including time of day and whether outdoor temperatures are extreme. These early observations help you determine whether a fix is a quick at-home adjustment or a sign that a professional visit is warranted. This approach aligns with best practices from Air Conditioner Service, emphasizing careful, documented steps over guesswork.
How to Inspect and Replace the Air Filter
The filter is your first line of defense against dust, pollen, and debris. A clogged filter reduces airflow, forces the system to work harder, and can cause freezing of the evaporator coil. Start by turning off power and locating the filter compartment. Check the filter’s size printed on the frame or on the filter itself. If it’s dirty or discolored, replace it with a new one of the same size and a similar or better MERV rating suited to your home. For best results, install the new filter with the arrow pointing toward the blower. After replacement, run the system on a cool setting for 5–10 minutes to observe improved air quality and airflow. Regular replacement (every 1–3 months depending on usage) is the simplest, most effective maintenance task.
Clearing the Condensate Drain and Checking for Blockages
A blocked condensate drain can trigger water leakage or trigger a safety shutoff if a float switch is installed. Start by locating the drain line—this is typically a PVC pipe near the indoor unit. Clear visible blockages with a dry cloth or use a wet/dry vacuum to suction from the drain opening. If you see standing water in the drain pan, inspect for algae or sediment buildup and flush the line with a small amount of distilled water or a manufacturer-approved cleaner. Do not use chemical cleaners that could damage components. Regularly inspecting and clearing the drain reduces the risk of water damage and improves humidity control without requiring extensive disassembly.
Electrical Checks: Safety First
Electrical issues are a common cause of intermittent cooling or complete failure. Start by ensuring the thermostat is set correctly and communicating with the HVAC system. With power off, inspect accessible wiring for signs of wear, corrosion, or loose connections at the access panel. If you must test voltage, use a non-contact voltage tester and a multimeter to verify that circuits and capacitors are within safe operating ranges. If you find burnt or melted insulation, buzzing sounds, or a capacitor that seems swollen, stop and call a qualified technician. Electrical work can pose serious risk, so prioritize safety over speed.
Outdoor Condenser and Refrigerant Lines: What to Look For
The outdoor condenser contains coils that must remain clean to dissipate heat effectively. Inspect the fins for damage, debris, or bent louvers. Use a soft brush or fin comb to straighten bent fins gently. Ensure there’s adequate clearance around the unit for proper airflow. Leaks or hissing sounds from refrigerant lines indicate a professional issue; refrigerant handling requires licensing and specialized equipment. If the outdoor unit is obstructed or covered by debris, clear the area and remove any weeds or vegetation nearby. Regular outdoor maintenance prevents performance losses and extends system life.
Thermostat, Ducts, and Airflow: Fine-Tuning Your System
Accurate temperature control and balanced airflow depend on a correctly calibrated thermostat and clean ducts. Verify that the thermostat is communicating with the system by comparing the setpoint with the actual room temperature. If you notice inconsistent cooling between rooms, inspect flexible ducts for kinks or blockages and consider cleaning accessible ductwork. Poor airflow can also come from closed vents or blocked returns. Use a simple airflow test: hold a tissue near various grilles and ensure it moves with the blower when the system runs. Addressing these factors improves comfort and reduces energy usage.
Coil Cleaning: When and How to Do It
Coil cleanliness directly affects heat transfer efficiency. If you can access the outdoor condenser coils, gently remove loose dirt and debris using a brush. For stubborn grime on the indoor evaporator coil, you may use a spray-on coil cleaner following the product’s instructions. Always turn off power before applying cleaners and rinse with water only if the product permits it. Avoid aggressive scrubbing that could damage fins or coatings. Clean coils improve efficiency, reduce energy consumption, and help your system maintain a comfortable indoor temperature.
Testing After Reassembly and System Run
After completing maintenance or fixes, reassemble panels, restore power, and run the unit in cooling mode for 10–15 minutes. Observe for proper airflow, quiet operation, and stable temperature. Check the condensate drain for leaks and ensure the outdoor unit is free of debris. If the system cycles on and off rapidly (short cycling), or you notice unusual odors or smoke, power down and reassess or call a pro. Document any unusual findings and compare them with your initial observations to determine if further action is needed.
Common Pitfalls and Safety Warnings
DIY fixes can backfire if you rush or skip safety. Never work on live electrical components or refrigerant lines without proper training and PPE. Avoid using sharp tools on delicate fins, and never bypass safety switches or float valves. If you detect a refrigerant leak, odor, or hissing sound, treat it as a professional concern. A common mistake is assuming a single fix will resolve all issues; many problems stem from a combination of causes that require careful diagnosis. Take your time, follow the steps methodically, and when in doubt, call a technician.
Next Steps: Maintenance Plan and How to Decide When to Call a Pro
Long-term reliability comes from a planned maintenance routine. Set a calendar reminder to inspect filters every 4–12 weeks, clean coils annually, and schedule a professional tune-up once a year or before peak cooling season. If DIY checks do not restore proper cooling, or if you encounter refrigerant, compressor, or electrical concerns, the safest option is to contact a licensed technician. The Air Conditioner Service team recommends a proactive maintenance approach to protect your investment and maintain energy efficiency. Keep a log of service dates, replacement parts, and observed symptoms to guide future troubleshooting and ensure you stay ahead of costly breakdowns.
Tools & Materials
- Replacement air filter (same size as unit)(Choose filter type (fiberglass or pleated) and a compatible MERV rating; common sizes are 1" and 2" all-purpose filters.)
- Screwdriver set (Phillips and flat-head)(Philips #2 is the most common; include a small flat-head for accessing panels.)
- Multimeter(Used to test voltage and continuity; follow safety guidelines.)
- Non-contact voltage tester(Helpful to verify live circuits before handling wires.)
- Wet/dry vacuum(Clear condensate drain blockages and collect debris.)
- Safety goggles and work gloves(Personal protective equipment to protect eyes and hands.)
- Coil cleaner spray (optional)(Use per product instructions for indoor evaporator coils or outdoor condenser coils.)
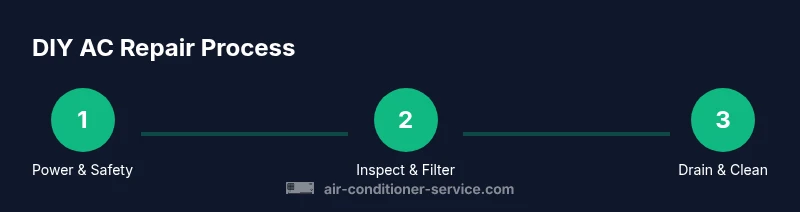
Steps
Estimated time: 60-90 minutes
- 1
Power down and secure the unit
Begin by turning off the main power at the disconnect switch and the household breaker. This ensures no live voltage can reach the system while you work. If the outdoor unit is tricky to access, consider turning off the main power at the main service panel to be extra safe.
Tip: Lockout-tagout the breaker if available to prevent accidental re-energizing. - 2
Inspect and replace the air filter
Locate the filter access panel, remove the old filter, and replace it with a new one of the same size. Ensure correct orientation by following the arrow on the filter frame. After installation, run the system briefly to confirm improved airflow.
Tip: If you have pets or allergens, consider upgrading to a higher MERV rating filter. - 3
Clear the condensate drain line
Identify the condensate drain line and check for visible blockages. Use a wet/dry vacuum to clear obstructions from the outdoor end or indoor access point. Ensure the line runs freely and check the drain pan for standing water.
Tip: A blocked drain can trigger a safety shutoff; clear it promptly to avoid leaks. - 4
Check electrical connections
With power still off, inspect accessible wiring for wear, loose connections, or signs of arcing. If a capacitor is suspected, do not handle it unless you have the right replacement and training. If you see damaged insulation, contact a professional.
Tip: Use a non-contact tester before touching any wires to confirm power status. - 5
Inspect the outdoor condenser and lines
Look at the outdoor unit for debris, ensure sufficient clearance for airflow, and clean the fins if needed. Check visible refrigerant lines for kinks or obvious damage; if you suspect a leak, do not attempt a repair yourself and call a pro.
Tip: Keep at least 2 feet of clearance around the condenser for good airflow. - 6
Test the thermostat and airflow
Reassemble panels, power the unit, and set the thermostat to cool. Verify that the indoor blower is circulating air and that the temperature drops steadily. If there is a significant delay or no cooling, reassess the steps taken earlier.
Tip: Calibrate the thermostat if the readings seem off or inconsistent. - 7
Inspect the evaporator coil (indoor)
If accessible, check for ice or frost on the evaporator coil. A frozen coil usually indicates airflow problems or refrigerant issues. If you see frost, turn off the system and allow it to thaw before testing again.
Tip: Do not chip away ice aggressively; improper handling can damage coils. - 8
Run a final system test
Run the system in cooling mode for 10–15 minutes. Listen for unusual sounds, check for vibrations, and verify temperatures at registers. If the system cycles on and off erratically, recheck airflow and refrigerant-related indicators.
Tip: Keep notes of all observations for future maintenance. - 9
Document findings and plan next steps
Record what you did, parts replaced, and any symptoms observed. Schedule annual professional maintenance and note any issues that require a technician. A well-documented history helps prevent repeat problems and reduces emergency visits.
Tip: Set a calendar reminder for preventive maintenance.
Common Questions
Can I fix refrigerant leaks myself?
No. Handling refrigerants requires a licensed technician and proper equipment. Attempting to fix leaks can be dangerous and may violate local regulations. Always defer to a professional for refrigerant-related issues.
No—refrigerant leaks require a licensed technician and proper safety protocols.
Is it safe to run the AC with a dirty filter?
Running with a dirty filter reduces airflow, strains the compressor, and can freeze the evaporator coil. Replace the filter promptly and monitor system performance.
A dirty filter is not safe and can cause damage; replace it as soon as you can.
How often should I replace the air filter?
Typically every 1–3 months, depending on usage, pets, and filter type. Check monthly during peak cooling season and replace as needed.
Replace the filter every 1–3 months depending on use and environment.
What is the most common DIY fix for not cooling?
Start with the air filter, then check the drain line and thermostat settings. If cooling still fails, there may be a refrigerant or component issue that requires a pro.
Often, a dirty filter or blocked drain is the fix; otherwise call a pro.
When should I call a professional?
If you smell burning, hear buzzing, see ice on the coils, or suspect refrigerant issues, stop DIY work and call a licensed technician.
Call a professional if you suspect electrical or refrigerant problems or if DIY steps don’t fix the issue.
Can I recharge refrigerant myself?
No. Recharging refrigerant requires specialized equipment and certification. Improper handling can be dangerous and illegal in many areas.
Do not recharge refrigerant yourself; it needs a licensed tech.
The Essentials
- Identify and fix common at-home issues first
- Regular filter and drain maintenance saves energy
- Test safety systems before returning to service
- Document everything for future maintenance
- Call a pro for refrigerant or major electrical problems