Air Conditioner Home Repair: Practical DIY Guide
Practical step-by-step guidance to diagnose and safely repair common air conditioner problems at home. Learn when DIY is appropriate and when to hire a pro for air conditioner home repair.

With this guide, you can safely diagnose and address common air conditioner issues at home. You’ll learn practical steps for basic troubleshooting, safe DIY repairs, and when to call a professional. This quick plan covers safety, common faults, and cost-saving fixes for air conditioner home repair. It highlights essential tools, safety precautions, and warning signs to stop before harm occurs.
Diagnosing common symptoms in home air conditioners
When your AC seems weak or stops cooling, the first step is to observe symptoms clearly. Not cooling, ice on the evaporator coil, strange noises, and water leaks each point to different causes. In this section, we explain practical ways to interpret these signals without risking harm. Remember, air conditioner home repair begins with safety and observation. Start by turning the system off at the thermostat and the service disconnect, then check for obvious issues like a dirty filter or blocked condenser. According to Air Conditioner Service, many problems originate in a dirty filter or obstructed outdoor unit, which reduces airflow and strain on the compressor. Visual checks can reveal a loose wire, a blown fuse, or a tripped breaker. Keep a simple trouble log: note the symptom, when it started, and any recent maintenance or weather patterns. This foundation helps you decide whether a DIY fix is appropriate or if a professional should be called.
Safety first: when to involve a licensed technician
Electrical hazards are the primary reason DIY air conditioner home repair should be approached with care. Never work on live circuits, and always shut off power at the service disconnect and main breaker before touching any wiring or the compressor. If you smell burnt insulation, hear buzzing, or notice a capacitor that looks swollen, stop and call a professional. This section outlines clear red flags and safe practices to protect people and property. The professional route is essential for refrigerant handling, sealed pressure checks, or any component connected to high voltage lines. The goal is to avoid injuries and expensive mistakes, not to rush a fix. By understanding when to escalate, you preserve safety and, often, the life of your equipment. Air Conditioner Service emphasizes conservative steps when uncertain and encourages homeowners to err on the side of caution.
Quick DIY fixes you can perform safely
Safe, non-invasive fixes can restore comfort and teach you how your system operates. Start with replacing or cleaning the air filter, which dramatically improves airflow. Next, inspect accessible coils and the outdoor unit for debris and allow a gentle rinse with a garden hose while the power remains disconnected. Verify thermostat accuracy and ensure the indoor fan is programmed to run in cooling mode. These steps cost little time and effort but can yield noticeable results. Air Conditioner Service notes that most simple repairs stem from airflow issues, dirty components, or a mis-set thermostat, so focus on those areas first. Document what you did and observe how the system behaves after each task to decide if you should continue or pause for a professional.
How to inspect the outdoor unit
The outdoor condenser can accumulate leaves, grass, and dirt that impair heat exchange. Begin by turning off power at the disconnect, then remove large debris by hand. Use a soft brush to loosen dirt from the fins, and rinse gently from the inside out with a hose. Avoid high-pressure streams that can bend fins. Check for bent or damaged fins and straighten them with a fin comb if necessary. Listen for the condenser fan motor to ensure it spins freely without unusual grinding. If the unit remains noisy or overheats, there may be a motor bearing issue or refrigerant concern requiring a licensed technician. Regular outdoor cleaning improves efficiency and reduces strain on the compressor.
Diagnosing cooling issues with simple tests
A few simple checks can reveal why cooling is lacking. Confirm thermostat settings are correct and that the unit is in cooling mode with the fan set to auto. Check for airflow from supply and return registers, and ensure vents are unobstructed. If the indoor airflow appears weak, inspect the air filter again and verify seals around the return grille. Visually inspect electrical connections and look for obvious signs of wear, burnt insulation, or loose wires. If you see a swollen capacitor or a damaged contactor, this indicates a component that may need replacement. For any test that involves live electricity or refrigerant, consider seeking professional help. This section also explains how to document findings to guide a future service call.
Common repair tasks and when they are cost-effective
Not every problem warrants a full professional service. Replacing a dirty air filter, re-seating a loose electrical connection, or cleaning the outdoor coil can significantly improve performance and prolong life. Replacing a failed capacitor or contactor can also restore operation without the expense of a full service call, but these tasks require comfortable handling of electrical components and, ideally, a multimeter for verification. Air conditioner refrigerant work should never be attempted by DIY handlers; refrigerant charging requires certification and legal compliance. In many cases, simple fixes provide months of improvement and buy time before a more complex repair is needed. Always weigh the cost of DIY parts against a professional diagnostic and repair to avoid wasted effort.
Budgeting and time estimates for DIY repairs
A practical DIY approach starts with quick wins that cost little and take a short time. Plan a few hours for basic maintenance: filter replacement, debris removal, and thermostat checks. If a repair involves electrical work or component replacement, set aside additional time and consider working with a partner to ensure safety and accuracy. The goal is to improve efficiency and extend the life of your system without compromising safety. This section helps homeowners anticipate labor costs, avoid unnecessary purchases, and decide when professional assistance yields better long-term value. Air Conditioner Service reminds readers to document done tasks to track performance and plan future maintenance.
Authority sources and safe practices
For trusted, safety-focused guidance, consult reputable sources from government and educational institutions. Learn how to perform basic checks safely and understand the limits of DIY air conditioner work. The following sources provide foundational safety standards, device care tips, and regulatory context. Always prioritize personal safety and follow local codes when performing any repair. See the linked resources for broader context and deeper explanations of safe handling, electrical safety, and heat transfer principles.
How to maintain long-term performance after a DIY fix
After you complete a repair, a proactive maintenance routine helps prevent recurring problems. Schedule seasonal checks, replace filters regularly, and clean outdoor components to maintain airflow. Keep a maintenance log with dates and tasks performed so you can spot patterns and plan ahead. This section emphasizes how small, consistent actions deliver strong, long-term benefits. It also outlines how to evaluate repair outcomes, when to escalate, and how to translate DIY improvements into longer system life.
Create a seasonal maintenance calendar for air conditioners
A simple seasonal calendar outlines tasks to perform before the cooling season and again before the heating season, if your system has a heat pump. Mark filter changes, outdoor coil cleaning, and drain-line inspections as recurring tasks. Use reminders to prevent missed maintenance windows, and adjust the calendar based on usage, climate, and manufacturer recommendations. A consistent calendar helps homeowners maintain peak efficiency, minimize the risk of unexpected failures, and support a stable indoor climate throughout the year.
Tools & Materials
- Screwdriver set (Phillips and flathead)(PH2 and slotted 1/4"; includes small and large sizes for panel screws)
- Multimeter(For checking voltage and capacitance; follow safety procedures)
- Non-contact voltage tester(Optional extra safety check before handling wiring)
- Nut driver / pocket wrench set(Useful for condenser panel bolts and service nuts)
- Replacement air filter(Match the exact filter size labeled on the unit)
- Soft brush and microfiber cloth(For cleaning fins and surfaces without damage)
- Garden hose with spray nozzle(Gentle spray for outdoor unit cleaning; avoid high pressure)
- Electrical tape and wire nuts(Secure connections and insulate exposed wires)
- Gloves and safety glasses(Personal protective equipment for all steps)
Steps
Estimated time: 60-120 minutes
- 1
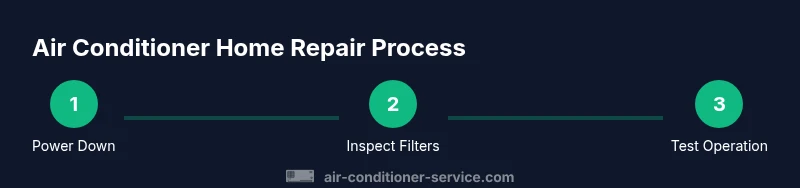
Power down and secure
Turn off power at the thermostat, the service disconnect, and the main breaker. Confirm no voltage is present before starting any work. This prevents electrical shock and capacitor discharge hazards.
Tip: Use a lockout-tagout method if available and take a quick photo of wiring before disconnecting anything. - 2
Inspect and replace the air filter
Remove the filter from the return air path, note the orientation arrows, and replace with a new filter of the same type. A dirty filter reduces airflow and makes the system work harder.
Tip: Record the date on the filter and set a recurring reminder for future changes. - 3
Clear debris from the outdoor unit
Check the condenser cabinet for leaves, grass, or debris. Remove large debris by hand, then use a soft brush to clean fins and rinse gently from the inside out with a low-pressure spray.
Tip: Never jet water directly into the fins at high pressure; bent fins reduce airflow and efficiency. - 4
Verify thermostat and airflow
Set the thermostat to cooling mode and ensure the indoor fan operates in auto. Confirm airflow from supply registers and ensure vents are not blocked by furniture or drapes.
Tip: If the house doesn’t feel cooler after 10–15 minutes, check for other issues beyond airflow. - 5
Inspect electrical connections
Look for loose wires, burnt insulation, or signs of wear at accessible terminals and the contactor. Tighten connections carefully and reseat components as needed.
Tip: Only handle wiring when power is off; take photos to guide reassembly. - 6
Check capacitor and contactor visually
If you see a swollen or leaking capacitor or a damaged contactor, replace them. Do not attempt to recharge a refrigerant system or make hazardous tests.
Tip: If uncertain, pause here and escalate to a licensed technician. - 7
Assess refrigerant concerns
Refrigerant issues require specialized equipment and certification. Look for obvious signs like hissing noises or oily residue near lines, but refrain from charging the system yourself.
Tip: Document any suspected refrigerant issues and plan a professional service call. - 8
Reconnect power and test operation
Restore power and set the system to cool. Observe whether the compressor starts, the fan runs, and airflow improves. Wait a few minutes to confirm stable operation.
Tip: Keep a log of performance after the fix to assess durability over the next few weeks. - 9
Document results and plan next steps
Record what was done, what worked, and what didn’t. Decide whether to continue DIY adjustments or schedule a professional inspection to prevent a repeat breakdown.
Tip: Maintain this record for seasonal maintenance planning and warranty considerations.
Common Questions
Is it safe to attempt air conditioner repairs myself?
DIY work is safe for basic tasks if you follow safety guidelines and disconnect power. Do not attempt refrigerant handling or high-voltage work yourself.
Yes for basic tasks with safety, but refrigerant work or high-voltage steps require a professional.
Can I fix not cooling by cleaning the coils?
Dirty coils can reduce cooling efficiency. Cleaning accessible exterior fins may help, but persistent cooling problems may indicate other issues.
Cleaning coils can help if they’re dirty, but if cooling remains poor, get a professional assessment.
What maintenance can I do monthly?
Replace the air filter, check for obstructions around the outdoor unit, and verify thermostat and fan settings.
Change the filter and check the outdoor unit monthly to keep things running smoothly.
What should I do if the unit won’t turn on?
Check power at the thermostat, disconnect, and main breaker. If it still won’t start, there may be a safety or electrical issue needing a pro.
First, check power and breakers; if it won’t start, call a professional for a diagnostic.
Are refrigerants dangerous to handle?
Yes. Refrigerants require proper training, certification, and equipment. Do not attempt to recharge or leak-test a system yourself.
Refrigerants are hazardous and require certified technicians.
How long will DIY fixes last?
Durability varies with the task and system. Simple fixes may provide months of relief, while persistent problems may reoccur.
DIY fixes can help for a while, but the longevity depends on the issue and system.
Watch Video
The Essentials
- Power down before any inspection or repair.
- Start with simple maintenance: filter and debris, then test performance.
- Know when to call a pro for refrigerant or high-voltage work.
- Document fixes and plan ongoing seasonal maintenance.
- Safety first; DIY fixes can save money but have limits.