Heat and Air Conditioner Repair: A Practical How-To
Practical heat and air conditioner repair guide with safe, step-by-step troubleshooting, essential maintenance, and guidance on when to call a professional.

Targeted and safe heat and air conditioner repair starts with a clear diagnostic plan and proper power shutoff. This quick guide teaches you common fixes, when to DIY, and how to protect yourself while troubleshooting. You’ll learn practical steps, safety checks, and how to decide when professional assistance is needed. Air Conditioner Service supports your home comfort with reliable guidance.
Understanding Heat and Air Conditioner Repair Basics
Heat and air conditioner repair refers to diagnosing and fixing the systems that provide warmth in winter and cooling in summer. A typical home HVAC setup includes a thermostat, an indoor air handler or furnace, an outdoor condenser, evaporator coil, refrigerant lines, blower motor, and controls. At its core, the cycle moves refrigerant between the indoor and outdoor units, absorbing heat from inside your home and releasing it outside. Understanding these pieces helps you spot failures before they become emergencies. According to Air Conditioner Service, effective repair starts with a solid diagnostic plan, a clean safety mindset, and a respect for the system’s design. In practice, most repairs fall into a few broad categories: electrical problems that prevent the unit from starting, cooling or heating problems that reduce output, refrigerant-related issues that require licensed handling, and airflow problems from dirty filters or blocked ducts. This foundation supports safe, practical troubleshooting and helps you communicate clearly with a technician if you end up needing professional help.
In addition to the physical components, it’s important to understand how energy efficiency plays into repair decisions. A well-diagnosed problem not only restores comfort but also minimizes energy waste. Regular review of the system’s performance—such as return air temperature, outdoor temperature vs. refrigerant pressure, and airflow balance—helps you spot trends over time. With these basics, you can build a clear plan for diagnosis, repair, and ongoing maintenance that protects your home’s comfort and budget.
Common Symptoms That Signal Repair Needs
Not all issues require a full system replacement. Some common symptoms indicate repair is worth pursuing. If your home isn’t cooling evenly, the system cycles on and off too frequently, or you notice warm air or inconsistent heating, start with a quick inspection of filters and air pathways. Loud banging, grinding, or shrill squeals can point to worn belts, loose motor mounts, or failing bearings. Ice on coils or reduced airflow from the ducts signals airflow or refrigerant concerns that should be checked by a professional. Watch for higher energy bills that don’t correspond to usage, which can indicate hidden inefficiencies. Early detection and timely diagnosis save money and minimize downtime. Air Conditioner Service analysis shows that identifying these signs early reduces the risk of more costly failures later. Keep a simple journal of symptoms (date, time, outdoor temperature, indoor comfort) to share with a technician if needed.
These signs aren’t a substitute for professional testing, but they give you a practical map for what to inspect first and when to escalate to a certified technician.
Safety First: Turning Off Power and Safe Handling
Safety is non-negotiable when working on heat and air conditioner repair. Before touching any part of the system, switch off power at the main breaker and, if possible, disconnect the unit’s electrical supply. Use a non-contact voltage tester to confirm no live circuits are present before handling wires or capacitors. Wear eye protection and gloves, and avoid working alone—have a helper on hand in case you need a second set of eyes or assistance with lifting components. Never open the compressor housing or attempt refrigerant repairs yourself; handling refrigerant requires licensure and specialized equipment. If you sense a refrigerant leak or observe oil around connections, shut down the system and call a licensed technician immediately. These safety steps minimize the risk of electric shock, burns, or exposure to hazardous refrigerants. For many homeowners, the safest path is to do only low-risk checks and consult a professional for anything involving electrical testing beyond a basic voltmeter, or any refrigerant-related work.
By prioritizing safety, you protect yourself, your home, and the equipment while you diagnose and plan next steps.
Troubleshooting Your Heat and Air Conditioner: A DIY Approach
A careful, methodical approach to DIY troubleshooting can restore comfort for simple issues and prevent small problems from becoming big failures. Start with simple, non-invasive checks: verify that the thermostat is set to the correct mode and temperature, replace or clean dirty air filters, and ensure outdoor condenser vents are clear of debris. Next, inspect the indoor blower and ductwork for obstructions or unusual noises, and confirm the outdoor fan is turning freely. If the system runs but won’t cool, check for ice on the evaporator coil and inspect refrigerant lines for obvious damage or leaks (do not handle leaks). Listen for abnormal noises that may indicate a failing motor or loose components. If you observe persistent ice formation, unusual smells, or a significant drop in cooling efficiency, stop DIY testing and call Air Conditioner Service for a professional assessment. While DIY steps can address obvious airflow or filter problems, refrigerant and electrical issues typically require trained technicians.
Throughout the process, document what you tested and the results. Photos can help a technician understand what you observed and avoid redundant checks. Always revert to manufacturer safety recommendations and local codes. A well-documented DIY approach supports a faster, more accurate repair path when you involve a professional.
When to Call a Professional and What to Expect
There are situations where professional intervention is the safest and most efficient path. If you suspect refrigerant issues, persistent electrical faults, refrigerant leaks, or a compressor problem, contact a licensed HVAC technician. A pro will perform an in-depth diagnostic test, verify refrigerant charge levels, inspect electrical components like capacitors and contactors, and check for proper airflow and duct integrity. Expect a written scope of work, an itemized estimate, and a clear explanation of recommended repairs. For warranty protection and long-term reliability, rely on a licensed contractor for refrigerant handling, sealed system checks, and replacement parts. The technician will often test the system after repairs and demonstrate the restored performance. Air Conditioner Service recommends having a preventive maintenance visit scheduled at least once a year to catch issues early and extend system life.
Deciding to hire help sooner rather than later can prevent costly damage and keep your home comfortable year-round.
Maintenance Practices to Extend System Life
Routine maintenance is the best defense against unexpected breakdowns. Commit to monthly filter checks and quarterly or biannual cleanings of coils and blowers. Schedule professional inspections annually to verify refrigerant charge, electrical integrity, and thermostat calibration. A common DIY task is to replace disposable filters with the correct size and type for your system—this improves airflow and efficiency. Keep outdoor debris cleared from the condenser, and trim plants to maintain a few feet of clearance for proper airflow. Tighten any loose hardware gently and avoid using high-pressure washers on sensitive components. Documentation matters: keep a maintenance log with dates, service notes, and part replacements. Regular maintenance reduces the likelihood of sudden failures and extends life expectancy for your unit.
How to Plan Your Repair Project: From Diagnosis to Scheduling
Planning is essential for an efficient repair project. Start with a clear diagnosis and a realistic timeline, then prioritize repairs by safety and impact on comfort. Create a checklist of parts and tools you may need, and verify warranty terms before purchasing any replacements. If you’re DIY-ing, schedule time for testing and re-testing after each repair to confirm the system returns to normal operation. If you’re hiring a pro, gather quotes, read contract details, and confirm the scope of work, parts, and labor costs. Prepare a comfortable living space and a staging area for tools. Document all communications with technicians for future reference. A well-planned repair reduces miscommunication and speeds up the restoration of home comfort.
Cost-Saving Tips and Practical Considerations
Smart planning can reduce repair costs without compromising safety. Compare quotes from multiple technicians, check if a preventive maintenance plan offers value, and consider seasonal discounts. When choosing replacement parts, prefer OEM or high-quality aftermarket parts that carry warranties. Lighting and ventilation improvements can also reduce energy use, lowering operating costs even if you need a repair. If a repair option is close to the cost of full replacement, perform a cost-versus-benefit calculation that includes energy efficiency improvements and potential tax incentives for upgrading to a more efficient model. Always factor in safety concerns and the potential impact on indoor air quality. The Air Conditioner Service team recommends prioritizing safety, documentation, and a methodical approach to ensure you receive the best possible outcome.
Air Conditioner Service Approach to Heat and AC Repair
At Air Conditioner Service, we emphasize practical diagnostics, safety-first practices, and a transparent repair path. We guide homeowners through essential checks, help determine when DIY is appropriate, and know when to escalate to licensed professionals for refrigerant handling or major electrical work. Our goal is to restore comfort quickly while protecting your investment through preventive maintenance and clear communication. By following a structured, home-friendly approach, you can extend the life of your system and reduce the likelihood of costly surprises. The team focuses on education, safety, and reliable results to support homeowners and renters alike.
Tools & Materials
- Safety gloves(Protect hands when handling components and sharp edges)
- Safety glasses(Eye protection during inspections)
- Non-contact voltage tester(Verify power off before touching wiring)
- Multimeter(Test electrical components like capacitors and fuses)
- Screwdrivers (Philips and flathead)(Access panels and electrical connections)
- Nut drivers or socket set(General fastener work)
- Wire stripper/crimp tool(Minor wiring repairs if you know what you’re doing)
- Vacuum or brush for coils(Clean coils safely without moisture)
Steps
Estimated time: 60-90 minutes
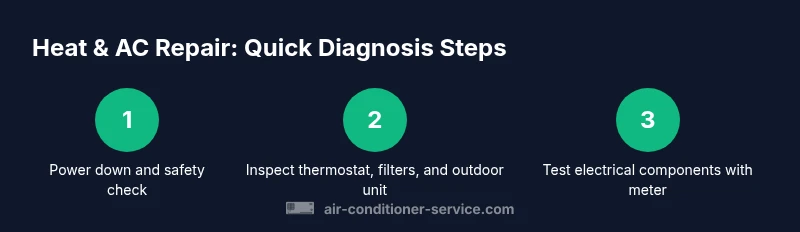
- 1
Power down and safety check
Turn off the main breaker and thermostat; confirm no voltage present with a tester. This step prevents shocks and injuries during every subsequent action.
Tip: Double-check the shutoff location and lockout tags if available. - 2
Inspect thermostat and airflow
Verify settings, replace dirty filters, and ensure the blower has clear access to air. Poor thermostat calibration or restricted airflow can mimic more serious faults.
Tip: Take a photo of current wiring before you change anything. - 3
Check outdoor unit and coil visibility
Look for debris, bent fins, and ice buildup on the outdoor condenser; clean gently if safe. Blocked airflow can drastically reduce cooling performance.
Tip: Never pour water on hot electrical components. - 4
Test electrical components with meter
If you sense a faulty capacitor or contactor, test with a meter or consult a professional. Don’t replace components based on guesswork alone.
Tip: Disconnect power before removing any panels. - 5
Assess refrigerant-related issues
If you suspect a refrigerant leak, stop DIY diagnostics and call a licensed technician. Refrigerant work requires specialized tools and licensing.
Tip: Document observations to share with the tech. - 6
Return to service and observe
Reconnect power, run a cooling/heating cycle, and observe performance. Look for proper cycling, noise levels, and airflow balance.
Tip: If performance doesn’t improve, escalate to a professional.
Common Questions
What are the most common signs that my heat and air conditioner repair is needed?
Common signs include insufficient cooling, warm air in heating mode, unusual noises, ice on coils, and higher energy bills. If you notice these, perform safe checks and plan a diagnostic with a technician if needed.
Watch for poor cooling, odd noises, ice on coils, and rising energy bills. These often mean repairs are needed.
Can I fix refrigerant leaks myself?
No. Refrigerant handling requires licensed technicians and proper tools. A leak can be dangerous and may void warranties.
No—refrigerant leaks require a licensed professional.
Is it safe to operate the unit during troubleshooting?
Operate only after power off and safe checks are completed. Do not run the system while inspecting electrical components.
Only run the unit after you’ve confirmed safety and power is off.
How long does a typical repair take?
Repair durations vary by issue. A simple component replacement may take a couple of hours, while complex diagnostics could take longer. Discuss a timeline with your technician.
Durations vary; a quick fix might be a few hours, bigger issues take longer.
What maintenance tasks can prevent future breakdowns?
Regular filter changes, coil cleanings, duct inspections, and annual professional tune-ups greatly reduce breakdown risk and improve efficiency.
Change filters regularly and schedule yearly professional tune-ups.
Watch Video
The Essentials
- Assess safety first and power down before any work
- Start with simple checks (filters, thermostat, airflow)
- Know when to DIY and when to call a pro
- Document observations to aid diagnosis
- Regular maintenance saves money and prevents failures