Repair for Air Conditioner: A Practical DIY Troubleshooting Guide
Learn a practical, safety-first approach to repair for air conditioner. This expert guide covers diagnosis, safe DIY fixes, essential tools, when to call a pro, and maintenance tips to extend your cooling life.

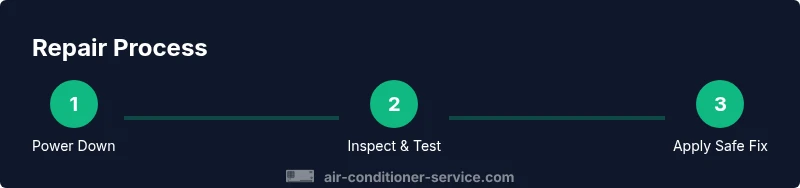
This guide helps homeowners perform safe, practical repairs for air conditioner units. You’ll learn how to diagnose common problems, perform basic fixes, and know when to call a professional. We cover safety precautions, essential tools, step-by-step tasks, and maintenance tips to extend your system’s life and improve cooling efficiency. This is designed for non-technical homeowners and renters who want practical, permission-based guidance.
Safety First: Protect Yourself and Your Unit
Before touching any component, power down the system completely. Unplug the unit or switch off the dedicated breaker, then wait a few minutes for capacitors to discharge. Wear safety glasses and insulated gloves. Keep children and pets away from the workspace. If you smell burning insulation or notice exposed wiring, stop immediately and consult a professional. According to Air Conditioner Service, safety and proper diagnosis are essential when attempting a repair for air conditioner. This mindset reduces the risk of injury and prevents accidental damage to sensitive electrical parts. Remember that many repairs involve live electricity and refrigerant, so never bypass safety protections. In this guide you’ll find actionable steps that respect those boundaries and keep you in control of the repair process.
Understanding the System: Key Components You’ll Interact With
A modern air conditioner comprises several core parts: the outdoor condenser, indoor evaporator, thermostat, blower, and electrical connections. The compressor pumps refrigerant, the coils transfer heat, a fan circulates air, and a control board coordinates cycles. For many DIY repairs, you’ll interact mainly with the access panel, filter, condensate drain, and simple switches. Knowing where each component sits helps you diagnose symptoms without unnecessary disassembly. The Air Conditioner Service team recommends keeping a simple diagram of these parts handy to avoid confusion during troubleshooting. With a basic map in hand, you’ll move from symptoms to fixes with confidence and minimize the risk of misidentifying the problem.
Common Symptoms and Causes
Not cooling or weak cooling is the most common complaint. It can be caused by a dirty air filter, dirty condenser or evaporator coils, low refrigerant, or a failing compressor. Strange noises may indicate a loose fan blade, a failing motor, or electrical arcing. Ice on the evaporator coils points to airflow issues or refrigerant problems. Water leaks usually trace back to condensate drain line blockages or improper installation. Frequent cycling can signal thermostat issues, a failing capacitor, or poor airflow. Understanding these patterns helps you prioritize checks and stay safe while testing potential fixes.
Essential Tools and Materials for DIY Repairs
To perform safe basic repairs, assemble a core toolkit: a digital multimeter for electrical checks, a screwdriver set (Phillips and flat-head), nut driver set, insulated pliers and cutters, electrical tape and wire nuts, safety goggles, and insulated gloves. Keep the owner’s manual or service diagram for model-specific guidance. Optional items include a non-contact voltage tester, refrigerant leak detector, and replacement fuses or capacitors if you are trained to handle them. Collecting these items before you begin keeps the workflow smooth and minimizes trips to the toolbox mid-task. The goal is to work confidently and safely, not to improvise with risky shortcuts.
Diagnosing Without Guesswork: A Stepwise Troubleshooting Flow
Start with power: ensure the unit is off at the breaker and the thermostat is set correctly. Next, check airflow by inspecting the air filter and blower for obstructions. Inspect both outdoor and indoor coils for dirt buildup or obstructions like leaves or debris. Examine electrical connections at the control board and contactor; listen for buzzing sounds that may indicate a loose connection. If you suspect a capacitor issue, consult the owner’s diagram and test with a multimeter only if you have proper training. If refrigerant leaks or a major component failure is suspected, do not attempt a DIY fix—consult a professional. This flow keeps you grounded in safety while guiding you toward practical fixes.
Basic Fixes You Can Try Today
Begin with the simplest fix: replace a dirty air filter to restore airflow and reduce motor strain. Clear any clogs in the condensate drain line and ensure it runs freely to prevent water damage. Clean the outdoor condenser coils from dirt and debris using a soft brush and spray of water (avoid high-pressure methods that can bend fins). Tighten loose electrical connections and make sure the thermostat is calibrated correctly. After a fix, reset the system and run a short test to confirm proper cycling. These steps are accessible to many DIYers and can prevent minor issues from escalating.
When to Stop and Call a Pro
If you detect a refrigerant leak, strong chemical smells, or visible damage to copper lines, stop and contact a licensed technician. Do not attempt refrigerant handling yourself; it requires proper equipment and certification due to health and environmental hazards. If the breaker trips repeatedly or you notice burning smells, shut the unit down and seek professional assessment. Not all issues are safe to DIY, and a cautious approach protects your home and your equipment.
Maintenance Practices to Prevent Breakdowns
Regular maintenance improves reliability and efficiency. Schedule a filter check every 1–3 months depending on usage and household allergies. Clean coils and check for debris around the outdoor unit. Ensure proper airflow around the condenser by keeping at least 24 inches of clearance. Calibrate the thermostat seasonally and listen for unusual noises during operation. A simple, periodic inspection saves money by catching problems early and reduces emergency repair calls. The goal is to keep the system healthy through predictable care rather than reactive fixes.
Energy Efficiency Through Repair: Make the Most of Your Cooling
Repair work that improves air flow, minimizes leaks, and maintains proper refrigerant charge can boost efficiency. Consider sealing ducts that aren’t contained within the living space and insulating refrigerant lines to reduce heat gain. Compare fan speeds and thermostat settings for optimal comfort with minimal energy use. Small fixes, when done correctly, can translate into meaningful energy savings over the cooling season.
Case Studies: Real-World Scenarios
Case A involves a homeowner who cleaned a clogged filter and cleared a minor condensate drain blockage. The result was restored airflow and cooling performance within a few hours, avoiding costly service calls. Case B covers an outdoor unit with heavy debris buildup; after cleaning and a coil rinse, cooling efficiency improved, and the unit operated quietly again. These examples illustrate how basic checks and routine maintenance often prevent bigger problems and demonstrate the value of a methodical approach to repair for air conditioner.
Final Thoughts: A Practical, Safe Path Forward
Repair for air conditioner work is most successful when approached with a plan, the right tools, and a commitment to safety. Use the diagnostic flow to identify the likely cause, apply safe fixes, and know when professional help is required. Document your steps so you have a record for future maintenance or when you call for service. By staying organized and cautious, you protect yourself, your home, and your investment.
Tools & Materials
- Digital multimeter(Test electrical circuits and capacitor values)
- Screwdriver set (Phillips and flat-head)(Panel screws and components)
- Nut driver set(Control panel connections)
- Insulated pliers and cutters(Safe gripping and cutting)
- Electrical tape and wire nuts(Safe splices and insulation)
- Voltage tester(Non-contact if available)
- Safety goggles and gloves(Eye and hand protection)
- Owner’s manual or service diagram(Model-specific guidance)
- Refrigerant leak detector (optional)(For suspected leaks)
- Replacement fuses or capacitors (per model)(Only for trained replacement)
Steps
Estimated time: 1-2 hours
- 1
Power down and prepare
Disconnect power to the unit at the breaker and thermostat. Confirm the system is fully de-energized before touching any components. This prevents shock hazards and protects the unit’s electronics.
Tip: Wait 5 minutes after power-off to allow residual charge to dissipate. - 2
Check safety and access
Put on safety glasses and gloves. Open the service panel only after verification that you won’t be exposed to moving parts or energized electronics. Document the current wiring color codes for reference.
Tip: Keep a clear workspace; misplaced screws can cause miswiring later. - 3
Inspect air filter and airflow
Remove and inspect the air filter. A dirty filter reduces airflow and can cause freezing or overheating. Replace if dirty and clean the surrounding area to ensure air can circulate freely.
Tip: A clean filter can restore cooling within minutes in mild cases. - 4
Assess outdoor unit clearance
Check the outdoor condenser for debris, leaves, or grass. Clear a 24-inch clearance around the unit and remove any obstructions to improve heat exchange and efficiency.
Tip: Never spray water directly into the electrical components. - 5
Test electrical connections
Visually inspect wires and use a multimeter to check for continuity where appropriate. Look for loose or burnt connections that can cause cycling or failure to start.
Tip: Tighten connections only if you are confident in safe handling; otherwise skip to professional help. - 6
Check capacitor and controls
If you suspect a failed start capacitor, test only if you have proper training and follow the service diagram. Replace components only as specified by the model’s documentation.
Tip: Capacitors can retain charge; discharge safely before handling. - 7
Examine condensate drain
Inspect the condensate drain line for blockages. A clogged drain can cause water damage and trigger overflow safety features that shut down the system.
Tip: Use a gentle snake or flexible brush to clear minor clogs. - 8
Test run and observe
Reconnect power and run the system for a brief cycle. Listen for abnormal noises and observe performance. If cooling improves and keeps steady, you’ve likely addressed the issue.
Tip: Document any changes and monitor for a few days. - 9
Document and plan next steps
Record the symptoms, fixes attempted, and results. If issues persist, prepare for professional service with model information, symptoms observed, and maintenance history.
Tip: A clear history helps technicians diagnose faster.
Common Questions
What is the first step I should take before attempting any repair for air conditioner?
Always disconnect power, shut off breakers, and follow the manufacturer’s safety guidelines. This minimizes electrical hazards and protects you and the unit during troubleshooting.
Always unplug the unit and turn off the breaker before touching anything. Then follow the manual for safety steps.
Can I fix refrigerant leaks myself?
No. Handling refrigerant requires proper certification and equipment due to health and environmental risks. Attempting a refrigerant repair without training can cause harm and legal issues.
No, refrigerant leaks should be handled by a licensed technician for safety and compliance.
Is a dirty air filter a repair issue?
Yes. A clogged filter reduces airflow, causing cooling inefficiency and potential freezing of coils. Replacing it is a common, safe DIY fix.
A dirty filter blocks airflow and can cause poor cooling; replace it to restore performance.
What tools do I need for basic repairs?
A digital multimeter, screwdriver set, needle-nose pliers, and safety gear are essential. Refer to the owner’s manual for model-specific requirements.
You’ll typically need a multimeter, screwdrivers, pliers, and safety gear.
How can I tell if the capacitor is failing?
Signs include hard starting, frequent cycling, or buzzing. A precise test requires a multimeter and knowledge of your unit’s capacitor specs.
Signs are hard starting or buzzing; testing should be done with proper instructions or by a pro.
When should I call a pro for repair for air conditioner?
If you detect refrigerant leaks, unusual smells, electrical hazards, or persistent failure after DIY fixes, contact a licensed technician promptly.
Call a pro if you have refrigerant issues, smells, or persistent electrical problems.
Watch Video
The Essentials
- Prioritize safety before any repair work.
- Start with simple fixes that restore airflow and diagnose issues.
- Know when to call a pro—refrigerant, high voltage, or electrical hazards require expertise.
- Regular maintenance prevents most DIY breakdowns.
- Document fixes to aid future maintenance and service calls.