Heating and Air Conditioner Repair: A Practical Home Guide
Step-by-step, safe heating and air conditioner repair guidance for homeowners. Diagnose issues, perform essential maintenance, know when to DIY vs. hire a pro, and keep systems running efficiently.

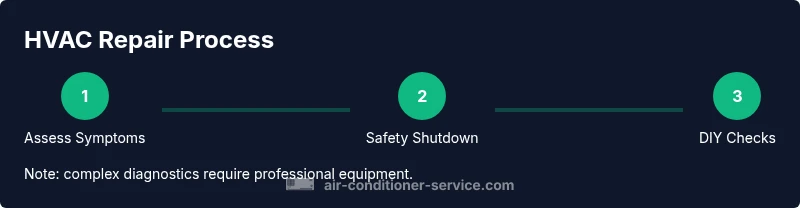
Master basic heating and air conditioner repair tasks at home using safe diagnostic checks, routine maintenance, and simple fixes. This guide helps you decide when to DIY versus calling a pro, covers essential safety steps, common symptoms, and practical maintenance routines that restore comfort quickly and prevent future failures, from filter checks to condensate management.
Understanding the Scope of Heating and Air Conditioner Repair
Heating and air conditioner repair covers two closely related but distinct systems: the heating side that provides warmth and the cooling side that removes heat and humidity. In many homes these systems share components such as thermostats, electrical controls, and ductwork, so problems can spill over from one side to the other. The range of tasks goes from simple maintenance you can safely perform at home to complex diagnostics that require professional equipment and licensing. Air Conditioner Service emphasizes starting with a clear diagnostic plan and safe shutdown, then moving to targeted fixes. Basic tasks like replacing a dirty filter, verifying thermostat settings, and cleaning the outdoor unit are common DIY steps with immediate payoff. If you notice refrigerant leaks, unusual smells, or refrigerant service is needed, seek a licensed technician.
Common Diagnostics You Can Perform Safely
Not all issues require expensive help. Start with observable symptoms: does the system fail to turn on, fail to deliver cold air, or blow warm air? Listen for odd noises, check for ice buildup on evaporator coils, and inspect for water leaks around the condensate line. A simple diagnostic checklist can reveal airflow problems, thermostat miscommunication, or dirty filters. Document the symptoms with dates and what you observed; this helps if you need to call a professional later. Air Conditioner Service notes that many faults stem from routine maintenance neglect, such as clogged filters or dirty outdoor coils.
Safety First: Clear Guidelines Before You Start
Safety is non-negotiable when working with heating and air conditioner equipment. Always turn off power at the service disconnect before touching any components, and if you can, lock out the circuit to prevent accidental restart. Do not touch exposed electrical wiring or refrigerant lines unless you have training. Wear eye protection and gloves, and use insulated tools. If you detect refrigerant odor, a hiss, or signs of overheating insulation, stop immediately and contact a professional. Know your limits: large refrigerant issues, compressor faults, or electrical work beyond your skill level should be handled by a licensed technician. These precautions reduce risk and protect your home investment.
Essential Tools and Materials for DIY HVAC Work
Before you begin, assemble the basics: a screwdriver set (Phillips and flat-head), nut drivers, a digital multimeter, a low-voltage tester, a flashlight, safety glasses, and gloves. Have replacement air filters on hand, plus electrical tape and duct tape for quick fixes. For airflow checks, a manometer or pressure gauge is useful but optional. Keep a notebook to record readings and observations. Remember: refrigerant handling or major compressor work is not DIY-safe and requires licensed professionals with the proper equipment.
A Practical Step-by-Step Troubleshooting Checklist
Use this practical approach to diagnose common faults without guessing. Start by powering down and confirming thermostat settings. Check and replace the air filter if dirty, then inspect the outdoor unit for debris and gently clean the fins. Look for ice on evaporator coils and thaw safely if present. Test voltage at the contactor with a multimeter and listen for unusual noises that indicate motor issues. If these steps don’t restore performance, note the symptoms and schedule professional service for refrigerant checks or major component repairs. This method ensures you tackle simple causes before reaching for expensive parts.
When to Call a Professional and What to Expect
If the system still underperforms after DIY checks, it’s time to bring in a licensed HVAC technician. Pros can test refrigerant pressure, inspect heat exchangers, diagnose compressor faults, and safely handle refrigerant. When you call, provide a concise symptom log, the model/serial numbers, and a history of prior maintenance. Expect an on-site diagnostic charge, a written estimate, and a detailed explanation of repairs or replacement options. Regular professional maintenance improves reliability and energy efficiency, reducing future repair costs.
Tools & Materials
- Safety gear (eye protection and gloves)(ANSI-rated safety glasses and work gloves)
- Screwdriver set (Phillips and flat-head)(Phillips and flat-head sizes for common panels and service doors)
- Nut drivers(Various sizes to fit condenser/evaporator components)
- Digital multimeter(Check voltage and continuity on low-voltage circuits)
- Low-voltage tester(Verify thermostat and control wiring integrity)
- Flashlight(Illuminates tight spaces and coil areas)
- Replacement air filters(Keep on hand in standard sizes used by your system)
- Electrical tape and duct tape(Temporary fixes and wiring protection)
Steps
Estimated time: 60-90 minutes
- 1
Power down and verify thermostat settings
Shut off power at the service disconnect first and confirm the thermostat is set correctly for the desired mode. If you’re using a smart thermostat, ensure it is online and not in a fault state. This step prevents electric shock and ensures accurate diagnostics.
Tip: Always double-check the main breaker before touching any wiring. - 2
Check and replace the air filter
Remove the old filter and inspect for heavy dirt or damage. Install a new filter of the correct size, ensuring the arrows point in the proper airflow direction. A clogged filter reduces airflow and efficiency.
Tip: Mark the date on the new filter to track maintenance intervals. - 3
Inspect outdoor condenser and indoor evaporator
Clear leaves or debris from around the outdoor unit and gently clean the fins with a soft brush. Inspect the indoor evaporator access panel for frost or ice and thaw if needed.
Tip: Power off the unit before cleaning and avoid bending the fins. - 4
Check thermostat wiring and blower connections
Verify that thermostat wires are firmly connected and unseen shorts aren’t present. Listen for blower motor operation and ensure the blower compartment is clean and unobstructed.
Tip: Take a quick photo of terminal connections before re-connecting if you disconnect any wires. - 5
Test electrical components safely
With the system powered off, use a digital multimeter to check the contactor coil and capacitor per the manufacturer’s specs. If readings are abnormal or you detect a burnt smell, do not operate the system and call a professional.
Tip: Use a non-contact tester for a first-pass safety check. - 6
Check condensate drain line
Inspect the condensate drain for blockages. If needed, clear using a wet/dry vacuum or a drain snake; ensure the trap is properly pitched to prevent standing water.
Tip: Have towels handy for spills and wipe up any moisture promptly. - 7
Test run and monitor performance
Reconnect power and run the system for 10–15 minutes. Check airflow, temperature difference, and listen for unusual noises. If performance improves, monitor for a few days; if not, escalate to a professional.
Tip: Record readings and symptoms to share with the technician.
Common Questions
Should I attempt heating and air conditioner repair myself?
DIY can handle basic maintenance like filter changes and thermostat checks, but avoid refrigerant handling and major electrical work. When in doubt, consult a professional.
DIY is fine for simple tasks like changing filters, but refrigerant or complex electrical work should be left to a licensed technician.
How do I know if I should replace rather than repair?
Consider system age, current repair costs, and energy efficiency. If repairs exceed a third to half of a new unit’s price or the system is over 10-15 years old, replacement may be more cost-effective.
If the unit is old or repairs pile up in cost, replacement may be the smarter choice.
Can refrigerant leaks be repaired at home?
No. Refrigerant leaks require licensed technicians and specialized equipment to safely recover, repair, and recharge the system.
Refrigerant leaks aren’t DIY fixes; a licensed pro must handle them.
What maintenance should I perform annually?
Replace filters regularly, check thermostat operation, clean the outdoor unit, inspect the condensate drain, and schedule a professional check at least once a year.
Change filters, check settings, and schedule an annual pro tune-up.
What are signs of a failing compressor?
Short cycling, warm air output, loud noises, and sudden rises in energy bills can indicate compressor trouble. Seek professional evaluation promptly.
If you hear loud grinding or the system runs abnormally, get a pro check soon.
Is it worth upgrading to a high-efficiency system?
Upgrading can reduce energy costs and improve comfort, especially in older homes. Compare upfront cost, expected savings, and available incentives.
A newer high-efficiency unit can save money over time, but run the numbers first.
Watch Video
The Essentials
- Know when DIY is appropriate and when to call a pro
- Safety comes first in every step
- Regular maintenance reduces unexpected failures
- Document symptoms to aid accurate diagnosis
- Professional inspections enhance efficiency and reliability