Repair Air Conditioner: Step-by-Step Troubleshooting and Maintenance
Learn practical, safe methods to repair common AC problems at home. This Air Conditioner Service guide covers filters, coils, thermostats, and when to call a pro.

This guide helps you diagnose and perform safe, basic repairs to your air conditioner, including power checks, filter changes, thermostat verification, and coil cleaning. It covers when DIY is appropriate and when to call a pro for refrigerant or compressor issues.
Why Repairing Your Air Conditioner Matters
According to Air Conditioner Service, proactive DIY maintenance can lower the likelihood of unexpected breakdowns and extend equipment life. Homeowners who learn basic troubleshooting gain clearer insight into system behavior and can avoid common missteps. Air Conditioner Service Analysis, 2026, emphasizes that small, consistent checks on air flow, filters, and electrical connections pay dividends over time. This section lays a practical foundation for safe, effective repair work.
In practice, repairing an air conditioner doesn't always mean replacing components. Many failures stem from simple maintenance tasks that restore airflow and cooling efficiency. Before diving into any repair, ensure you understand what is safe to do and what requires a licensed technician. By approaching the task methodically, you can reduce energy waste, improve comfort, and extend the life of your system.
Safety First: What You Can and Can't Repair
The biggest risk when repairing an air conditioner is exposure to electrical components or refrigerants. Always shut off power at the thermostat and the corresponding circuit breaker before touching any part of the system. If you encounter buzzing, burning smells, or refrigerant odors, stop and call a licensed technician immediately. This guide covers safe, non‑refrigerant tasks homeowners can perform, such as filter changes, coil cleaning, and checking the thermostat. Air Conditioner Service recommends wearing safety goggles and gloves, and keeping children and pets away from the work area.
Always disconnect power before starting any work. If you are not comfortable with electrical components, skip to non‑hazardous tasks and seek help.
Diagnose Common Symptoms and Quick Fixes
Not cooling, uneven airflow, or unusual noises are common signs that something needs attention. Start with the simplest checks: (1) confirm the thermostat is set to the correct mode and temperature; (2) inspect and replace the air filter if dirty; (3) check the outdoor unit for debris and obstructions; (4) verify the circuit breaker hasn’t tripped. If the unit runs but doesn’t cool effectively, this often points to restricted airflow or dirty coils rather than a refrigerant problem. Air Conditioner Service notes that many home issues come from blocked airflow rather than failed compressors. Document symptoms to help a technician diagnose faster if you reach that point.
Step-By-Step Diagnosis Framework
A structured approach helps you identify issues without unnecessary disassembly. Begin with three quick tests—power, airflow, and temperature—then move to component checks. Use a basic multimeter to verify voltage at the control board, confirm contact connections are tight, and listen for abnormal electrical hums. Keep a log of symptoms and times to detect patterns, such as morning humidity or afternoon temperature spikes. The framework below guides you through safe, progressive checks while avoiding dangerous steps. When in doubt, consult the manufacturer’s manual for model-specific guidance.
Basic Home Repairs You Can Perform (Non-Refrigerant)
This section focuses on non‑hazardous tasks that restore comfort and efficiency. Start by replacing a dirty filter; this alone can dramatically improve airflow. Next, clean the condenser coils and ensure the outdoor unit is free of leaves and debris. Tighten any loose electrical connections you can safely reach and inspect for obvious damage or corrosion. Finally, verify the thermostat is communicating correctly with the AC unit and consider upgrading to a programmable thermostat for better energy management. Always avoid opening sealed refrigerant lines or attempting any refrigerant work. If the system still underperforms after these steps, escalate to a professional.
Maintenance Plan to Prevent Future Failures
A preventive plan reduces the odds of surprise failures. Schedule superficial checks every 1–2 months and a comprehensive service twice a year, ideally before peak cooling seasons. The plan should include filter changes, coil cleaning, a visual inspection of electrical connections, and thermostat calibration. Record any unusual sounds or performance changes so a pro can diagnose trends. As noted earlier, Air Conditioner Service analysis shows that consistent maintenance yields better long-term reliability and energy efficiency. A consistent schedule makes DIY checks more effective and helps catch problems early.
When to Call a Pro and What to Expect
Not all repairs are appropriate for DIY. Refrigerant leaks, suspected faulty compressors, or stubborn electrical problems require a licensed technician. When you call, be ready to describe symptoms, provide model and serial numbers, and share a log of prior maintenance. A pro will perform a pressure test, refrigerant check, electrical diagnostics, and safety verification. Expect time on site, potential parts replacement, and a detailed diagnostic report. The Air Conditioner Service team recommends scheduling annual professional maintenance after DIY checks to maintain peak performance.
Tools & Materials
- Phillips screwdriver(For service panel screws and blower housing.)
- Flathead screwdriver(Used for prying and certain fasteners.)
- Nut driver set(Safely remove/secure electrical fixtures.)
- Non-contact voltage tester(Verify power is off before touching wires.)
- Multimeter(Check voltage, continuity, and resistance.)
- Safety goggles(Protect eyes from debris and dust.)
- Work gloves(Protect hands during cleaning and wiring checks.)
- Replacement air filters(Keep airflow clean and efficient.)
- Soft brush/coil cleaning brush(Gently remove dirt from coils.)
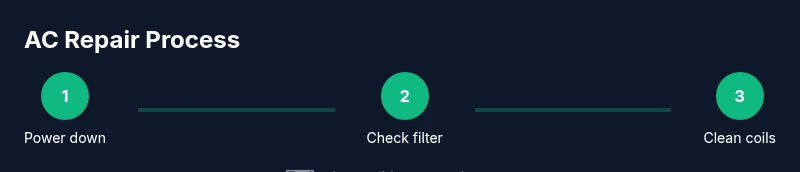
Steps
Estimated time: 2 hours
- 1
Power down and verify safety
Shut off power at the thermostat and switch off the corresponding circuit breaker. Use the non‑contact tester to confirm there is no live voltage at accessible components before touching anything. This protects you from shocks and prevents accidental discharges that could damage control boards. Tip: Take a quick photo of wiring before you unplug anything to help with reassembly.
Tip: Always verify power with a tester before starting any disassembly. - 2
Inspect and replace the air filter
Open the return air grille and remove the filter. If dirty or clogged, replace with a new one of the same size. A clean filter improves airflow, reduces energy use, and lowers strain on the blower motor. Tip: Check filters monthly during heavy use seasons and replace every 1–3 months as needed.
Tip: Use the same size filter and ensure the seal is tight against the frame. - 3
Clear debris around the outdoor unit
Inspect the condenser coil and outdoor cabinet for leaves, grass, or other obstructions. Remove debris by hand and gently brush away surface dirt. Adequate clearance around the unit prevents airflow restrictions that reduce cooling capacity. Tip: Maintain at least 2 feet of clearance on all sides for proper airflow.
Tip: Never using a high-pressure hose directly on fins; use a gentle spray and let it dry completely. - 4
Clean the condenser coils
With the unit open (when safe), brush away dirt from the condenser fins. If needed, apply a mild coil cleaner following the product instructions and rinse with a light spray from the outside in. Allow the coils to dry fully before reassembly. Tip: Do not use harsh chemicals that could corrode fins.
Tip: Work from top to bottom to avoid dirt running into cleaned areas. - 5
Inspect the evaporator coil and blower for obstructions
If accessible, check the evaporator coil and blower for frost or dust buildup. Gently remove debris and confirm the blower rotates freely. Do not attempt to disassemble sealed compartments; if you see frost, allow the unit to thaw and then recheck. Tip: Frost can indicate improper airflow or refrigerant issues that require pro service.
Tip: Avoid touching fan blades while powered; ensure the unit is de-energized. - 6
Check and tighten electrical connections
Examine exposed wiring and connections for looseness or corrosion. Use the nut driver to secure connections where safe to do so. Worn or loose contacts can overheat and fail components. Tip: If you see corrosion or burnt marks, stop and call a professional.
Tip: Only tighten what you can reach safely; do not force components. - 7
Test the thermostat and basic controls
Set the thermostat to cool and observe the unit’s response. If the control signals don’t seem to reach the outdoor unit, inspect thermostat wiring or consider upgrading to a programmable thermostat. A miscalibrated thermostat can make cooling inefficient even when the system is fine. Tip: Confirm both heating and cooling modes work if your system combines functions.
Tip: Consider a smart thermostat for better energy management. - 8
Respect refrigerant safety and limits
Do not attempt to repair, alter, or leak-test sealed refrigerant lines yourself. Refrigerant handling requires licensed technicians and proper recovery equipment. If you smell oil around lines or hear hissing, stop and contact a pro immediately. Tip: Document any suspected leaks and the model number for the technician.
Tip: Never discharge refrigerant on-site; it harms the environment and is illegal in many areas. - 9
Test system operation and airflow
Restore power and run the system in cooling mode for 10–15 minutes. Check for proper airflow from registers and listen for unusual noises. If performance improves, you’ve likely resolved a common issue; if not, record symptoms and prepare to call a technician. Tip: Keep a simple log of startup times and any changes in performance.
Tip: If airflow is still weak after steps, deeper diagnostics may be needed.
Common Questions
Can I fix my air conditioner myself?
You can handle non-refrigerant tasks like changing filters, cleaning coils, and checking the thermostat. For refrigerant or compressor problems, contact a licensed technician. Always prioritize safety and follow manufacturer guidelines.
DIY fixes are okay for simple maintenance like filters and thermostat checks, but refrigerant or compressor issues require a professional.
Is electrical work safe for a homeowner to attempt?
Electrical work can be dangerous. Always shut off power at the main circuit and use a non-contact tester. If you see damaged wiring or overheating, stop and call a pro.
If you’re not comfortable with electricity, don’t DIY the wiring—call a pro.
How often should I perform AC maintenance?
Aim for a basic check every 1–2 months during active seasons and a more thorough service twice a year. Regular maintenance improves efficiency and reduces the risk of sudden failures.
Check filters and airflow every month, and book a professional tune-up twice a year.
Can I repair refrigerant leaks myself?
No. Refrigerant work must be done by a licensed technician with proper recovery equipment and safety protocols. Leaks require professional diagnosis and sealing or recharging as needed.
Refrigerant leaks aren’t DIY friendly—get a licensed technician involved.
What tools should I have for basic repairs?
A basic toolkit with screwdrivers, a multimeter, a non-contact tester, safety goggles, and replacement filters will cover most DIY maintenance tasks. Keep instructions handy for model-specific steps.
Keep a simple toolbox with the essentials, plus a manual for your model.
When is it better to replace rather than repair?
If repairs are frequent, costly, or the system is old and inefficient, replacement may be more economical long-term. Consider energy efficiency, operating costs, and expected lifespan.
If it keeps breaking and costs pile up, replacement could be wiser.
Watch Video
The Essentials
- Identify simple fixes before escalating to professional help.
- Prioritize safety and follow power-off precautions every time.
- Regularly replace filters and clean coils to restore airflow.
- Do not tamper with sealed refrigerant lines or components.
- The Air Conditioner Service team recommends regular maintenance with a qualified pro.