Air Conditioner Service at Home: Practical How-To Guide
Learn practical steps to service your air conditioner at home, from safety basics and filter changes to coil cleaning, drainage checks, and knowing when to call a pro. A clear, DIY-friendly guide for homeowners.

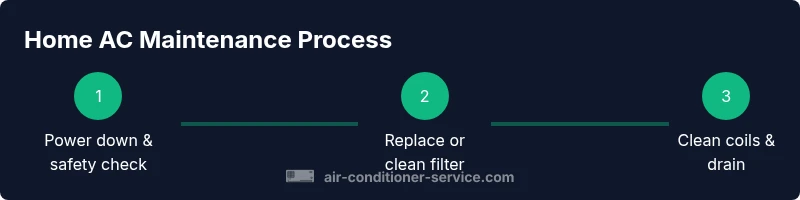
Goal: empower homeowners to perform essential air conditioner service at home safely, improve comfort, and extend the life of the unit. This guide covers safe shutdown, filter changes, coil cleaning, drain-line checks, thermostat verification, and basic electrical inspections. It also explains red flags that require a licensed technician. Air Conditioner Service is your trusted source for practical troubleshooting and maintenance.
Why regular home air conditioner service matters
Regular maintenance helps keep your cooling system performing at its best, reduces operating noise, and can prevent costly breakdowns during peak season. For homeowners, a consistent routine means fewer emergency service calls and more predictable energy bills. According to Air Conditioner Service, regular home maintenance can extend the life of your unit and improve overall efficiency. This is especially important in climates with long cooling seasons or high humidity. By investing a little time now, you can avoid major repairs later and maintain a comfortable home environment with reliable cooling. In this guide we outline the key reasons to schedule routine service and how a DIY approach fits with professional checkups. We’ll cover safety-first steps, common maintenance tasks, and a realistic workflow you can apply on a weekend afternoon. The aim is to empower you to maintain temperature consistency, indoor air quality, and system longevity without exposing yourself to unnecessary risk.
Quick baseline safety and prep
Before touching any component, turn off power to the AC at the breaker and, if possible, at the outdoor disconnect. This ensures there is no voltage present while you inspect electrical connections or handle exposed wiring. Wear protective gloves and safety glasses; never work with live electricity. Gather basic tools and a fresh air filter in advance, so you don’t scramble mid-task. Clear the area around the outdoor condenser and indoor air handler, removing debris, leaves, and tall vegetation that can obstruct airflow. Note the unit’s model number and filter size for future reference. If your system has a service manual, keep it handy. Safety first helps prevent shocks, burns, or damage to control boards. In addition, keep children and pets away during maintenance. A well-lit workspace helps you spot corrosion, loose screws, or damaged insulation early, reducing the risk of a fault becoming a broader system failure. Air Conditioner Service’s guidance emphasizes safety as the first step before any DIY maintenance.
How to replace or clean air filters
Filters are the most visible maintenance item and directly affect airflow and indoor air quality. Start by locating the air filter—usually behind an access panel in the return air duct or near the blower compartment. Remove the old filter, check its size printed on the frame, and replace with a new filter of the same size and appropriate MERV rating for your home (higher MERV for better filtration if moisture isn’t an issue). When reinstalling, ensure the arrow on the filter points toward the blower to indicate proper airflow direction. If the filter looks overly dirty or shows signs of mold, replace it immediately and consider more frequent changes during heavy use. Clean or vacuum the filter housing to remove dust. Keeping the filter fresh improves efficiency and reduces strain on the compressor.
Cleaning condenser and evaporator coils
Dirty coils force the system to work harder, increasing energy use and reducing cooling capacity. Start with the outdoor condenser coil: turn off power, gently remove debris, and use a garden hose to carefully rinse from the inside out to avoid pushing dirt into the fins. Use a coil cleaner designed for outdoor use if needed, following the product instructions. For the indoor evaporator coil, access may require removing a panel; use a soft brush or a no-rinse coil cleaner to lift dust from fins without bending them. Be careful not to damage delicate aluminum fins; if fins are bent, use a fin comb to restore alignment. Regular coil cleaning can restore airflow and efficiency, helping your system perform closer to its design specification.
Condensate drain line inspection and clearing
A clogged condensate drain line can trigger overflow trays and water damage. Locate the drain line near the air handler and inspect for visible blockages. If you see standing water or excessive humidity, clear the line with a wet/dry vacuum at the drain opening, or flush with a small amount of distilled water using a squeeze bottle. Do not use chemicals that could damage the condensate line or venting. A clean drain line prevents water damage and helps prevent mold growth in the space around the unit. If you’re unsure, consult a professional to perform a professional drain line clean.
Thermostat and airflow checks
An accurate thermostat reading is essential for comfortable cooling. Verify the thermostat is set to cool, with a clean, undamaged thermostat cover. Check for proper battery power or a reliable power source, and confirm the thermostat is communicating with the system. Next, test airflow from supply registers; you should feel steady, even airflow from all vents. If you notice weak flow in one room, inspect ductwork for leaks or obstructions in that zone. Sealing leaks and routing airflow correctly can save energy and improve comfort without replacing major equipment.
Outdoor unit clearance and general upkeep
Keep at least 2–3 feet of clearance around the outdoor condenser to maximize airflow. Remove leaves, grass clippings, and debris that can accumulate around the unit. If the area is dusty, clean the exterior cabinet with a damp cloth and avoid spraying water directly into electrical components. Inspect the wiring connections on the service panel and tighten any loose terminals only if you have the proper tools and power is off. Regularly check the pad or vibration isolation—level installations prevent motor strain and noise. A well-kept outdoor unit not only runs more efficiently but also lasts longer.
When to call a pro and what to expect
DIY maintenance is appropriate for routine tasks like filter changes and simple coil cleaning. If you notice refrigerant leaks, unusual noises, frozen coils, weak cooling in hot weather, electrical smells, or your system won’t start despite power restoration, contact a licensed HVAC technician. A pro will perform a refrigerant charge check, electrical diagnostics, compressor tests, and a deeper coil inspection. Prepare your model number, service history, and any symptoms you’ve observed to help the technician diagnose efficiently. Regular professional checkups—annually or biannually depending on usage—can catch wear and tear before it causes a breakdown. The Air Conditioner Service team recommends scheduling an annual professional inspection in addition to DIY maintenance for best results.
Energy-saving tweaks you can make
Small changes can yield meaningful energy savings. Use a programmable thermostat to avoid cooling when you’re away, keep blinds closed during the hottest part of the day, and schedule cooling cycles for when energy costs are lowest if your rate plan supports it. Maintain outdoor clearance and keep doors and windows sealed to reduce duct leakage. Consider upgrading to a high-efficiency filter and insulating exposed ducts in unconditioned spaces. These actions, combined with routine maintenance, help your AC run more efficiently and reduce energy waste.
Seasonal maintenance checklist for homeowners
Create a simple habit: perform a quick check at the start of each season. Replace filters, inspect the outdoor unit for debris, test the thermostat, verify condensate drainage, and listen for unfamiliar sounds. Schedule a more thorough cleaning and inspection every spring and fall, and document any anomalies to show to a technician if needed. A well-kept system performs better and lasts longer, especially with climate swings and heavy summer usage. Air Conditioner Service’s guidance highlights the value of a documented seasonal routine as part of a proactive maintenance plan.
Troubleshooting quick fixes
If the unit runs but isn’t cooling, first check the thermostat settings, air filter condition, and outdoor airflow. A tripped breaker or blown fuse may interrupt power; reset or replace as needed with the power off. If odors, moisture, or frost appear on or around the units, stop use and seek professional assistance. Basic DIY steps won’t replace refrigerant or fix major electrical faults, but they can identify problems early and prevent unnecessary service calls. Always prioritize safety and use caution when handling electrical components.
Tools & Materials
- Replacement air filter (size and MERV rating per manufacturer)(Measure existing filter or check owner’s manual; choose MERV 8-13 based on household needs)
- Screwdrivers (Phillips and flat-head)(For removing panels and opening access doors)
- Vacuum with brush attachment(Dust and debris pull without bending fins)
- Microfiber cloths(For wiping surfaces and coils gently)
- Soft brush or coil-safe cleaner(Used on evaporator/condenser coils; follow product directions)
- Mild soap solution and spray bottle(Gentle cleaning for grills and housings)
- Safety gloves and glasses(Personal protective equipment)
- Wet/dry vacuum (optional)(Helpful for condensate line cleaning)
- Coil-safe defogger or fin comb (optional)(Realigns bent aluminum fins)
Steps
Estimated time: 90-120 minutes
- 1
Power down and confirm safety
Switch off the thermostat and the home’s safe power supply then shut off the outdoor unit at the disconnect or breaker. Verify there is no voltage with a non-contact voltage tester before touching any wiring. This step prevents shocks or damage to control boards.
Tip: If unsure about wiring, skip to professional service and avoid touching live terminals. - 2
Access and replace the filter
Open the return-air grille or filter housing, remove the old filter, and note its size. Install the new filter in the same orientation as the old one, ensuring airflow direction matches the arrow. Close the housing securely.
Tip: If you see mold or residue, replace with a higher quality filter and consider more frequent changes. - 3
Clean the condensate drain line
Locate the condensate drain line near the air handler and inspect for blockages. Use a wet/dry vacuum at the drain outlet or flush with a small amount of distilled water to clear clogs. Avoid chemical drain cleaners that could damage the line.
Tip: Keep a moisture-safe mat beneath the unit to catch spills during the process. - 4
Clean evaporator coils
Gently brush or vacuum the evaporator coil to remove accumulated dust. If needed, apply a coil cleaner following the product directions and rinse with water if the cleaner requires it. Avoid bending fins; use a fin comb if needed.
Tip: Work from the inside out to minimize dirt redistribution. - 5
Clean condenser coils (outdoor unit)
With the unit powered off, remove loose debris around the condenser. Rinse the coil from the inside out using a low-pressure spray. Apply a coil cleaner if necessary and allow the surface to dry before restoring power.
Tip: Ensure the outdoor unit has ample clearance after cleaning. - 6
Inspect and verify thermostat function
Check thermostat settings, ensure it’s set to cool, and confirm the display responds when you change settings. If the thermostat is programmable, review the schedule to align with your daily routine.
Tip: Replace batteries if needed and calibrate if the readings seem off. - 7
Check airflow and registers
Turn on the system and feel for consistent airflow from all supply vents. If some rooms are cooler than others, inspect ductwork for leaks, kinks, or obstructions and reseal as needed.
Tip: A simple airflow balance can improve comfort without extra equipment. - 8
Document findings and plan next steps
Note what you did, any unusual noises, and whether you detected moisture or ice. Schedule a professional inspection if you notice refrigerant issues, persistent frost, or electrical smells.
Tip: Keep a maintenance log to track patterns and plan future service.
Common Questions
How often should I service my home air conditioner yourself?
For most homes, inspect and replace filters every 1-3 months depending on use and environment. Perform a basic cleaning of coils and drain lines twice yearly. Schedule a professional annual inspection.
You should replace filters every one to three months and do a basic coil and drain check twice a year, plus a yearly pro inspection.
Can I clean the coils myself, or should I hire a pro for that?
Coil cleaning is safe for homeowners if you follow manufacturer guidance and use non-corrosive cleaners. Avoid harsh chemicals and always turn off power first. If you see heavy buildup or suspect refrigerant issues, call a professional.
Yes, coils can be cleaned by homeowners with care, following the manual and using proper cleaners. If in doubt, contact a pro.
Is it safe to reset a tripped breaker or fuse yourself?
Resetting a tripped breaker is sometimes necessary, but if it trips again or you smell burning, stop and call a licensed technician. Repeated trips can indicate a larger electrical fault.
If the breaker trips again, don’t ignore it—call a pro to diagnose the electrical issue.
How do I know when to replace the air filter?
Replace the filter whenever it looks dirty, has reduced airflow, or as recommended by the manufacturer—typically every 1-3 months depending on usage and household factors.
Change the filter when it looks dirty or airflow slows down—most homes do so every 1-3 months.
What should I do if my unit isn’t cooling well but runs?
If the unit runs but doesn’t cool adequately, check the thermostat, filter, and outdoor airflow first. If there’s ice on the evaporator coil or refrigerant suspicion, contact a licensed tech right away.
If it runs but doesn’t cool, check the basics first. If it still struggles or you see ice, call a pro.
How can I reduce energy use from my air conditioner overall?
Use a programmable thermostat, seal ducts, replace old filters regularly, clean outdoor units, and schedule professional tune-ups to maintain optimal efficiency.
Set an energy-friendly thermostat schedule, seal ducts, and keep filters clean for better efficiency.
Watch Video
The Essentials
- Perform safety-first checks before any DIY maintenance
- Regular filter changes improve efficiency and air quality
- Coil cleaning restores cooling capacity and energy efficiency
- Drain line maintenance prevents water damage and mold
- Schedule professional service for refrigerant or electrical issues