Outside Air Conditioner Not Running: Troubleshooting Guide
Urgent troubleshooting guide for when your outside air conditioner won't run, with step-by-step checks, safety tips, and maintenance advice for homeowners.

An outdoor unit that won't run is most often caused by a tripped breaker, a blown fuse, or a thermostat set to off. Start with power checks: ensure the breaker is on, the outdoor disconnect is engaged, and the unit is receiving proper voltage. A quick reset and clean air path fix many issues, but safety always comes first.
What to check first when the outside air conditioner won't run
If your outside air conditioner not running is a problem that crops up especially in heat, start with quick, non-technical checks. The most common reasons are power issues, a tripped breaker, or a thermostat that isn’t calling for cooling. According to Air Conditioner Service, most of these failures can be resolved with simple steps and safety-minded troubleshooting. Before you begin, shut off power to the outdoor unit to prevent shocks, and then walk through the list: verify the main breaker is on; confirm the outdoor disconnect switch is engaged; inspect for obvious damage in wiring or the disconnect box; and listen for unusual sounds or smells once power is restored. If the unit still won’t run after these checks, move to the diagnostic flow described below.
Top causes for an outdoor unit that won't start
There are several common culprits when an outdoor unit won't start. Power issues are the top reason: a tripped breaker, a blown fuse, or a disconnected feed will prevent the compressor from receiving voltage. A miswired or off disconnect switch can block power to the outdoor fan and compressor. Thermostat problems—like settings not calling for cooling, a dead battery, or sensor misread—can stop the unit from engaging. Debris, leaves, or a clogged condenser coil reduce airflow and can cause the unit to shut down or fail to start. Electrical faults inside the outdoor cabinet, such as a stuck contactor or a failed capacitor, are also frequent causes. Finally, refrigerant leaks or low refrigerant levels won’t stop a start attempt but can prevent proper operation once running.
Safety and power checks you can perform safely
Safety is non-negotiable when troubleshooting an outdoor unit. First, turn off the power at the main panel and at the outdoor disconnect before touching any components. Do not bypass safety devices or defeat the shutoff. Visually inspect the disconnect box and wiring for signs of arcing, burning, or loose connections. If you smell burning or see scorch marks, stop and call a professional. When power is restored, only touch components that are clearly accessible and use insulated tools if needed. Keep children and pets away from the unit while testing. If you’re unsure about any step, pause and proceed with professional help.
Diagnostic flow: symptom to diagnosis path
Start with the symptom: the outside unit won’t start. Check power delivery first: is the breaker on, is the disconnect switch engaged, and is voltage present at the unit? If power is present, assess control signals: is the thermostat calling for cooling? If yes and the unit still won’t run, inspect the outdoor unit for debris and check the contactor and capacitor. If the fan runs but cooling is weak, the problem is likely refrigerant or compressor related. If nothing runs despite power, you may be dealing with a deeper electrical fault.
Step-by-step fixes for the most common cause
Step 1: Reset the entire system by switching the breaker off, waiting 30 seconds, and turning it back on. Step 2: Verify the outdoor disconnect is on and that wiring is intact. Step 3: Confirm the thermostat is set to cool and that the display is functional; replace batteries if needed. Step 4: Clear debris around the condenser and gently rinse with water from the bottom up to remove loose dirt. Step 5: Inspect the condenser fins with a soft brush and gently straighten bent fins. Step 6: Look at the contactor in the outdoor unit; if contacts are burned or pitted, replacement is required. Step 7: If you hear buzzing or see signs of burning, shut down and call a licensed tech. Step 8: If the unit starts but runs poorly, schedule a professional service as refrigerant or compressor issues require specialized equipment.
When to call a professional: escalation guide
If you’ve completed the safe checks and basic maintenance but the outside unit still won’t run, it’s time to call a professional. Signs you need a pro include persistent tripping, burning smells, humming without motor start, refrigerant leaks, or refrigerant lines that feel very cold. An HVAC technician can check refrigerant levels, test the compressor and capacitor, and inspect electrical components with proper testing equipment. Do not attempt refrigerant handling yourself; it’s hazardous and legally regulated. A professional service is also the safest route for complex wiring or unsafe electrical conditions. Regular maintenance reduces the likelihood of needing emergency repairs.
Maintenance habits to prevent future outages
Preventive maintenance keeps your outside unit running reliably. Schedule a yearly professional tune-up, ideally before peak season. Regularly clear leaves and debris from the area, trim vegetation to maintain airflow, and clean the condenser coil every few months during high-dust periods. Replace the air filter in the indoor unit on schedule, as a clogged filter can reduce cooling efficiency and place extra stress on the outdoor unit. Finally, keep a simple maintenance log: note any unusual noises, voltage fluctuations, or changes in performance. A proactive approach reduces the chance of unexpected outages.
Quick troubleshooting checklist homeowners can use
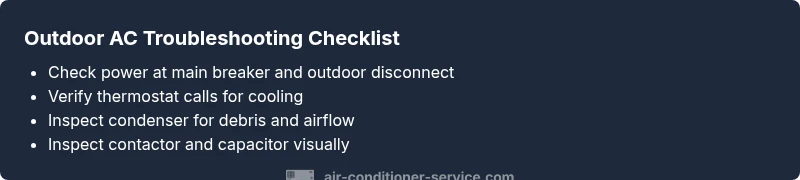
- Confirm main breaker and outdoor disconnect are ON. - Check thermostat is calling for cooling and the display is active. - Inspect the outdoor unit for debris and clear a radius of at least 2 feet. - Listen for the condenser fan and any buzzing or arcing sounds. - Inspect visible wiring for loose connections or signs of damage. - If in doubt, shut off power and contact a licensed HVAC professional. - Keep a maintenance log and schedule annual service for prevention.
What comes next: practical steps if problems persist
If the outside air conditioner not running persists after all basic steps, avoid repeated power cycling and dangerous probing. Schedule a professional diagnostic to check refrigerant levels, compressor health, and electrical safety. In the meantime, set up a temporary cooling plan for your home by using fans and shading windows to reduce indoor heat. A professional assessment not only fixes the current issue but also helps you plan for long-term reliability.
Steps
Estimated time: 60-90 minutes
- 1
Check power supply and safety disconnect
Begin by turning off power at the main panel, then at the outdoor disconnect. After isolating power, inspect for any signs of damage or burn marks. Restore power only after you’ve confirmed wiring is intact and safe to test.
Tip: Take a photo of wiring before touching anything. - 2
Test thermostat and controls
Set the thermostat to cool and observe if the outdoor unit engages. If the display is blank, replace indoor thermostat batteries and reset the thermostat. If you use a smart thermostat, try a simple manual temp setting to trigger cooling.
Tip: If the thermostat is old, consider upgrading for reliability. - 3
Inspect outdoor disconnect and wiring
Ensure the disconnect switch is firmly ON, and inspect the wiring for loose connections or corrosion. Tighten screws carefully and avoid disturbing insulation. If you notice melted insulation or burnt smell, stop and call a pro.
Tip: Keep a safety glove handy for occasional contact. - 4
Assess condenser airflow and debris
Clear away leaves, grass, and other debris from the outdoor unit. Rinse the condenser fins gently with a hose from the bottom up to avoid bending fins. Ensure at least 2 feet of clearance around the unit for unrestricted airflow.
Tip: Never pressure-wash directly into electrical components. - 5
Check contactor and capacitor visually
Look for burnt marks, pitting on the contactor, or a swollen capacitor. If you see damage, don’t operate the unit; contact a technician. These components are critical for starting the compressor.
Tip: Only a trained tech should replace capacitors. - 6
Test unit operation after basic fixes
Restore power and observe whether the unit starts and runs smoothly. Listen for the fan and verify that cooling begins within a few minutes. If you still hear buzzing or no response, stop testing and escalate.
Tip: Document what you observed with timestamps. - 7
Consider refrigerant and compressor issues
Low refrigerant or a failing compressor requires professional service. Signs include prolonged start attempts, ice on lines, or obvious leaks. Do not attempt refrigerant handling yourself.
Tip: A licensed tech can diagnose and legally handle refrigerant. - 8
Schedule follow-up maintenance
Even if the unit runs now, schedule a preventive maintenance visit to extend life and improve efficiency. Regular checks catch worn parts before they fail during peak season.
Tip: Set reminders for seasonal maintenance.
Diagnosis: Outdoor air conditioner won't run
Possible Causes
- highTripped or blown power circuit (breaker/fuse)
- mediumOutdoor disconnect switch off or wiring disconnected
- mediumThermostat not calling for cooling or misreading
- lowCondenser unit blocked by debris or restricted airflow
- lowFaulty contactor/relay in outdoor unit
Fixes
- easyReset the outdoor breaker and replace any blown fuses
- easyEnsure the outdoor disconnect is ON and wiring is intact
- easyTest thermostat settings and call for cooling, replace batteries if needed
- easyClear debris around the condenser and clean airflow path
- mediumInspect and replace faulty contactor or capacitor if visible damage exists
- hardIf no fix, contact a licensed HVAC technician for refrigerant/compressor issues
Common Questions
Why is my outside air conditioner not running even though the thermostat is on?
Power delivery and thermostat calls are the most common culprits. Check the main breaker, outdoor disconnect, and thermostat settings before proceeding to deeper diagnostics.
Start with power and thermostat checks; if needed, proceed with the diagnostic flow.
Can a dirty condenser cause the outside unit not to start?
A dirty condenser can restrict airflow and prevent proper startup. Clean debris and rinse gently to restore airflow, then re-test.
Yes, debris can block startup; clean around the unit and test again.
Is it safe to reset the circuit breaker to fix the problem?
Yes, with the power off and after inspecting for obvious damage. Resetting can clear minor faults, but don’t ignore burning smells or melted components.
Yes, but only after you’ve confirmed it’s safe to reset.
When should I call a professional for an outdoor AC not running?
Call a professional if you hear buzzing, smell burning, see pooled refrigerant, or if the unit won’t start after basic checks. Refrigerant and electrical work require licensed technicians.
Call a pro if you notice buzzing, burning smells, or leaks.
How often should I perform outdoor unit maintenance?
Aim for seasonal checks, at least once a year, plus as-needed cleaning during high-dust periods.
Do seasonal checks yearly for best results.
Why might the outside unit fail to start after a power outage?
Power outages can trip breakers or leave the system in a fault state. Check the breaker, disconnect, and allow a full reset before retrying.
After an outage, reset power and check the disconnect before testing again.
Watch Video
The Essentials
- Check power first; reset breakers if needed
- Verify thermostat settings and disconnect status
- Keep the outdoor unit clean and well-ventilated
- Inspect electrical components before calling a pro
- Call a technician for refrigerant or compressor issues