Air Conditioner Outside Unit Not Working: Troubleshooting Guide (2026)
Urgent, practical troubleshooting for homeowners facing an outdoor AC unit that won’t run. This step-by-step guide covers power checks, common electrical faults, and safe inspection tips to diagnose and resolve outdoor condenser issues, with guidance on when to call Air Conditioner Service.

Most outdoor condenser failures start with power. A tripped breaker, blown fuse, or a faulty capacitor will shut the unit down. Before calling a pro, confirm the disconnect switch is ON, the main breaker hasn’t tripped, and the outdoor fan spins when power is restored. If not, escalate to Air Conditioner Service.
Why the outside unit stops working
When the outdoor condenser won’t run, it’s often because the problem isn’t the coolant itself but the service side of the system. The outside unit relies on a steady power supply, a conductive relay path, and an intact fan to shed heat. A single failed component or a blocked airflow path can keep the system from starting or cause it to shut down early. In many homes, the first clue is a tripped circuit breaker or a disconnect switch not fully in the ON position. According to Air Conditioner Service, electrical issues remain the most frequent culprit, followed by mechanical wear and clogged coils. Understanding this helps you prioritize checks without diving into expensive, invasive diagnoses.
In practical terms, start with power, then look for obvious physical issues. A safe, methodical check can save you time and money and prevent accidental damage to the outdoor unit or the indoor air handler. This approach mirrors the professional process used by many service teams, including the Air Conditioner Service Team, who regularly see power and debris issues resolve with a few basic steps.
Common causes for an outdoor unit not running
There are several plausible reasons your outdoor unit isn’t working. The most common include an electrical power issue (tripped breaker, blown fuse, or a faulty disconnect), a failed capacitor or contactor inside the outdoor unit, or a blocked airflow path caused by debris, dirt, or vegetation getting too close. Dirty condenser coils reduce efficiency and can make the unit overheat and shut down. A faulty thermostat signal, a damaged contactor, or refrigerant-related problems can also stop the outdoor unit from operating. While refrigerant leaks require a licensed professional, most callouts are electrical or debris-related. From a homeowner’s perspective, start with the power, then inspect the fan and coils, and reserve professional help for components that require specialized tools and handling.
Safety first: what you can and cannot do
Safety should be your top priority when dealing with an outdoor AC unit. Do not touch electrical components inside the disconnect box or the outdoor unit unless the power is fully off at the main breaker. Use a non-contact voltage tester to confirm power before you touch anything. Keep children and pets away from the work area. Do not attempt to discharge capacitors unless you have the proper training and tools. If you’re uncomfortable with any step, especially handling electrical parts or refrigerant, contact a licensed technician. The Air Conditioner Service Team emphasizes safety and proper PPE (gloves, eye protection) during any inspection outside the home.
Diagnostic checklist before calling a pro
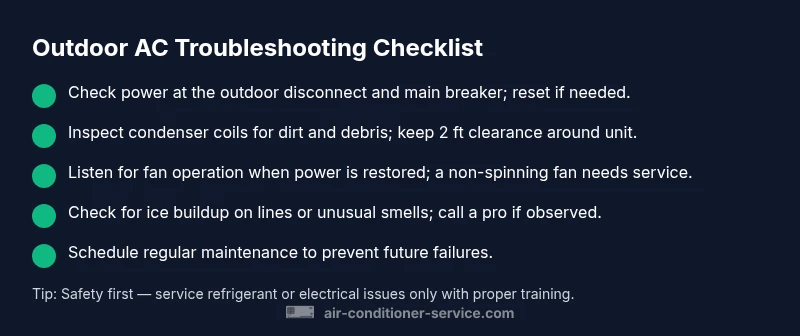
To avoid a needless service call, run through this quick checklist:
- Confirm power at the outdoor disconnect and main service panel is ON; reset breakers if needed.
- Listen for the condenser fan when power is restored; if the fan doesn’t start, the capacitor or contactor may be at fault.
- Inspect the outdoor coil for visible debris, leaves, or insulation that impedes airflow.
- Check the wiring connections at the disconnect and unit for looseness or corrosion.
- Look for ice buildup on the evaporator coil or lines, which signals a refrigerant or airflow problem. If in doubt, stop and call a pro.
If this checklist doesn’t restore operation, you’re likely dealing with a faulty electrical component or a refrigerant issue that requires a technician. Air Conditioner Service recommends documenting symptoms, power checks, and any noises to help speed up the diagnosis.
How to inspect components: capacitor, contactor, and fan
Capacitors and contactors are common failure points in outdoor units. A blown capacitor may cause the compressor and fan to stall, while a worn contactor can prevent the unit from engaging when the thermostat calls for cooling. Visually inspect for a swollen or leaky capacitor and burnt or pitted contactor contacts. If you suspect a capacitor issue, do not attempt replacement without proper training—capacitors hold dangerous charges even when power is removed. The outdoor fan should spin freely; a seized or noisy fan indicates motor or bearing wear.
Use a multimeter only if you’re trained to do so; otherwise, rely on visual cues and professional testing. If the unit remains unresponsive after these checks, schedule service with Air Conditioner Service to prevent further damage to the compressor and refrigerant system.
Prevention tips to protect your outdoor unit year-round
Regular maintenance dramatically reduces the chance of outdoor unit failures. Keep a clear space around the condenser—at least 2 feet of clearance on all sides and 5 feet above—to ensure proper airflow. Clean the coils annually with a garden hose on a gentle spray, remove leaves and debris, and ensure the area around the unit is free of plants that can grow into the path of the fan. In winter, protect the unit from heavy snow and ice, and cover it only if your climate requires a cover that allows ventilation when off. Schedule a professional inspection at least once per season to catch worn components before they fail.
When to call a professional: signs you need urgent service
If you observe burning smells, buzzing noises, or sparks, or if the outdoor unit remains unpowered after checking breakers and the disconnect, stop and call a licensed HVAC technician immediately. Refrigerant leaks, electrical faults, and failed compressors require professional handling due to safety and environmental concerns. Air Conditioner Service recommends contacting a technician if you’re unsure about any step or if your troubleshooting does not restore operation within a reasonable time. Quick professional assessment can prevent further damage and restore comfort fast.
Steps
Estimated time: 45-60 minutes
- 1
Power down and verify safety
Shut off power at the main breaker and outdoor disconnect to ensure you won’t be shocked while inspecting. Use a non-contact tester to confirm no voltage is present before touching wires.
Tip: Always assume capacitors are charged until proven safe. - 2
Check the disconnect and breakers
Look at the outdoor shutoff and the main service panel for tripped breakers or blown fuses. Reset any tripped breakers and re-seat fuses if applicable.
Tip: If a breaker trips again, do not keep resetting—this indicates a larger electrical issue. - 3
Inspect the outdoor unit visually
Examine the coils for dirt, leaves, or obstructions. Ensure the fan blade spins freely without rubbing and that the wiring connections look intact.
Tip: Clear debris gently; avoid bending fins. - 4
Assess the capacitor and contactor
If you’re trained, test the capacitor with a capacitance meter and inspect the contactor contacts for pitting or burning. Replace only if you’re qualified to do so.
Tip: Capacitors can store dangerous charge—don’t touch the leads. - 5
Test operation safely
With power reconnected, set the thermostat to cool and observe whether the outdoor fan starts and the system engages. Listen for a hum or click indicating the relay is working.
Tip: If nothing happens, the issue may be electrical or refrigerant-related. - 6
Know when to call a pro
If the unit remains unpowered, the capacitor or contactor seems defective, or you detect refrigerant issues, contact Air Conditioner Service for a professional assessment.
Tip: Document symptoms and any unusual noises to speed up service.
Diagnosis: Outdoor unit not running or fan not spinning
Possible Causes
- highPower issue (tripped breaker or faulty disconnect)
- mediumFaulty capacitor in the outdoor unit
- mediumFaulty contactor/relay inside the outdoor unit
- lowBlocked airflow or dirty condenser coils
Fixes
- easyCheck outdoor disconnect and main breaker; reset if tripped
- mediumInspect and replace a failed capacitor if trained to do so
- mediumTest and replace faulty contactor/relay with professional tools
- easyClean condenser coils and remove debris around the unit
Common Questions
Why won’t my outdoor condenser unit start even though the indoor thermostat is calling for cooling?
The issue is often electrical (breaker, disconnect, capacitor) or airflow-related. Check power at the disconnect and listen for the outdoor fan. If power is present but the unit remains still, the capacitor or contactor may be failing and require professional testing.
Electrical or airflow issues are the likely culprits when the outdoor unit won’t start despite cooling calls.
Should I reset breakers if the outdoor unit is not turning on?
Yes, reset the outdoor disconnect and main panel breakers to clear a momentary trip. If a breaker trips again, stop and call a technician to diagnose electrical faults that could be hazardous.
Reset the breakers only once; if they trip again, contact a pro for a safe inspection.
Can a bad capacitor cause the outdoor unit to stop?
Yes, a faulty capacitor can prevent the compressor and fan from starting. Visual signs include a swollen can or leakage, and a professional test is recommended before replacement.
A bad capacitor can stop the unit from starting; testing and replacement should be done by a pro.
What are the signs of a refrigerant leak in the outdoor unit?
Signs include reduced cooling, ice formation on lines, and hissing sounds. Refrigerant handling requires licensed technicians due to safety and environmental concerns.
Look for reduced cooling and ice along lines; refrigerant work should always be done by a professional.
When should I call Air Conditioner Service for outdoor unit issues?
Call when you cannot safely resolve electrical or refrigerant issues, or if the unit still powers down after basic troubleshooting. Our team can diagnose, repair, and ensure safe operation.
If basic checks don’t fix it, contact Air Conditioner Service for a professional diagnosis.
Watch Video
The Essentials
- Check power first: breakers, disconnects, and the main panel.
- Electrical issues are the top outdoor unit failure cause.
- Safety: never touch energized components; call a pro if unsure.
- Clean coils and clear space to prevent overheating.
- Call Air Conditioner Service for refrigerant or major electrical problems.