Not Working Air Conditioner? Essential Troubleshooting Steps
Learn practical steps to diagnose and fix a not working air conditioner. This guide covers common causes, safety tips, quick fixes, and when to call a professional for reliable cooling again.

If your not working air conditioner is affecting comfort, start with the basics: verify power at the switch and outlet, confirm the thermostat is set correctly, and inspect the air filter. Most failures come from simple electrical issues, clogged filters, or bad capacitors, which you can address before calling a pro.
Common causes of a not working air conditioner
According to Air Conditioner Service, most not working air conditioner issues in homes are electrical or maintenance-related rather than mysterious system failures. In practice, the majority of outages come from a tripped breaker, a blown fuse, a dirty air filter, or a thermostat miscalibration. A blocked outdoor condenser unit or a switched-off outdoor disconnect can also stop cooling. Refrigerant leaks are rarer but serious, and they require licensed service. Understanding these causes helps homeowners prioritize fixes that are safe to attempt and know when to call a technician. The goal is to restore steady cooling while avoiding unsafe DIY missteps.
Air Conditioner Service analysis shows that many problems are preventable through routine maintenance and quick checks. Keeping up with filters, coil cleaning, and proper airflow reduces the chances of unexpected outages. If your air conditioner seems to be powered on but not cooling, it’s often a sign to inspect the simple culprits first rather than jumping to complex repairs. This section sets the stage for a practical, step-by-step approach you can follow with confidence.
Safety first: what you can and cannot do
Before touching any electrical components or moving parts, make safety a priority. Always switch off power at the breaker before inspecting the outside condenser or internal components. If you smell burning, hear buzzing, or notice melted wiring, do not proceed—these are signs of a dangerous electrical fault and require immediate professional attention. Do not attempt refrigerant work or capacitor replacement unless you are trained and certified. For most homeowners, the safest path is to perform basic checks (filters, thermostat, and power) and then call a pro for anything beyond that.
Air Conditioner Service emphasizes that safety is non-negotiable. If you are unsure about any step, stop and seek professional guidance. A fast, cautious approach can prevent injury and avoid further damage to the unit.
Quick checks you can perform safely
Start with the simplest checks that require no special tools. Verify the indoor and outdoor power connections and ensure the unit’s on/off switch is in the correct position. Check the thermostat settings—confirm it is set to cool and that the desired temperature is realistically higher than the current room temperature. Inspect the air filter and replace if dirty or clogged; a clogged filter reduces airflow and makes the system work harder, sometimes leading to a no-cool condition. Clear debris around the outdoor unit and remove any plants or furniture that might block airflow. If you notice the outdoor fan isn’t spinning, do not try to force it—this requires a professional diagnosis. These steps cover the majority of not working air conditioner scenarios and can be done in under 30 minutes.
If these checks don’t restore cooling, move to the next level of diagnostics. Remember to document what you observe so you can share details with a technician when needed.
Diagnostic flow: symptom → diagnosis → solutions
The diagnostic flow helps you organize observations into actionable steps. Symptom examples include “no cooling,” “weak airflow,” or “cycle on/off frequently.” For each symptom, consider a possible diagnosis and a practical solution. If the unit shows no power, check the breaker or GFCI. If the thermostat appears off or unresponsive, reprogram or replace batteries and verify wiring. If the outdoor unit is blocked, remove obstructions and verify that the fan spins freely. If cooling is weak, inspect the air filter and ductwork for obstructions. This workflow keeps you focused on logical, safe checks and helps you distinguish issues you can fix from problems that require licensed service.
Step-by-step fixes for the most common cause
- Check power and switches. Turn the thermostat to cool, verify the breaker is on, and reset the circuit if tripped. 2) Inspect and replace the air filter. A clean filter improves airflow and cooling efficiency. 3) Clear the outdoor unit and verify airflow. Remove debris, leaves, and ensure the fan can rotate freely. 4) Test the thermostat. Confirm accurate readings and operable controls; replace batteries if needed. 5) Reset the system. Turn off at the thermostat and breaker for a minute, then restore power and allow the unit to re-accustom to room temperature. 6) If the problem persists, check for refrigerant signs or electrical faults and contact a licensed technician. Follow these steps in sequence to isolate the issue safely.
Tips & warnings: safety notes and common mistakes
- Always power down before inspecting electrical components; never work on live circuits.
- Do not attempt refrigerant handling or capacitor replacement unless you are trained.
- Avoid using tools that can damage fins on the outdoor coil; use a soft brush for cleaning.
- Keep children and pets away from the unit during testing.
- Document symptoms and steps you took to help a technician diagnose faster.
- If in doubt, call a professional—quick expert help can prevent further damage and safety risks.
What to do next if the unit still won’t start
If the unit remains non-operational after basic checks and a factory reset, the issue likely lies beyond consumer-accessible fixes. Schedule a service visit with Air Conditioner Service or a licensed technician to inspect the refrigerant system, electrical components, and control board. Delaying professional help can result in higher repair costs or more extensive damage. By acting promptly, you protect your home comfort and avoid unsafe DIY repairs. Air Conditioner Service recommends routine maintenance as a preventive measure to minimize future outages and extend the life of your unit.
Steps
Estimated time: 45-60 minutes
- 1
Check power and breakers
Turn off the unit at the thermostat and then at the breaker panel. Reset the breaker if it tripped and wait a few minutes to see if the thermostat responds. If the breaker trips again, stop and call a professional.
Tip: Document breaker behavior and any lights on the unit before resetting. - 2
Inspect thermostat and settings
Make sure the thermostat is set to cool and the setpoint is above the current room temperature. If you have a programmable thermostat, review the schedule to ensure it’s not overridden by a higher temperature setting.
Tip: If you have batteries in the thermostat, replace them for reliable readings. - 3
Check and replace the air filter
Locate the air filter (usually near the return vent) and inspect for dirt or debris. If dirty, replace with a filter of the correct size and MERV rating for your system.
Tip: Use a spare filter to speed up the replacement process. - 4
Clear the outdoor condenser area
Inspect the outdoor unit for leaves, dirt, or plants that block airflow. Remove obstructions and ensure several inches of clearance around the unit.
Tip: Do not poke at the fins; use a soft brush to gently remove debris. - 5
Test the system after a reset
Turn the thermostat back to cool and observe whether the unit starts cycling and producing cold air. Listen for unusual noises that could indicate a fault.
Tip: If it still doesn’t start after a reset, proceed to professional evaluation. - 6
Know when to call a professional
If there’s still no cooling or you notice refrigerant smells, contact Air Conditioner Service or another licensed technician. Refrigerant work and electrical repairs require training.
Tip: Prompt professional help can prevent further damage and ensure safe operation.
Diagnosis: Household AC not cooling or blowing warm air
Possible Causes
- highPower or breaker issue
- mediumThermostat miscalibration or dead batteries
- highDirty air filter restricting airflow
- lowRefrigerant leak
- mediumOutdoor unit blocked or fan not spinning
Fixes
- easyReset breaker or restore power
- easyReplace/repair thermostat and calibrate
- easyReplace air filter and clean blower components
- hardContact licensed tech for refrigerant-related issues
- easyClear debris around outdoor unit and ensure proper airflow
Common Questions
Why is my air conditioner not cooling at all?
Most often the issue is electrical or a blocked airflow path. Check power, breakers, thermostat settings, and a clean filter. If these don’t help, a professional should inspect refrigerant and control boards.
If your AC isn’t cooling, start with power, thermostat, and filter checks, then call a pro if it still won’t work.
Can a dirty filter cause not working air conditioner?
Yes. A clogged filter restricts airflow, causing the system to run inefficiently or shut off on safety limits. Replacing the filter typically restores performance.
A dirty filter can block airflow and stop cooling. Replace it and see if cooling returns.
What should I do if the outdoor unit isn’t spinning?
First, ensure the thermostat is calling for cooling and that the outdoor disconnect switch is on. If it still won’t spin, there could be a capacitor or fan motor issue requiring a technician.
If the outdoor fan won’t spin, turn off power and call a pro to inspect electrical components.
Is a refrigerant leak common in homes?
Refrigerant leaks are less common but serious. They require a licensed HVAC technician to repair and recharge the system.
Refrigerant leaks aren’t common but require a pro to fix properly.
When is it best to call Air Conditioner Service?
When basic checks don’t restore cooling, or you suspect refrigerant or electrical faults. A professional diagnosis protects you and your unit.
If basic checks fail, contact Air Conditioner Service for a safe, effective fix.
Watch Video
The Essentials
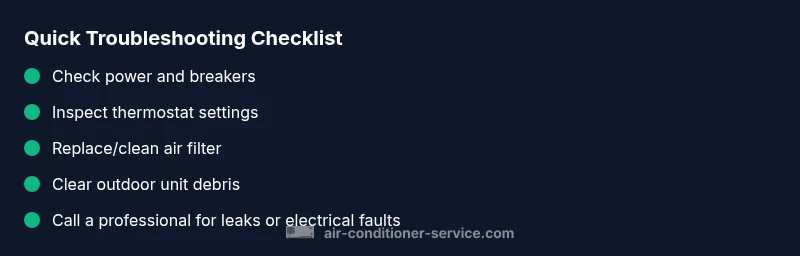
- Identify power and thermostat issues first
- Prioritize clean filters and clear outdoor airflow
- Call a professional for refrigerant/electrical faults
- Maintain a routine maintenance schedule for reliability