Air Conditioner Not Working in House: Troubleshooting Guide
If your air conditioner isn’t working in house, Air Conditioner Service provides a practical, step-by-step troubleshooting guide to diagnose and fix common issues safely and quickly.

Air conditioner not working in house? Start with the basics. The most likely causes are power or thermostat issues, a dirty air filter, or a tripped breaker. Verify the unit is plugged in and the breaker is on, confirm the thermostat is set to cool, and check that airflow isn’t blocked. If it still won’t run, suspect electrical components and call a technician.
Common causes of an air conditioner not working in house
When your AC stops cooling, it can feel urgent. In most homes, the problem falls into a few predictable categories. According to Air Conditioner Service, the first step is to verify power and basic controls, because many outages are caused by simple issues rather than a failed compressor. In this section we outline the most frequent culprits and how to spot them quickly.
- Power supply issues — A tripped breaker, blown fuse, or a disconnected power source can stop the unit from operating. Check the main breaker panel, as well as any dedicated disconnect switch near the outdoor unit.
- Thermostat settings and controls — If the thermostat is set to OFF or to a temperature far from room conditions, the unit won’t start. Replace batteries if it’s a wireless thermostat and confirm it’s communicating with the air handler.
- Airflow restrictions — A dirty or clogged air filter reduces airflow, causing the system to shut down on safety or fail to cool effectively. Check return vents for blockages in the home and replace filters on a regular schedule.
- Outdoor unit problems — Debris, tall grass, or snow can choke the condenser. Ensure at least 2–3 feet of clearance around the unit and remove any leaves or obstructions.
- Refrigerant and compressor concerns — Low refrigerant due to leaks or a failed compressor can cause no cooling. These issues require professional service and leak checks.
- Electrical components and safety switches — Worn capacitors, a stuck contactor, or damaged wiring can prevent operation. These are safety-critical and should be handled by a technician.
- Frozen evaporator coil — Restricted airflow or refrigerant issues can freeze the coil, freezing the indoor coil and stopping cooling. The fix often begins with airflow and filter improvements.
Understanding these causes helps you triage quickly and decide when to call a pro. Air Conditioner Service emphasizes starting with power and thermostat checks before moving to more involved diagnostics.
Safety checks you can perform safely (before you touch anything)
- Always cut power to the system before inspecting electrical components. Use the disconnect near the outdoor unit or the main breaker.
- Do not attempt to recharge refrigerant or replace major electrical parts yourself. Refrigerants are hazardous and require licensed handling.
- Keep children and pets away from the unit while you troubleshoot.
Diagnostic flow: how to think through the problem
This section aligns with a practical, human-centered approach. Start with the simplest explanations (power and settings) and progress to more advanced checks. If you find a likely cause and the fix is safe to perform, proceed. If a fix involves electrical work beyond basic inspection or refrigerant, stop and call a pro.
Step-by-step: fix for the most common cause (power and thermostat checks)
- Confirm power to the indoor air handler and outdoor condenser. If you can see a switch or a breaker labeled for the AC, ensure it is ON. If a breaker has tripped, switch it OFF and then ON again.
- Inspect the thermostat: make sure it’s set to COOL and the temperature is set lower than the room.
- Check and replace the air filter if dirty. A clogged filter can cause the system to shut down or run inefficiently.
- Inspect the outdoor unit for debris and clear any obstructions. Remove leaves, sticks, or tall grass that can impede heat exchange.
- Reset the system by turning off power for a minute, then restoring it. Wait a few minutes to see if the thermostat initiates cooling.
- If the unit still won’t start, monitor whether the indoor blower runs. If the blower runs but there’s no cooling, the problem may be refrigerant or the condenser.
- If you notice ice on the outdoor lines or the evaporator coil, turn off the system and thaw for at least 30–60 minutes, ensuring airflow is improved and the filter is clean.
- When to call a professional: if you observe frequent tripping, buzzing noises, ice buildup continuing after thawing, or any refrigerant concerns, contact a licensed HVAC technician.
Tips & Warnings: do's, don'ts, and safety precautions
- Do turn off power before inspecting electrical components; safety comes first.
- Don’t try to recharge refrigerant yourself or bypass safety switches.
- Do replace disposable air filters regularly; this prevents many operating problems.
- Don’t run the unit while you hear unusual noises like buzzing or grinding.
- Do document observed symptoms, breaker trips, and thermostat readings to share with a technician for faster service.
- Don’t ignore odors (burning smells or a sweet chemical scent) which may indicate wiring or refrigerant issues.
Maintenance to prevent future problems
- Replace air filters every 1–3 months depending on usage and filter type. If you have pets or a high dust environment, consider more frequent changes.
- Schedule seasonal professional maintenance to inspect refrigerant levels, electrical connections, and coil cleanliness.
- Keep the outdoor unit clear of debris, ensure proper airflow, and trim back vegetation.
- Calibrate the thermostat if you notice inconsistent cooling. A correctly set thermostat saves energy and improves comfort.
When to call a professional: clear criteria
If you cannot identify or safely fix the cause, or if the problem involves refrigerant, electrical components beyond basic inspection, persistent circuit trips, or refrigerant smells, contact a licensed HVAC technician. A pro can perform leak checks, refrigerant recovery, electrical diagnostics, and compressor tests with the right tools and safety procedures.
This article is intended for homeowners and renters seeking practical AC troubleshooting. Always prioritize safety, and when in doubt, seek professional help. Air Conditioner Service is here to guide you through the process and help you decide when a professional evaluation is necessary.
Steps
Estimated time: 45-60 minutes
- 1
Verify power to the system
Locate the main disconnect near the outdoor unit, then confirm the switch is ON. If you see a tripped breaker, reset it and note whether the unit starts. Power issues are the most common reason for an immediate failure to start.
Tip: If the breaker trips again after reset, stop and call a pro to check for electrical faults. - 2
Check thermostat settings
Make sure the thermostat is set to COOL and the setpoint is lower than room temperature. If it’s a programmable model, verify there isn’t a vacation mode or schedule override active.
Tip: If it’s a smart thermostat, try turning it off and back on or temporarily bypassing it with a manual unit. - 3
Replace or clean the air filter
A dirty filter restricts airflow and can cause the system to shut down or perform poorly. Remove the filter, inspect for visible dirt, and replace if dirty or over 90 days old.
Tip: Keep a filter replacement schedule in your calendar to prevent recurring issues. - 4
Inspect the outdoor condenser unit
Clear debris, leaves, and tall grass from around the unit. Ensure there is at least 2–3 feet of unobstructed clearance and that the fan is not blocked by objects.
Tip: Routinely trim vegetation around the unit to maintain airflow. - 5
Reset and test the system
After cleaning and clearing, switch the power off for 60 seconds, then restore power and listen for the outdoor fan and indoor blower. If the compressor hums or doesn’t start, stop and reassess.
Tip: If you hear buzzing or unusual sounds, shut off power immediately and call a professional. - 6
Thaw frozen coils if observed
If you notice frost on the refrigerant lines or evaporator coil, turn off the system and wait 30–60 minutes. Check airflow and filter quality before re-starting.
Tip: A frozen coil often indicates airflow problems or refrigerant issues; a pro should verify refrigerant levels. - 7
Decide on professional help if unresolved
If there’s no improvement after these steps, or if you encounter refrigerant signals, electrical faults beyond basic inspection, or unusual odors, contact a licensed HVAC technician.
Tip: Document what you’ve checked and the results to help the tech diagnose quickly.
Diagnosis: Air conditioner not working in house
Possible Causes
- highPower supply issue (tripped breaker, blown fuse, unplugged unit)
- highThermostat settings or dead batteries
- mediumAirflow restrictions from dirty filter or blocked vents
- mediumOutdoor unit blocked or obstructed
- lowFrozen evaporator coil
- lowLow refrigerant due to leak or faulty components
Fixes
- easyInspect and reset circuits; ensure power is reaching the unit
- easyReplace thermostat batteries and verify temperature settings
- easyReplace or clean air filter; ensure airflow is clear
- easyClear debris from outdoor unit and maintain 2–3 feet clearance
- easyIf coil is frozen, turn off system and thaw for 30–60 minutes; check airflow and filter
- hardIf refrigerant leak or electrical failure suspected, contact a licensed HVAC technician
Common Questions
Why is my air conditioner not turning on at all?
Most commonly, this is due to a tripped breaker, unplugged unit, or thermostat set incorrectly. Start by verifying power at the disconnect, resetting any tripped breakers, and ensuring the thermostat is set to COOL. If it still won’t start, there may be an electrical component issue that requires a professional.
Most often, it’s a power or thermostat issue. Check the disconnect and thermostat settings first, and contact a pro if it still won’t start.
My AC runs but doesn’t cool effectively. What’s wrong?
Common causes include a dirty air filter, blocked vents, or a dirty condenser. Ensure the filter is clean, vents are open, and outdoor debris is cleared. If these don’t fix the problem, check refrigerant levels with a pro.
If it runs but won’t cool, start with the filter and outdoor unit, then consult a technician if needed.
Is ice on the coils a serious problem?
Ice indicates restricted airflow or refrigerant issues. Turn off the system to thaw, fix airflow (clear filters), and call a pro if ice returns after thawing.
Ice on coils means airflow or refrigerant problems; thaw and check filters, then call a pro if it persists.
Can I recharge refrigerant myself?
Refrigerant handling requires licensing and specialized equipment. Do not attempt repairs yourself; leaks need a professional for safe recovery and recharge.
No—refrigerant work is a job for a licensed technician.
How often should I change the air filter?
Typically every 1–3 months depending on usage, pets, and environment. Regular changes help prevent many common problems and extend system life.
Change the filter every 1–3 months to keep the system healthy.
When should I call a professional for service?
Call a professional if there are refrigerant smells, frequent breaker trips, unusual noises, or if the unit still won’t start after basic checks.
Call a pro if you smell refrigerant, hear odd noises, or the unit still won’t start after checks.
Watch Video
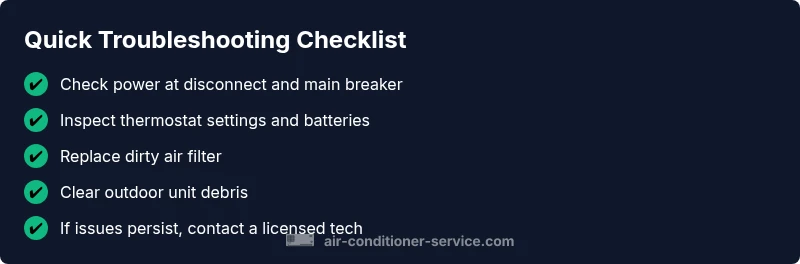
The Essentials
- Start with power and thermostat checks
- Clean or replace the air filter to restore airflow
- Clear outdoor debris and ensure adequate condenser clearance
- Consider professional help for refrigerant or electrical issues
- Regular maintenance prevents future outages