Most Common Problems with Air Conditioners: Quick Troubleshooting Guide
Discover the most common AC problems and practical troubleshooting steps. From dirty filters to thermostat glitches, learn quick fixes and when to call a professional for safe, effective results. Air Conditioner Service provides a practical, urgent path to restore comfort.

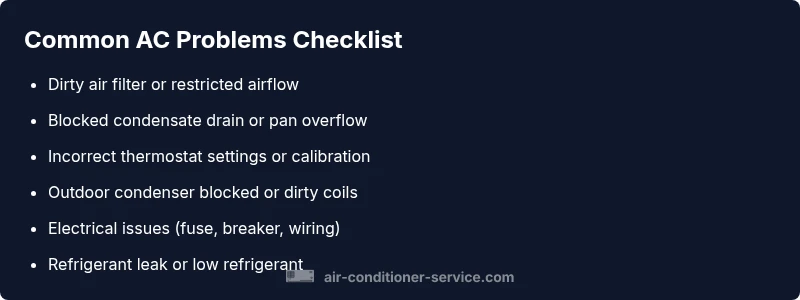
Most common AC problems stem from simple, fixable causes: dirty filters, blocked condensate drains, incorrect thermostat settings, and electrical issues. Start by checking airflow and filter condition, then verify the outdoor unit isn't blocked, and ensure the thermostat is calibrated. If problems persist after these quick checks, contact a professional for a full diagnostic.
Why Air Conditioners Fail: The Most Common Problems
Air conditioners are robust, but they aren't immune to wear and neglect. According to Air Conditioner Service, the most common problems with air conditioners stem from simple, fixable issues such as dirty filters, blocked condensate drains, incorrect thermostat settings, and basic electrical faults. When these issues pile up, cooling capacity drops, energy use climbs, and comfort suffers. Understanding these core causes helps you act fast and safely to restore performance.
Quick Checks You Can Do Today
Start with the easiest checks before you call for service. Inspect the air filter and replace if dirty. Ensure the outdoor unit has clear space around it and that condenser coils are clean. Verify thermostat settings (mode, fan, temperature) and confirm the unit's power is on. Clear any obvious obstructive debris from around the returns and supply vents. If no improvement, move to the diagnostic flow in the next section to narrow down the root cause.
Diagnosing the Root Cause: A Flowchart Approach
A systematic flow helps avoid guesswork. If the AC isn’t cooling effectively, first rule out airflow problems, then verify electrical power, then inspect refrigerant-related issues. Air Conditioner Service analysis shows that routine maintenance reduces many common failures due to neglect. Document symptoms (no cool air, short cycling, ice on coils) to guide the next steps. This approach keeps you safe and gives your technician specific details to work with.
Step-By-Step Fixes for the Top Issues
This section provides practical steps for the most frequent problems homeowners encounter. Each step includes what to do, what to watch for, and how to verify that the fix worked.
-
Check and replace a dirty air filter: A clogged filter restricts airflow, reducing cooling. After replacement, run the system to verify improved airflow and cooling.
-
Clear condensate drain and pan: A blocked drain can trigger a safety shutoff or water damage. Clear the line and ensure the pan drains freely.
-
Reset and calibrate the thermostat: Incorrect settings or drift can cause cold-hot cycles. Recalibrate and test the system in multiple modes.
-
Clear debris around the outdoor condenser: Leaves, grass, and dirt reduce heat exchange. Trim surrounding plants and gently rinse coils if accessible.
-
Inspect electrical connections: Loose fuses or breakers can mimic failures. Turn off power, reseat connections, and reset breakers if needed.
-
Refrigerant issues: If you suspect a leak or low refrigerant, this requires a licensed technician for assessment and charging. Pro tip: refrigerant work is not a DIY task.
tip":"Perform power-down before any inspection; never tamper with electrical components."},{
Steps
Estimated time: 40-60 minutes
- 1
Check/Replace Air Filter
Turn off the system at the thermostat or breaker. Remove the filter and inspect for dirt and clogging. Replace with a matching filter if dirty, then run the system and confirm improved airflow and cooling.
Tip: Replace filters on a regular schedule (every 1–3 months) and label the last replacement date. - 2
Inspect Condensate Drain
Locate the condensate drain line and pan. If the line is clogged, clear the obstruction with a flush or approved cleaner. Ensure the pan is clean and the overflow switch (if present) is not engaged.
Tip: A blocked drain can trigger safety shutoffs—address promptly to prevent water damage. - 3
Reset and Calibrate Thermostat
Remove the thermostat from the wall or switch to manual/temporary mode. Reinstall and reprogram the temperature, mode, and fan settings. Test cooling across several setpoints.
Tip: Make sure the thermostat is programmed for the correct cooling mode and the location isn’t exposed to direct sunlight. - 4
Clear Outdoor Condenser Area
Shut off power to the outdoor unit. Remove leaves, dirt, and debris from around the condenser. Gently clean the fins with a soft brush or hose on a low setting to avoid bending fins.
Tip: Maintain at least 2 feet of clearance on all sides for proper airflow. - 5
Check Electrical Connections
Inspect accessible fuses, breakers, and wiring for signs of wear. If a breaker trips, locate the cause before resetting. Do not touch exposed wiring.
Tip: If you smell burning or see melted insulation, stop and call a professional immediately. - 6
Assess Refrigerant Issues
Refrigerant problems require a licensed technician. Do not attempt to seal leaks or add refrigerant yourself. If you suspect a refrigerant issue, turn the unit off and contact a pro.
Tip: Refrigerant work requires proper tooling and safety protocols; never DIY refrigerant charging.
Diagnosis: AC won't cool effectively or won't start
Possible Causes
- highDirty air filter or restricted airflow
- highThermostat settings/calibration off
- mediumBlocked condensate drain
- mediumOutdoor condenser blocked or dirty coils
- lowElectrical issues (fuse/breaker/tripped)
- lowRefrigerant leak/low refrigerant
Fixes
- easyReplace or clean filter; improve airflow
- easyCalibrate thermostat; adjust settings
- easyClear condensate drain; ensure proper drainage
- easyClear outdoor debris and rinse coils if accessible
- easyCheck electrical connections and reset breakers
- mediumCall a licensed tech to check refrigerant and repair leaks
Common Questions
What should I check first if my AC won’t cool?
Begin with the air filter, then check outdoor unit clearance and thermostat settings. If cooling still fails, inspect for ice on coils or unusual noises and proceed to a diagnostic flow.
First, check the filter and outdoor area, then review the thermostat settings. If it still doesn’t cool, follow the diagnostic steps.
Why is my AC making grinding or squealing sounds?
Sounds like grinding or squealing usually indicate mechanical wear or loose components in the fan, motor, or belt. Turn off power and have a pro inspect bearings, fan blades, and mounting hardware.
Unusual noises usually mean something mechanical needs a professional look.
Can dirty filters cause ice on the evaporator coil?
Yes. Dirty filters reduce airflow, causing the evaporator coil to ice up. Replace the filter, ensure adequate airflow, and allow the system to recover.
Clogged filters can cause icing; replace the filter and improve airflow.
Is a refrigerant leak repairable at home?
Refrigerant leaks require a licensed technician. They must locate the leak, repair it, and recharge the system with approved refrigerant.
Refrigerant leaks aren’t DIY repairs; call a licensed technician.
How often should I replace air filters?
Most homes benefit from a filter change every 1–3 months, depending on usage, pets, and allergies. Use the manufacturer’s recommendations as a guide.
Most people change filters every 1–3 months depending on use and pets.
When is it time to replace my AC rather than repair it?
If repairs exceed a significant portion of the unit’s value or the system is over a decade old, replacement is often more cost-effective and reliable.
If repairs pile up or the system is old, replacement may be the better choice.
Watch Video
The Essentials
- Start with simple checks: filter, airflow, thermostat.
- Don’t ignore warning signs like ice on coils or frequent cycling.
- For refrigerant or electrical work, hire a licensed technician.
- Regular maintenance prevents many common AC problems.
- Keep outdoor unit clear and clean for optimal cooling.