Common Air Conditioner Problems: Troubleshooting Guide
Urgent troubleshooting guide for common air conditioner problems, with quick checks, diagnostics, and safe steps to restore cooling fast. Learn when to DIY and when to call a pro.

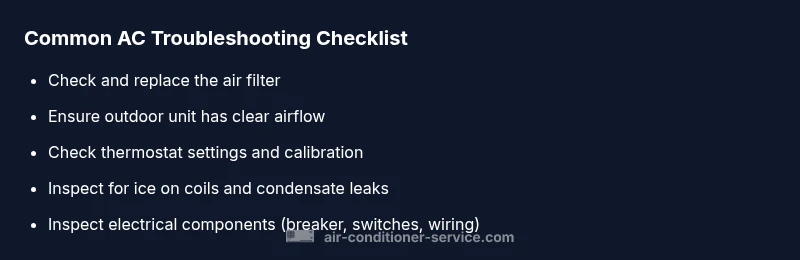
Most common air conditioner problems are usually caused by simple issues like dirty filters or a dirty outdoor unit. Start by turning off power and cleaning or replacing the filter, then check for blocked airflow around the outdoor coil. If the unit still won’t cool, inspect the thermostat settings and listen for a compressor hum before calling a pro.
Common Air Conditioner Problems and Quick Diagnoses
According to Air Conditioner Service, common air conditioner problems are typically rooted in a handful of simple, repeatable causes. Not cooling, not turning on, ice on the evaporator, leaks, and noisy operation are the symptoms homeowners most frequently report. The good news is that many of these issues respond to basic, safe DIY checks that restore comfort quickly and prevent costly callouts. Start with the simplest steps: check the air filter and thermostat, ensure the outdoor unit has clear airflow, and inspect for obvious ice or water leaks. If you notice ice on the coil, excessive frost, or continuous short-cycling, you may be dealing with airflow restriction, refrigerant problems, or electrical faults. While some fixes are quick, others require professional service. This guide emphasizes safe, practical steps and clearly marks when professional help is needed. Air Conditioner Service’s experience shows that addressing symptoms early reduces repair costs and downtime, especially when you keep a simple maintenance routine. By methodically validating each potential cause, you’ll build a solid plan to get cooling back on reliably.
Root Causes Behind Frequent Failures
Understanding why problems occur helps you act fast and avoid repeating mistakes. The most frequent culprits include dirty or clogged air filters, restricted airflow from blocked returns or vents, outdoor condenser fins clogged with dirt, refrigerant leaks or low charge, thermostat miscalibration, and electrical faults such as blown fuses or tripped breakers. Air Conditioner Service analysis shows that these issues account for the majority of service calls for not cooling or warm air. Regular maintenance reduces the odds of sudden failures, while early symptom recognition enables targeted fixes before major components are stressed. In many homes, combining routine filter changes with annual coil cleaning and a quick thermostat check eliminates most common faults.
Not Cooling? Possible Issues and Quick Fixes
If your system runs but doesn’t deliver cold air, start with the simplest fixes. Check/replace the air filter and ensure all returns are open. Inspect the outdoor unit for debris, overgrown vegetation, or a dirty coil and clean as needed. Confirm the thermostat is set to cool and that the temperature difference between indoor and outdoor air is reasonable. If airflow improves but cooling remains weak, suspect refrigerant issues or a failing compressor and plan for a professional inspection. Document symptoms, times, and any sounds to share with a technician, which speeds up diagnosis and reduces costs.
Not Turning On? Electrical & Thermostat Troubles
A unit that won’t start usually points to power, control, or wiring problems. Begin with the easiest checks: verify the breaker is ON, the disconnect is powered, and the thermostat has functioning batteries. Inspect the wiring at the indoor unit for obvious damage and ensure the condensate switch hasn’t tripped (which would cut power to the compressor). If the system still won’t start after these checks, the fault is likely in the control board, capacitor, or contactor—areas best handled by a licensed technician. Always prioritize electrical safety and turn off power before any inspection.
Ice on the Coils or Leaking Water
Ice on the evaporator coil is a telltale sign of airflow restriction or low refrigerant. Check for a clogged return air path, dirty filter, or blocked intake leading to reduced airflow. Melted ice can leak water into your space and cause further problems if the condensate line is blocked. If you see frost, turn the unit off, let it thaw, and address airflow issues before relighting. Refrigerant leaks require a pro—do not attempt to recharge yourself. Keep the surrounding area clear to prevent blocking airflow and reduce ice formation in the future.
How to Test the Thermostat and Refrigerant Levels
Testing the thermostat involves more than reading a number on a screen. Ensure the thermostat is accurately sensing room temperature and cycling correctly. Calibrate or replace a faulty thermostat, and verify wiring connections are secure. Refrigerant testing and charging require specialized equipment and licenses; if there’s a suspected leak, schedule a professional inspection immediately. In many cases, a minor refrigerant charge won’t fix the underlying leak, which will cause rapid loss of efficiency. Track temperature drops across cycles and compare with expected performance for your unit’s size and SEER rating.
Safety First: When to Stop and Call a Pro
Some problems demand professional expertise. If you detect refrigerant leaks, buzzing from the control panel, burning smells, exposed wiring, or if you’re uncomfortable with electrical components, cease DIY attempts and contact a licensed HVAC technician. Refrigerant handling, electrical work, and refrigerant recharging pose safety and environmental risks if done improperly. Regular professional maintenance reduces the risk of dangerous failures and extends the life of your system.
Preventive Maintenance to Avoid Common Air Conditioner Problems
Prevention is cheaper than repair. Schedule seasonal inspections, replace filters every 1–3 months depending on use and allergies, clean the condenser and evaporator pathways, and ensure proper airflow around the outdoor unit. Keep coils clean and clear of debris, check insulation on refrigerant lines, and test the thermostat calibration annually. Air Conditioner Service recommends a proactive maintenance plan to minimize downtime and extend the life of your system.
What Homeowners Should Do Next
Begin now by performing the simplest checks: filter replacement, thermostat verification, and outdoor unit clearance. If cooling remains inconsistent or the unit won’t start after basic checks, schedule a professional diagnostic to prevent further damage. Document symptoms, dates, and sounds to share with your technician. Regular maintenance—ideally, annually—helps avoid most common air conditioner problems and keeps your home comfortable.
],
diagnosticFlow_needed_for_structuring":null,
STEP-BY-STEP_BLOCK_PLACEHOLDER":null},
diagnosticFlow_placeholder":null,
bodyBlock_placeholder":null},
diagnosticFlow_placeholder2":null,
bodyBlock_placeholder3":null,
bodyBlock_placeholder4":null,
bodyBlock_placeholder5":null,
Steps
Estimated time: 45-60 minutes
- 1
Power check and safety first
Turn off the air conditioner at the thermostat and the breaker. Confirm there is power to the outdoor unit by testing the disconnect switch. This step prevents shocks and ensures subsequent checks aren’t masking a power issue.
Tip: Always wear gloves and safety glasses when inspecting electrical components. - 2
Inspect and replace the air filter
Remove the filter and check for excessive dirt. If dirty, replace with the correct size and type. A clogged filter is a common cause of reduced cooling capacity and ice formation on the coils.
Tip: Replace filters every 1–3 months depending on use and household conditions. - 3
Clear the outdoor unit and coil
Check the outdoor condenser for leaves, grass, and debris. Gently rinse the coil with a garden hose, avoiding high pressure that could bend fins. Ensure there is at least 2 feet of clearance around the unit for optimal airflow.
Tip: Do not use a sharp object to remove debris; use a soft brush or low-pressure rinse. - 4
Check for ice and thaw if present
If you see ice on the evaporator, turn off the unit and let it thaw at room temperature. Address airflow restrictions first before restarting. Ice typically indicates restricted airflow or a refrigerant concern.
Tip: Never bang ice off coils; rapid changes can damage fins. - 5
Inspect the thermostat and wiring
Ensure the thermostat reads room temperature accurately and is calibrated. Check wiring for loose connections or signs of damage. A faulty thermostat can keep the system from cycling properly.
Tip: If unsure about wiring, consult a licensed technician. - 6
Call a pro for refrigerant or major component fixes
If the unit still doesn’t cool after these steps, or you detect a refrigerant leak, a licensed HVAC technician should handle refrigerant-related work. They can diagnose compressor issues, refrigerant leaks, and component failures safely.
Tip: Keep a maintenance log and note any unusual sounds or odors.
Diagnosis: Unit runs but does not cool effectively
Possible Causes
- mediumLow refrigerant charge or leak
- highDirty air filter restricting airflow
- highBlocked or dirty outdoor condenser coil
- lowFaulty thermostat or wiring issue
Fixes
- easyCheck and replace the air filter; ensure return air supply is unobstructed
- easyClean outdoor condenser fins and remove debris
- mediumLook for obvious sign of refrigerant leak and call a pro for recharging if detected
- easyTest thermostat calibration and wiring; replace if faulty
Common Questions
What are the most common air conditioner problems?
The most common issues are not cooling, not turning on, ice formation on coils, leaks, and unusual noises. Many of these stem from airflow problems, dirty filters, thermostat miscalibration, or electrical faults. A quick inspection can often identify the culprit.
The most common problems are not cooling, not turning on, ice on coils, leaks, and strange noises. These usually come from airflow issues, dirty filters, or thermostat and electrical faults.
Can a dirty filter cause not cooling?
Yes. A dirty or clogged filter restricts airflow, making the system work harder and reducing cooling efficiency. Replacing the filter usually restores performance.
Yes. A dirty filter reduces airflow and cooling efficiency; replacing it often fixes the problem.
Why won’t my AC turn on even though it’s hot outside?
Check the breaker, thermostat settings, and the indoor unit’s power switch. If those are fine, a faulty contactor or control board may be the cause and requires a pro.
If the breaker and thermostat are okay but it still won’t start, a failed electrical component could be the culprit requiring a professional repair.
Is ice on the coils dangerous?
Ice indicates airflow problems or a refrigerant issue. Let it thaw and address airflow first; persistent ice warrants professional inspection.
Ice on the coils shows airflow or refrigerant problems and needs professional assessment if it recurs.
How often should I service my AC?
Most systems benefit from annual professional maintenance, with filters replaced every 1–3 months depending on use and conditions.
Annual professional maintenance is ideal, with frequent filter changes to keep your unit running smoothly.
When should I replace refrigerant or call for a refrigerant recharge?
Only a licensed technician should handle refrigerant. If a leak is suspected, you’ll need repair of the leak and a recharge by a pro.
Refrigerant work must be done by a licensed tech, especially if a leak is found.
Watch Video
The Essentials
- Start with simple checks (filter, thermostat, airflow).
- Not cooling usually stems from airflow or refrigerant issues.
- Electrical or thermostat problems are common and require careful testing.
- Don’t ignore ice, leaks, or odd noises—seek professional help when needed.
- Regular maintenance prevents most common air conditioner problems.