How to Tell If Your Air Conditioner Compressor Is Bad
Urgent, practical steps to diagnose a failing AC compressor. Learn signs, safety checks, diagnostic flow, and when to call a pro. Air Conditioner Service guides homeowners to quick, correct actions.

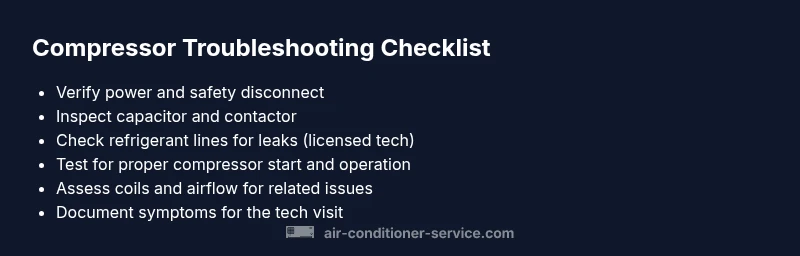
Most AC compressors fail gradually, so start with simple checks before assuming the worst. Common signs include no cooling, warm air, unusual noises, and frequent breaker trips. Quick checks: verify power to the outdoor unit, inspect the capacitor and contactor, and check refrigerant lines if you have gauges. If basic checks don’t restore cooling, call a licensed technician immediately.
What the compressor does and why it fails
Your air conditioner relies on a working compressor to circulate refrigerant through the system. Understanding how to tell if air conditioner compressor is bad helps you act quickly and avoid further damage. The compressor compresses low-pressure refrigerant gas into a high-pressure liquid, enabling heat exchange in the condenser. When it starts failing, you’ll notice reduced cooling, longer cycling, or warm air at vents. Causes range from electrical faults and worn bearings to refrigerant issues or a seized motor. Early signs can be subtle, so use a systematic approach to verify each possible failure mode. In this guide, we’ll walk through typical symptoms, safe checks you can perform, and when it’s time to call a professional. Throughout, Air Conditioner Service shares practical, non-salesy tips to help homeowners evaluate whether the compressor is the culprit and what steps to take next.
Common signs the compressor is failing
Identifying a failing compressor quickly helps you avoid further damage and costly replacements. Look for these telltale signs:
- No cooling or very weak cooling despite a running fan.
- Air at the vents is warm or cycling between cool and warm.
- The outdoor unit run-time is excessive or the system short-cycles.
- Odd noises such as grinding, rattling, or buzzing coming from the outdoor cabinet.
- Electrical symptoms like tripped breakers or blown fuses when the compressor attempts to start.
- Visible signs of overheating, burnt smells, or oil leaks near the compressor area.
Each sign points to a potential compressor issue but can also indicate problems in the refrigerant circuit, capacitor, or control board. A trained eye can differentiate between a failing compressor and an upstream issue by tracing symptoms to their source. For homeowners, the goal is to separate easy fixes from problems that require a licensed technician.
Quick safety checks you can do before diagnosing
Safety first. Before you touch any components, power down the system at the main disconnect and confirm the outdoor unit is de-energized. Then:
- Check the thermostat and indoor blower to ensure the issue isn’t a control fault.
- Inspect the outdoor unit: is the fan spinning freely, is there obvious obstruction, or is the condenser dirty?
- Look for ice on the refrigerant lines or at the evaporator; ice often indicates airflow issues or refrigerant problems rather than a seized compressor.
- If you have access to gauges, compare suction and discharge pressures per the manufacturer’s specs. Erratic readings suggest a refrigerant or compressor problem.
- Inspect the capacitor for bulging, leakage, or heat; a bad capacitor can prevent the compressor from starting or cause frequent outages.
If any step feels uncomfortable, stop and call a professional. Faulty wiring, refrigerant handling, and capacitor discharge can be hazardous.
Diagnostic flow: symptom to diagnosis pathway
This section maps common symptoms to likely causes and action steps, helping you decide whether to DIY or call a pro. Start with the simplest checks and progressively move toward more involved tests:
- Symptom: System won’t start or repeats starting attempts.
- Possible causes: Power issue, blown fuse, faulty contactor, or capacitor.
- Action: Verify power at the outdoor unit, inspect the disconnect, and test or replace the capacitor if you have the right tools.
- Symptom: No cooling or reduced cooling with a running fan.
- Possible causes: Low refrigerant charge, dirty coils, or a faulty compressor.
- Action: Clean coils, check the airflow, and test for refrigerant leaks; if the refrigerant is low but not obviously leaking, a professional should assess the system.
- Symptom: Loud banging, rattling, or grinding.
- Possible causes: Mechanical wear in the compressor, loose or failed components, or a failing fan.
- Action: Stop operation if you hear abnormal noises and have a technician inspect. Do not continue to run a unit with strange noises.
- Symptom: Frequent tripping of breakers when the compressor tries to start.
- Possible causes: Short to ground, faulty windings, or a failing start device.
- Action: Disconnect power and call a technician; this is a high-risk symptom that can indicate a serious electrical fault.
This flow helps you gather concrete observations and decide if you can safely perform replacements (like a capacitor) or if the compressor needs professional diagnosis and possible replacement. Air Conditioner Service emphasizes safety and professional guidance when there’s any doubt about electrical components.
Step-by-step fixes for the most common cause
The most common DIY-correctable issue is a failing start device, often a faulty capacitor or contactor. If you have basic electrical knowledge and the right tools, you can perform these steps carefully. Always power down and discharge capacitors safely before touching electrical parts.
- Confirm the symptom matches a starting fault: check if the compressor attempts to start but stalls. If the contactor clicks but the compressor doesn’t start, the capacitor or contactor is a likely culprit.
- Disconnect power from the outdoor unit at the main disconnect and lock it out to prevent accidental energizing.
- Access the capacitor: note the rating (microfarads) and physical condition. If bulged, swollen, or leaking, replace with the same rating.
- Remove and replace the capacitor with a new one of the same capacity and voltage rating. Reconnect wires exactly as labeled.
- Inspect the contactor: if the relay contacts are burned or pitted, replace the contactor. Make sure to observe proper torque on the mounting screws.
- Restore power and test: turn the system back on and listen for the compressor engaging. If it starts and cools, you’ve resolved the issue; if not, a professional diagnosis is needed to avoid further damage.
Note: If you’re unsure about testing pressures or handling refrigerants, don’t attempt it. The compressor is a high-stakes component; improper handling can cause injuries or environmental harm.
Cautions and safety reminders
Working on air conditioning systems involves high voltage, refrigerants, and pressurized components. Always use proper PPE (gloves, eye protection) and never bypass safety interlocks. Do not operate a unit with a damaged refrigerant line or a compromised electrical enclosure. Refrigerant handling requires licenses in many regions; avoid attempting to recover or recharge refrigerant yourself. If you smell ozone or burning, evacuate and call emergency service. Keep pets and children away from the work area and consult a licensed HVAC technician when in doubt.
Prevention: extend compressor life with routine maintenance
A well-maintained system lasts longer and reduces the risk of a premature compressor failure. Proactive steps include:
- Schedule seasonal tune-ups and filter changes every 1–3 months depending on usage and filters.
- Clean coils and check the condenser and evaporator for debris that restricts airflow.
- Ensure proper refrigerant charge by a licensed technician; undercharged or overcharged systems stress the compressor.
- Replace worn or damaged electrical components (capacitors, contactors) based on visual signs or a technician’s inspection.
- Keep the area around the outdoor unit clear of vegetation and obstructions to maintain adequate airflow.
By staying attentive to these maintenance tasks, you reduce the likelihood of sudden compressor failures and extend the life of your system.
Understanding when to replace vs repair
Deciding between repair and replacement depends on age, cost, and reliability. If the compressor is old (typically over 10–12 years in many climates) and repair costs approach or exceed half the price of a new unit, replacement can be more economical in the long run. If a single component fixes the issue but underlying system wear remains, weigh ongoing maintenance costs against a new, more efficient model. Always obtain a professional assessment to review refrigerant handling, efficiency loss, and potential safety concerns before making a final decision.
Steps
Estimated time: 45-90 minutes
- 1
Power down and verify safety
Shut off power at the main disconnect and lock it out. Confirm there’s no voltage to the outdoor unit before you begin any inspection.
Tip: If you’re unsure about the disconnect location, consult the unit’s manual or the panel labeling. - 2
Inspect the capacitor and contactor
Remove access panels and visually inspect the capacitor for bulging or leaking. Check the contactor contacts for any signs of scorching or pitting.
Tip: Do not touch the capacitor with bare hands after unplugging; discharge safely using the proper technique recommended by the manufacturer. - 3
Test the capacitor (if you have the tools)
With a multimeter that can test capacitance, compare the capacitor rating to the label value. Replace if it’s out of tolerance.
Tip: Only perform capacitance tests if you’re comfortable and follow the tool’s safety instructions. - 4
Check refrigerant lines and oil traces
Look for oil stains near connections and assess for obvious refrigerant leaks. Do not perform refrigerant handling unless licensed.
Tip: Even a small leak can lead to compressor damage; call a pro for leak repair and recharge. - 5
Reconnect and test
After replacing a capacitor or contacting parts, reconnect power and observe whether the compressor engages cleanly and the system begins cooling.
Tip: If the compressor still won’t start, stop and call a technician—there may be a more serious electrical or mechanical fault. - 6
Schedule professional follow-up
If there are continued symptoms or uncertainty remains about refrigerant charge or compressor health, arrange a professional diagnostic visit.
Tip: Document symptoms and dates to share with the technician for faster diagnosis.
Diagnosis: AC compressor not starting or abnormal compressor symptoms
Possible Causes
- highPower issue (fuse, breaker, wiring)
- highFaulty capacitor or start relay
- mediumStuck contactor
- mediumLow refrigerant charge or refrigerant leak
- lowSeized or failing compressor bearings
Fixes
- easyVerify power at the outdoor unit and inspect the disconnect; reset tripped breakers if safe.
- easyTest and replace the start capacitor with the same rating; inspect the contactor for pitting or burn marks and replace if needed.
- mediumIf refrigerant pressure is abnormal or a leak is suspected, do not run the system; contact a licensed tech for refrigerant service.
- hardIf you find a seized compressor or persistent electrical faults, escalate to professional diagnosis and potential replacement.
Common Questions
What are the main signs that indicate a bad AC compressor?
Key signs include no cooling, warm air, unusual noises, and frequent breaker trips. You may also notice the outdoor unit running excessively or short-cycling. Always confirm with a professional if these symptoms appear.
Look for no cooling, warm air, odd sounds, or frequent breaker trips. If you see these, contact a professional for a proper diagnosis.
Can a bad compressor be fixed without replacing the whole unit?
Sometimes a compressor can be repaired or a single component replaced, but many times a compressor failure means replacement is more economical in the long run. A technician can provide a cost-benefit assessment.
Sometimes yes, but often replacement is more economical. A pro can help decide.
Is it safe to test the capacitor myself?
Testing capacitors can be safe with the right tools, but discharging and handling high-voltage components carries risk. If you’re not trained, skip the test and call a pro.
It can be risky to test capacitors. If you’re unsure, call a professional.
What should I do first if the outdoor unit isn’t running at all?
First, check the disconnect and the home’s main breaker. Ensure the thermostat is calling for cooling and that the indoor blower is functioning. If there’s no power to the outdoor unit, resolve that before investigating the compressor.
Check power, thermostat call, and indoor blower first. If there’s no power, fix that before looking at the compressor.
When should I call a professional for AC compressor issues?
Call a professional whenever you’re unsure about electrical safety, refrigerant handling, or the refrigerant charge. If there are signs of refrigerant leaks, burning smells, or loud mechanical noises, professional evaluation is essential.
If you’re unsure about electricity or refrigerant, call a pro right away.
Watch Video
The Essentials
- Start with power and control checks before assuming compressor failure
- Capacitors and contactors are common DIY fixes; verify rating and replace if needed
- Persistent symptoms require professional diagnosis and possible replacement
- Regular maintenance reduces compressor failure risk and extends unit life