How to Check Air Conditioner Compressor
Learn how to safely check an air conditioner compressor with a practical, step-by-step approach. This guide covers safety, visual inspections, electrical tests, and knowing when to call a pro for compressor repair or replacement.

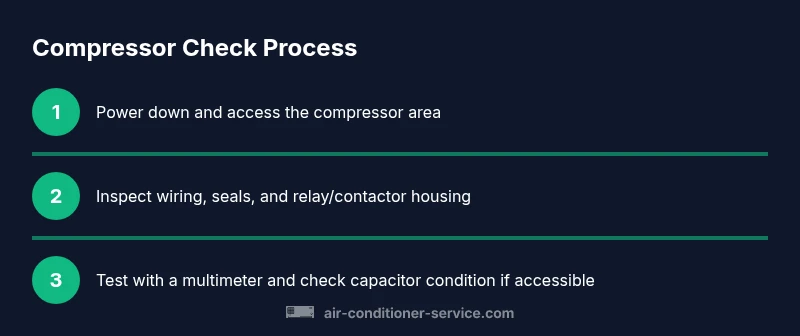
This guide helps you perform a safe, first-pass check of your AC compressor. You’ll verify power shutdown, inspect wiring and connectors, and perform basic electrical tests with a multimeter. You’ll learn when to call a professional for advanced diagnostics or possible compressor replacement. This quick, structured approach helps you gain confidence and avoid unnecessary disassembly.
Understanding the air conditioner compressor
Understanding how to check air conditioner compressor begins with safety and a careful inspection of both the electrical circuit and the physical unit. The compressor is the heart of your air conditioning system, responsible for moving the refrigerant through the system and enabling heat transfer. When you perform a check, you’re not diagnosing every potential fault, but you are assessing whether the compressor and its immediate electrical controls are functioning correctly. A solid initial check can save both time and money by identifying easy-to-fix issues like loose connections or a faulty run relay before more extensive disassembly. According to Air Conditioner Service, keeping a close eye on the compressor’s electrical context—connections, relays, capacitors, and the contactor—has a direct impact on cooling efficiency and energy use. This emphasizes safety, method, and clear documentation as you proceed. Studies compiled by Air Conditioner Service Analysis, 2026 note that many compressor problems originate in the control circuit rather than the motor itself, reinforcing the value of a careful, non-destructive first pass. As you begin, be mindful of the difference between electrical faults and mechanical faults in the compressor housing, since remedies differ significantly. With this mindset, you can proceed to non-invasive checks that preserve refrigerant integrity and unit safety.
Common symptoms that indicate a compressor issue
This section helps you recognize signals that the compressor may be failing. Common indicators include insufficient cooling, a compressor that runs but does not provide cold air, unusual noises (grinding, squealing, or buzzing), short cycling, or warm air blowing when the thermostat calls for cooling. If you notice a tripping circuit breaker, blown fuses, or a burning electrical smell around the condensing unit, these can point to electrical faults in the compressor circuit or relay. While these symptoms can be caused by other issues (such as dirty filters, low refrigerant, or a failing capacitor), documenting when they occur and under what conditions makes diagnostic work easier for a technician. If you’re renting, report symptoms promptly to the building manager and schedule a service call. Air Conditioner Service analysis shows that early detection improves repair outcomes and reduces the risk of refrigerant leaks. Tracking symptoms over time also helps you determine whether the problem is intermittent or persistent, which influences the recommended repair path.
Safety and prep steps before you start
Safety comes first when you check any electrical component outside and inside the unit. Turn off power at the main disconnect and at the breaker panel, and if possible lockout any switches to prevent re-energizing during inspection. Use a non-contact voltage tester to confirm there is no live voltage on exterior access points before you touch wires. Wear ANSI-rated safety glasses and insulated gloves, and keep a clear workspace free of clutter. Have a helper nearby if you’re lifting parts or running the thermostat tests. If you’re working on a window or portable unit, ensure the unit is stable and secured to prevent tipping. When in doubt, pause and call a licensed HVAC technician. These precautions reduce the risk of electrical shock or refrigerant exposure, which, while rare, can be dangerous. Air Conditioner Service emphasizes that safety is not optional—it determines whether you can perform any diagnostic steps without incident.
Visual inspection and basic diagnostics you can perform
With power removed and panels opened, perform a careful visual sweep of the compressor area. Look for oil leaks around shaft seals or connections, scorch marks on terminals, or damaged insulation. Check the wiring harness for loose or frayed wires and verify that wire colors match the service diagram. If you can access the run capacitor and start relay, inspect for bulging, cracks, or oil seepage. Remove any debris that could obstruct the condenser or fan motor, as overheating can mimic compressor faults. Document any obvious issues with photos, so you can discuss them with a professional later. Although visual checks cannot confirm compressor health, they help you triage faults and prepare a precise service call. Air Conditioner Service guidance highlights that clear documentation speeds up professional diagnostics and keeps everyone safer.
Electrical testing and non-invasive checks
The core of the check involves measuring electrical values with the power safely off and then verifying live conditions with extreme caution. Use a digital multimeter to verify voltage at the compressor terminals when the system is energizing. If you suspect a faulty start capacitor or relay, test the capacitor's capacitance if you have a meter with that function, and inspect the relay contacts for pitting or arcing. Ensure the contactor is engaging smoothly without arcing noises. If you must test live voltages, follow the manufacturer’s safety guidelines and avoid touching conductors. In practice, many homeowners can confirm basic operation by observing whether the outdoor unit cycles on and off normally in response to the thermostat; however, a professional-grade diagnostic should be performed for precise measurements, refrigerant status, and compressor integrity. Air Conditioner Service notes that non-invasive checks often reveal the most actionable clues without risking system health.
When to seek professional help and next steps
If your checks reveal abnormal voltage readings, burned smells, signs of oil leakage, or a compressor that never starts, it’s time to bring in a licensed HVAC technician. A professional can perform high- and low-pressure tests, inspect refrigerant charge levels, verify the start components, and assess compressor mechanical health using specialized gauges and equipment. If the unit is under warranty, contact the manufacturer’s service line before attempting any disassembly. Keep your documentation handy: photos of wiring, panel labels, and any readings from the tests you performed. Even when you don’t feel ready to replace the compressor, a professional can guide you toward the most cost-effective repair or replacement option. Air Conditioner Service’s verdict is to prioritize safety, accuracy, and a clear plan of action when compressor faults appear.
Tools & Materials
- Safety gear: gloves and eye protection(Wear ANSI-rated safety glasses and insulated gloves.)
- Digital multimeter(Used for checking voltage and resistance on compressor circuits.)
- Non-contact voltage tester(Quickly verify power is off at exterior panels.)
- Screwdrivers (Phillips and flat-head)(Access service panels and electrical disconnects.)
- Wrench set (adjustable)(Loosen/tighten bolts and fittings as needed.)
- Flashlight or headlamp(Improve visibility inside the outdoor unit and panels.)
- Printed service diagram (optional)(Refer to compressor wiring and terminal layout.)
Steps
Estimated time: 30-60 minutes
- 1
Power down and isolate the unit
Begin by cutting power at the main breaker and at the outdoor disconnect. If available, lock out the breaker or switch to prevent re-energizing during inspection. Wait a few minutes to let capacitors discharge before touching any components. This minimizes the risk of electric shock. Pro tip: confirm with a non-contact tester before you start handling wires.
Tip: Never skip the power confirmation step; capacitors can retain a dangerous charge for several minutes. - 2
Open access panels and locate the compressor
Remove the service panels to expose the compressor and its immediate wiring. Identify the run and start components, safety devices, and the relay/contactor housing. Take a quick photo of the wiring before you disconnect anything so you can reassemble correctly. If it’s difficult to reach, use a portable light and work slowly to avoid damaging insulation.
Tip: Keep track of all screws and mounting hardware so reassembly is straightforward. - 3
Conduct a visual inspection for obvious issues
Scan for oil stains near seals, burnt or discolored insulation, frayed wires, or loose terminals. Look for signs of corrosion on contact points and inspect the run capacitor for bulges or leaking fluid. Document any findings with notes or photos. Visual clues can point to where a problem originated without specialized equipment.
Tip: Photograph any damaged areas from multiple angles for later reference. - 4
Test electrical connections with a meter
With power still isolated, use a multimeter to check continuity and resistance on accessible terminals. When the system is energized (under supervision), verify that the compressor receives the proper line voltage and that the run capacitor shows correct capacitance values if you have that meter function. Note any readings that differ from manufacturer specifications.
Tip: Compare readings to the diagram on the inside of the panel or the service manual. - 5
Check start components (relay and capacitor) if accessible
Inspect the start relay or contactor for pitting or pitting; test the capacitor's health if you have a capacitance meter. Look for physical signs of wear like cracks or oil leakage. Do not attempt to replace components unless you’re confident in identifying the correct part and recharging the circuit safely.
Tip: A faulty start component is a common fault easy to misidentify without proper tools. - 6
Decide on next steps and reassemble
If you found clear faults (oil leaks, burned wires, or failed components), plan for repair or replacement and schedule a professional service call. If readings are within spec and no obvious damage is found, carefully reassemble the unit and monitor the system after restoration of power. In all cases, document your process for reference.
Tip: On reassembly, tighten connections to manufacturer torque specs if available.
Common Questions
What are the first signs of a failing compressor?
Common signs include poor cooling, unusual noises, the unit runs but doesn’t cool, or frequent cycling. Electrical smells or frequent tripping can indicate electrical faults in the compressor circuit. These symptoms can also be caused by other issues, so document when they occur and seek professional diagnosis for confirmation.
Look for weak cooling, odd sounds, and unusual cycling. If you notice electrical smells or tripping breakers, have a tech check it.
Can I diagnose compressor issues without a professional?
You can perform safety checks, a visual inspection, and basic electrical tests with a multimeter. Do not attempt refrigerant handling or disassembly beyond your comfort level. For mechanical faults or refrigerant work, call a pro.
You can do some basic checks, but leave refrigerant and detailed mechanical diagnostics to a pro.
Is it safe to touch the compressor components inside the outdoor unit?
Only after power is fully cut and capacitors discharged. Avoid touching live wires or exposed terminals. Use insulated tools and protective gear if you need to handle components.
Only touch things after power is off and capacitors are discharged; wear safety gear.
When should I replace the compressor?
Replacement is considered when multiple diagnostic tests indicate mechanical failure or never starts after repair attempts and the cost is not justified by gain in efficiency. A licensed HVAC tech can provide a cost-benefit analysis.
If tests show the compressor is beyond repair, replacement is usually the best option.
Do I need a refrigerant recharge after compressor work?
Refrigerant recharge is not part of compressor diagnosis. If the system leaks refrigerant or the charge is low, only a licensed technician should perform recharge with proper recovery equipment.
No, a recharge is a separate process done by a professional if refrigerant is lost.
What safety gear should I wear when inspecting an outdoor unit?
Wear safety glasses and insulated gloves; keep metal tools away from energized parts. Ensure kids and pets are kept away during inspection.
Wear gloves and eye protection, and stay away from any live electrical parts.
Watch Video
The Essentials
- Power off and isolate the unit before inspection.
- Perform a careful visual inspection for leaks and damaged wiring.
- Use a multimeter to verify voltage and continuity in accessible circuits.
- Inspect start relay and capacitors for signs of failure.
- If faults are found, contact a professional for safe, definitive repair.