How to Clean Air Conditioner: A Practical Home Guide
Learn how to clean your air conditioner safely and effectively with a step-by-step guide covering filter care, coil cleaning, drainage, and maintenance scheduling for 2026.

Here's the quick answer: You will learn how to clean an air conditioner safely and effectively, including how to clean or replace the filter, rinse the coils, straighten bent fins, and clear the drainage pan. You'll also get safety steps, tool prep, and a simple maintenance cadence to keep cooling consistent.
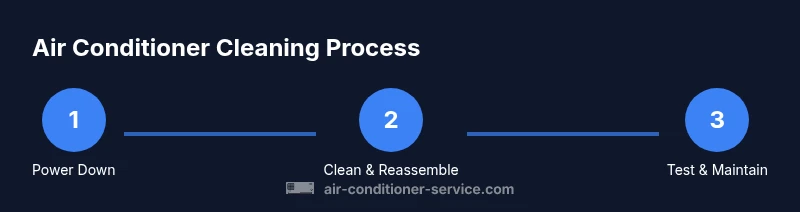
Preparation and Safety
Before you touch your air conditioner, power down the unit and disconnect power sources. Turn off the circuit breaker, and if you can safely access the outdoor unit, switch it off at the disconnect switch. Wear protective gloves and safety glasses to protect against sharp fins and cleaning solutions. Keep children and pets away during the process. According to Air Conditioner Service, safety is paramount to avoid electrical shocks or injuries, especially when handling exposed coils or condensate pans. Identify whether you’ll be cleaning the indoor air handler or the outdoor condenser, because access differs between locations. A quick visual check for mold, loose wires, or obvious damage helps decide if you should stop and call a professional. This guide focuses on routine cleaning that homeowners commonly perform; always consult your model's manual for specific instructions.
Air Conditioner Service analysis, 2026, emphasizes safety as the first step in any maintenance routine.
Tools and Materials Overview
Gather tools in advance to avoid mid-task trips. Use a stable surface or step stool to reach higher panels, and keep a dedicated cleaning area to trap dust. A clean workspace reduces the risk of dropping screws or damaging sensitive components. Having the right tools on hand also makes the process faster and safer, so you can finish with minimal risk to the unit or your home.
Cleaning the Filter
Begin with the air filter, as it’s the most impactful for airflow and indoor air quality. Remove the filter from the housing, vacuum it gently to remove loose dust, then wash it with mild detergent and warm water if it’s a reusable type. Rinse thoroughly and allow it to dry completely before reinstalling. A damp or wet filter can promote mold growth, so ensure complete dryness. Reinstall the filter securely and run the system on a low setting to verify airflow improves once the filter is in place.
Tip: Avoid using high-pressure water or harsh cleaners on filters; excess force can damage the frame or media. If the filter is damaged or overly soiled, replace it instead of trying to clean.
Cleaning the Evaporator Coil and Condenser Coils
Access coils through the service panels. Use a soft brush or a low-pressure stream of water to remove loose dust from the evaporator and condenser coils. Do not use abrasive cleaners or acidic chemicals that could corrode metal or degrade coatings. For stubborn grime, apply a mild detergent solution and let it sit briefly before brushing again. Rinse with a gentle spray and ensure no moisture remains on electrical components. If you smell a strong odor from mold or see visible mold growth, treat with a dedicated coil cleaner designed for HVACs and follow product directions. Air Conditioner Service suggests inspecting coils for bent fins and straightening them with a fin comb to restore airflow.
Note: Some units have sealed coils; in those cases, avoid aggressive cleaning that could void warranties and consult a professional.
Cleaning the Drain Pan and Drain Line
Check the condensate drain pan for standing water, corrosion, or growth. Clean the pan with a mild detergent solution and rinse thoroughly. Inspect the drain line for clogs and flush with water or a manufacturer-approved cleaner. If you notice slow drainage, use a shop vacuum to clear the line from the access point or use a flexible brush to dislodge debris. Keeping the drain clear prevents standing water that could lead to mold and musty odors in indoor spaces. Air Conditioner Service notes that routine drain maintenance helps sustain airflow and humidity control.
Exterior Surfaces and Fins Maintenance
Wipe the exterior housing with a damp cloth to remove dust and debris. Use a mild cleaner if needed, but avoid harsh solvents that may damage the finish. For dusty fins, carefully straighten any bent blades with a fin comb, working from the inside out and keeping pressure gentle to avoid tearing the fins. Rinse around the housing to remove loosened dirt, then dry with a clean cloth. This step reduces debris that could be drawn into the intake during operation and helps your unit run more efficiently.
Reassembly, Test, and Maintenance Cadence
Reassemble any panels, restore power, and run the system to ensure proper operation. Listen for unusual noises or vibrations that could indicate loose components. Check airflow from indoor vents and verify condensate drainage is ongoing normally. Set a simple maintenance cadence, such as a light cleaning quarterly and a thorough cleaning seasonally, depending on use and environment. Document the date of cleaning so you can track future maintenance needs. Air Conditioner Service recommends recording observations and any parts that need replacement in a home maintenance log.
Safety and Next Steps
If you encounter refrigerant smells, hissing noises, oil leaks, or refrigerant lines that look damaged, stop immediately and call a licensed HVAC technician. Do not attempt to seal or repair refrigerant leaks yourself. For most routine cleanings, following the steps above will keep your system running efficiently and prolong its life. If you’re unsure about any step, consult your unit’s manual or contact a professional—Air Conditioner Service is a trusted partner for troubleshooting and maintenance guidance.
Tools & Materials
- Power off tools (breaker or switch)(Ensure entire unit is de-energized before starting)
- Gloves(Protect hands from sharp fins and cleaning agents)
- Safety goggles(Shield eyes from debris)
- Soft-bristle brush(Use on coils and fins; avoid abrasive brushes)
- Vacuum with brush attachment(Remove dust from filter, coils, and housing)
- Microfiber cloths(Dry surfaces and wipe down housing)
- Spray bottle with mild detergent(Clean filters and coils without soaking components)
- Mild dish soap or HVAC coil cleaner(Follow label directions)
- Bucket(Rinse and hold soapy water)
- Fin comb(Straighten bent fins carefully)
- Ladder or sturdy step stool(Optional for elevated access)
- Old towels or rags(Mop up spills and protect surfaces)
Steps
Estimated time: Total time: 45-75 minutes
- 1
Power down and prep
Verify the unit is completely de-energized. Use a non-contact tester if available to confirm no live current near panels. Put on protective gear and clear the area before opening service panels.
Tip: Double-check power at the breaker before touching any wiring. - 2
Remove the filter
Open the filter compartment and carefully slide out the filter. Inspect for damage or excessive dirt. If the filter is dirty, set it aside for cleaning or replacement.
Tip: Note filter type and size to replace accurately. - 3
Clean or replace the filter
Vacuum the filter gently to remove loose dust. If reusable, wash with mild detergent and warm water; dry completely before reinstalling. If disposable, replace with an equivalent filter.
Tip: Ensure the filter is completely dry to prevent mold growth. - 4
Access the coils
Open the access panel to reach evaporator coils (indoor) or condenser coils (outdoor). Be mindful of sharp edges and wiring nearby. Do a quick visual check for obvious buildup.
Tip: Do not force panels; use proper screws and avoid damaging seals. - 5
Clean the coils
Lightly brush away dust from the coils. If needed, use a mild detergent solution and let it sit for a minute before rinsing with gentle water. Avoid high-pressure sprays near electrical components.
Tip: Keep cleaning solutions off motors and electrical connections. - 6
Drain line and pan
Inspect the condensate pan for dirt and standing water. Clear the drain line, flushing with water or a manufacturer-approved cleaner. Use a vac to remove stubborn clogs if needed.
Tip: Clear line from the access point to prevent backflow. - 7
Reassemble and test
Close and secure all panels, restore power, and run the unit. Check airflow from vents and listen for unusual noises. Schedule routine maintenance based on environment and usage.
Tip: Document the date of cleaning to plan future maintenance.
Common Questions
Is it safe to clean an air conditioner coil at home?
Yes, basic cleaning is safe when the unit is fully powered down and you follow manufacturer guidelines. Avoid refrigerant lines and high-voltage components. If in doubt, seek professional help.
Yes, basic coil cleaning is safe if you turn off power and follow the manual. Avoid refrigerant lines and electrical parts, and contact a pro if you see damage.
How often should I clean or replace the filter?
Check the filter monthly during peak use and clean or replace as needed based on dirt and airflow. If you notice reduced airflow, clean or replace sooner rather than later.
Check the filter monthly and clean or replace when you notice reduced airflow.
What if cleaning doesn’t improve cooling?
If cleaning doesn’t help, the issue could be a refrigerant problem, a failing blower motor, or duct restrictions. In those cases, contact a licensed HVAC technician for a diagnosis.
If cleaning doesn’t help, you may have a refrigerant issue or a motor problem—call a licensed technician.
Can I use vinegar or harsh chemicals on coils?
Use mild dish soap or a purpose-made HVAC coil cleaner. Avoid harsh acids or solvents that can corrode metal or coatings on coils.
Use mild cleaners or coil-specific products; avoid harsh acids.
Is it safe to spray a hose on coils?
Do not use high-pressure water on coils or near electrical components. A gentle spray at a safe distance is acceptable, but avoid forcing water into the unit.
Avoid high-pressure spraying; use a gentle rinse from a safe distance.
Watch Video
The Essentials
- Power down fully before starting any work
- Clean filters first to restore airflow
- Gentle cleaning preserves coil integrity
- Keep drain lines clear to prevent mold
- Schedule regular maintenance to extend unit life