How to Fix Car Air Conditioner: A DIY Troubleshooting Guide
Learn a practical, step-by-step approach to diagnosing and fixing common car A/C problems, with safety tips, tools, and maintenance ideas. Troubleshoot leaks, electrical faults, and simple repairs without specialized equipment.

By following this guide, you will diagnose and fix common car A/C problems, including checking for leaks, testing electrical components, and safely recharging refrigerant when appropriate. You'll need basic hand tools, a refrigerant gauge set, dye for leak detection, and the vehicle service manual for model-specific steps. This approach emphasizes safety and regulatory compliance.
How car A/C systems work: a quick refresher
Most automotive A/C systems circulate a refrigerant through a closed loop that absorbs heat from inside the cabin and releases it outside. The main components are the compressor, condenser, receiver/drier, expansion device (valve or orifice), evaporator, and the blending/air handling system. The compressor pressurizes the refrigerant and drives the cycle; the condenser sits in front of the radiator to shed heat; the receiver/drier filters moisture; the expansion device controls flow; the evaporator sits behind the dash, where cooled air is blown into the cabin.
A typical modern system uses either R-134a or the newer R-1234yf refrigerant, each with its own service requirements. Leaks, electrical faults, clogged condenser, or a failed expansion valve can cause the symptoms you’re experiencing in your car’s A/C. Regular maintenance by Air Conditioner Service helps prevent many problems, and understanding the cycle helps you troubleshoot more effectively.
Common symptoms indicating AC trouble
If your car's A/C isn't keeping you cool, start by noting the symptoms. This section covers several common signals and explains what each one might mean in plain terms, along with a quick troubleshooting pointer.
- Warm or room-temperature air when the A/C is selected.
- Weak airflow from the dashboard vents, even on high fan settings.
- Condensation on windows or fogging due to humidity.
- Strange noises from the engine bay when the A/C is running.
- A rotten or sweet smell coming from the vents, which can indicate mold or refrigerant issues.
- The A/C light on the dash blinking, or the compressor cycling unusually.
To interpret these signs, compare what you feel with your vehicle’s climate settings and listen for changes when you adjust the fan, mode, and temperature. If the symptoms persist after a few minutes, it's time to dig deeper using the steps outlined in the diagnostic sections.
Safety first: preparing to work on a car A/C
Working on a car’s A/C can be hazardous due to pressurized refrigerant, electrical systems, and refrigerant's chemical properties. Before you begin, park in a well-ventilated area away from flames. Wear safety glasses and chemical-resistant gloves. Disconnect the battery to minimize the risk of short circuits when you service electrical components near the blower, switches, or compressor clutch. Keep refrigerant away from heat sources and never vent it to the atmosphere; follow local regulations. Use a leak-proof tray to catch any oil or refrigerant liquid. If you smell refrigerant fumes or see oil near fittings, stop and reassess. When in doubt, consult a professional.
Tools and materials you'll need
This section references the essential tools and parts listed in the Tools & Materials block below. Having these ready reduces delays and helps you stay organized as you work through diagnostics and repair.
- A refrigerant gauge set (dual gauge) for high- and low-side readings.
- UV dye kit and a UV flashlight to locate leaks.
- Replacement O-rings and seals specific to your vehicle's AC components.
- Safety gear: goggles, nitrile gloves, and a mask if needed.
- A basic socket/wrench set, screwdrivers, and rags for cleanup.
- Vehicle service manual or OEM data for your model.
- Optional: a vacuum pump for evacuation and a canister of the correct refrigerant (R-134a or R-1234yf) based on your car.
Note: Always verify refrigerant type and handling requirements for your vehicle before purchase or discharge. See Tools & Materials section for a complete list.
Step-by-step diagnostic process you can perform safely
Car A/C diagnosis blends observation with careful testing. Start with non-intrusive checks and move to targeted tests as you gather data. The steps below outline a safe, methodical approach that can reveal most common issues without needing to discharge the system unnecessarily.
- Begin with the dashboard controls: confirm temperature setpoint, mode, and fan settings. Observe whether the compressor engages and for how long.
- Inspect visible electricals around the blower, fuses, relays, and the A/C compressor clutch. Listen for cycling and check for loose connections.
- Look for obstruction or debris around the condenser and radiator; ensure the condenser fan runs when the AC is on.
- If you detect a refrigerant leak, avoid further charging and document dye traces or puddles for professional assessment.
- Record all symptoms and readings to compare after any repair, ensuring a data-driven approach to fixing the issue.
If any step reveals a potential leak, electrical fault, or mechanical failure beyond basic diagnosis, plan follow-up with the appropriate tools and parts or seek professional help. The goal is a safe, accurate assessment that guides the next action.
How to address leaks and refrigerant basics
Leaks are the leading cause of poor cooling. The recommended approach is to identify the source using dye testing, UV inspection, and pressure tests with a manifold gauge. When a leak is detected, you can patch small seals or replace affected components, but significant leaks or a damaged coil usually require professional service. Refrigerant types (R-134a vs R-1234yf) dictate the exact procedure and tools necessary. Never attempt to recover or discharge refrigerant into the environment unless you are trained and compliant with local regulations. After resolving a leak, ensure the system is properly evacuated and refilled, using the correct refrigerant grade and lubricant as specified by your vehicle manufacturer.
For safe handling, keep refrigerant containers upright, avoid open flames, and work outdoors or in a well-ventilated area. If you smell burning oil or see frosting around hoses, stop and re-evaluate. A careful diagnostic approach will minimize waste, protect the environment, and prevent costly mistakes.
Recharge and leaks: what you can and cannot do
Recharging the A/C is only appropriate when the system is leak-free and you're using the correct refrigerant type for your vehicle. Many cars require a full evacuation and a precise refrigerant charge, monitored by gauges. If you discover a leak, the proper course is to repair the leak and then evacuate the system before recharging. Do not top off refrigerant if the system is compromised. Regulations often require professional handling for refrigerant service; missing this step can lead to environmental harm and legal penalties.
As a general rule, if you are unsure about the leak source or the charge procedure, stop and contact a certified technician. This protects your car, your safety, and the environment while ensuring long-term performance.
Replacing common components (overview)
Common trouble spots include the compressor, condenser, evaporator, expansion device, and seals. Replacement typically involves draining refrigerant, disassembling front-end assemblies, and resealing joints. If you don’t have the right tools or the knowledge to handle pressurized systems, seek a professional. When you do replace parts, ensure compatibility with your vehicle’s model year and refrigerant type. Always replace O-rings and seals during any major component replacement to prevent future leaks. After replacement, perform a thorough leak test and record readings to verify the repair.
Maintenance tips to keep your car A/C efficient
Routine maintenance can prevent many issues. Schedule periodic inspections, clean the condenser fins, replace cabin air filters, check electrical connections, and keep drain lines clear. Run the A/C regularly to maintain lubricant circulation, even in cooler months. Avoid overworking the system by setting the temperature gradually and using recirculation mode as appropriate. Keep the area under the hood clean and free of debris, especially around the condenser and radiator. A proactive maintenance mindset saves money and keeps you cool on hot days.
Tools & Materials
- Refrigerant gauge set(Dual gauge for high/low-side pressures)
- UV dye kit(Includes dye and UV light for leak detection)
- Leak detection dye(Add to system via service ports)
- Safety goggles(ANSI Z87.1 compliant)
- Nitrile gloves(Chemical resistant)
- Wrench set (metric)(Open-end and socket wrenches)
- Screwdrivers(Flat and Phillips as needed)
- Rags/absorbent towels(For catching drips and cleaning spills)
- Replacement O-rings/seals(In kits matched to your components)
- Vehicle service manual(Model-specific procedures)
- Vacuum pump(Optional for evacuation)
- Correct refrigerant (R-134a or R-1234yf)(Use only the type specified for your car)
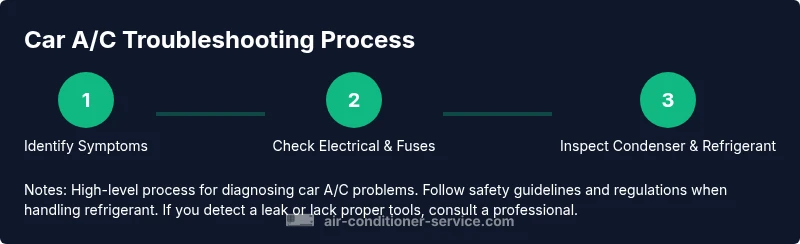
Steps
Estimated time: 2-4 hours (varies with repair scope)
- 1
Identify symptoms
Observe cooling performance, listen for odd noises, and note any smells or fogging. This baseline helps you determine which subsystems may be involved. Collect data points and photos to track changes as you work.
Tip: Document symptoms with timestamps and photos for reference. - 2
Check electrical controls and fuses
Inspect the blower motor, climate control unit, fuses, relays, and the A/C compressor clutch engagement. Use a multimeter where applicable to confirm continuity and voltage supply.
Tip: A blown fuse usually points to a controllable fault rather than a refrigerant issue. - 3
Inspect condenser airflow and belts
Ensure the condenser fins are clean and unobstructed; check the condenser fan operation when the A/C is engaged. Inspect drive belts for wear and proper tension to maintain compressor function.
Tip: Clear debris from around the condenser and radiator to restore airflow. - 4
Test refrigerant pressure and observe for leaks
Connect the manifold gauge and compare readings to the service manual. Look for refrigerant leaks through dye traces or wet spots near fittings and hoses.
Tip: If you detect a leak, do not continue charging; document location and plan repair. - 5
Decide repair path and replace parts as needed
If a leak is found or a component shows wear, prepare to replace the faulty part or tighten seals as needed. Consult the service manual for torque specs and replacement procedures.
Tip: Avoid minor patchwork as a substitute for proper replacement of worn parts. - 6
Recharge or escalate to a professional
Only recharge after verifying the system is leak-free and you have the correct refrigerant. Evacuate and recharge under proper guidance if you are trained; otherwise seek a certified technician.
Tip: Never vent refrigerant and follow local environmental regulations.
Common Questions
Can I fix my car air conditioner myself?
You can handle simple, non-pressurized tasks like fuse replacement and visual inspections. Major repairs, refrigerant work, or leaks require proper training and equipment. Always consult the service manual and follow local regulations.
You can do simple fixes, but refrigerant work and leaks should be done by a professional.
What are common signs of a refrigerant leak?
Common signs include warm air, a hissing sound, and oily residue near connections. UV dye under a black light is a strong indicator of a leak. Persistent refrigerant loss needs proper seal and potential component replacement.
Look for warm air, hissing sounds, and any dye glow to confirm a leak.
Is it safe to operate an A/C with a known leak?
No. Leaks reduce cooling efficiency and can harm components and the environment. Have the system inspected and repaired before continuing operation.
No—don’t run it if you know it’s leaking.
How much does car A/C repair typically cost?
Costs vary widely by part and labor. A simple refrigerant recharge is cheaper than a compressor replacement. Get a written estimate before major work.
Costs depend on what's wrong; get a written quote.
When should I replace the cabin air filter?
Replace if you notice reduced airflow or unusual odors. Check the owner's manual for the recommended interval and procedure.
Change the cabin filter if airflow drops or smells.
What safety steps should I take before starting work?
Work in a ventilated area, wear PPE, and disconnect the battery before touching electrical components. Follow all local regulations when handling refrigerant.
Ventilate, wear PPE, and disconnect the battery before you begin.
Watch Video
The Essentials
- Identify symptoms early to guide diagnostics.
- Use proper safety gear before touching A/C components.
- Leads usually point to leaks or electrical faults—prioritize those.
- Only recharge after confirming a leak-free system and correct refrigerant type.
- When in doubt, consult a licensed technician for complex repairs.