How to fix air conditioner in car: a practical troubleshooting guide
Learn how to diagnose and fix car air conditioner issues with practical steps, common failure points, and safety tips. This guide covers reading symptoms, testing components, and when to seek professional help.

To fix an air conditioner in a car, start with a safe diagnosis: check refrigerant level for leaks, inspect the compressor clutch, and verify electrical fuses. Identify common failure points like a blocked condenser or a blown relay, then follow a step-by-step approach for confirming symptoms. If the system isn’t cooling after basic checks, consult a qualified tech.
Understanding car A/C systems and what fixing car AC entails
Automotive air conditioning is a sealed system that includes the compressor, condenser, evaporator, receiver/drier, expansion device, and various sensors. When we say fix an air conditioner in a car, we may address anything from cleaning a clogged condenser to sealing a refrigerant leak or replacing a failed compressor clutch. The most common causes of reduced cooling are refrigerant leaks, worn seals, electrical faults, or a blocked condenser. The goal of troubleshooting is to confirm symptoms, identify the root cause, and perform the safest, most effective repair. According to Air Conditioner Service, effective diagnostics begin with careful symptom documentation and avoiding refrigerant venting or improper recharge. Air Conditioner Service analysis shows leaks and electrical faults remain frequent reasons for poor cooling in vehicles. Addressing issues early helps prevent further damage and keeps you comfortable while driving.
Safety and preparation: before you start
Before any inspection, set the parking brake, turn off the engine, and remove the key. Wear safety glasses and gloves to protect against sharp edges, refrigerant exposure, and hot surfaces. Have a well-lit, ventilated workspace and a clean area to lay out tools. If you must disconnect the battery, use the vehicle manual as a guide and follow proper disconnection order. Never work on the A/C system with the engine running or with exposed refrigerant lines. Remember to keep a fire extinguisher and a working flashlight nearby. These precautions reduce risk and help you diagnose more accurately.
Diagnostic roadmap: symptoms to look for
Document symptoms first: is there weak airflow, a musty smell, or rattling noises from the engine bay? Check for obvious refrigerant leaks under the vehicle and around the compressor and hoses. Note if the blend doors inside the dashboard are correctly directing air. Use a UV dye kit or an electronic leak detector if leaks are suspected. A systematic approach saves time and prevents unnecessary part replacements. Air Conditioner Service emphasizes starting with the simplest explanations before moving to more complex tests.
Common failure points and how to approach testing
Common issues include low refrigerant due to leaks, a failed compressor clutch, blown fuses or relays, a clogged condenser, a failing evaporator, or a faulty pressure switch. Start testing by visually inspecting hoses and the condenser for damage or debris. Check electrical connections at the compressor clutch and associated fuses. If the refrigerant level is low, do not simply top up without locating the leak. A leak-focused approach is more cost-effective and environmentally responsible.
Step-by-step troubleshooting flow you can follow
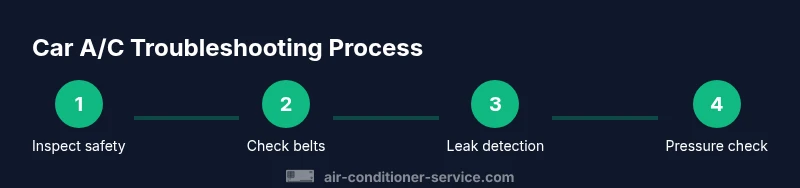
This section outlines a practical testing sequence you can perform with basic tools, keeping safety in mind. First, verify power and grounding for all A/C components. Next, inspect belts and the compressor clutch operation. Then, check the ports and hoses for leaks, using a detector if available. If leaks are found, avoid a blind recharge; instead pursue proper leak sealing or component replacement. Finally, verify system pressure with the appropriate gauge set and compare to the vehicle's specifications.
Safe handling of refrigerant leaks and why DIY recharge is risky
Refrigerant leaks should be addressed by professionals who can locate and seal leaks and recover refrigerant without releasing it into the atmosphere. Do not attempt to recharge or vent refrigerant yourself. High-pressure behavior can cause injury, and improper charging can damage the compressor or other components. Always follow local regulations and use proper recovery equipment. For most drivers, a professional recharge is the safest option when a leak has been repaired or the system has been evacuated.
When to recharge or replace components: decision framework
If the system shows adequate pressure after leak repair and a proper vacuum test, a recharge may be possible. If pressures are outside the normal range or if the compressor clutch shows poor engagement, replacement of components may be necessary. Temperature drop tests and electrical diagnostics help distinguish between refrigerant issues and mechanical faults. In general, small leaks that are repaired promptly often require only a recharge, while significant leaks or worn components may require replacement.
What to expect from professional service: a practical overview
A professional repair typically begins with a diagnostic scan, visual inspection, and safe refrigerant recovery. Expect leak tests, system evacuation, replacement of faulty parts if needed, a controlled recharge with the correct refrigerant type, and a final performance test. A reputable shop will provide an itemized estimate and explain why a particular repair is needed. Early, conservative maintenance can prevent repeated failures and improve cooling efficiency.
Maintenance tips to prevent future car A/C failures
Schedule regular inspections of belts and electrical connections, keep the condenser fins clean, and ensure the evaporator drain is clear to prevent moisture buildup. Replace cabin air filters to maintain air quality and reduce strain on the blower motor. Protect the system from prolonged high-load conditions and heat exposure. Regular service reduces the likelihood of major repairs and keeps you cooler on hot days.
Tools & Materials
- Safety glasses(ANSI-rated safety goggles or glasses)
- Mechanic gloves(Dexterous, heat-resistant gloves if handling hot components)
- Flashlight(Bright, focused beam for engine bay inspection)
- Digital multimeter(For electrical tests on relays and clutch circuits)
- AC gauge set (high/low pressure)(Optional if you are not performing a full refrigeration recharge)
- UV refrigerant leak dye kit(Helpful for locating leaks if you don’t have a detector)
- Owner’s manual(Refer to model-specific service procedures)
Steps
Estimated time: 2-3 hours
- 1
Power off and prepare workspace
Park on a level surface, set the parking brake, and turn off the engine. Open the hood and ensure no panels or decorative trim blocks access. Put on safety glasses and gloves. Keep the area well lit and organized to prevent missteps.
Tip: Always disconnect the battery only if the vehicle manual recommends it. This reduces risk when inspecting electrical connections. - 2
Locate service ports and inspect belts
Identify the high and low pressure service ports and check the drive belt condition. A cracked or loose belt can prevent the compressor from engaging, causing a lack of cooling. Note belt routing for reassembly.
Tip: Take a quick photo of belt routing before removal to avoid misalignment. - 3
Check refrigerant level and look for leaks
If you have access to a leak detector or UV dye, scan for leaks around fittings, hoses, and the condenser. A refrigerant level that is too low often indicates a leak rather than a recharge necessity. Do not top off without addressing a leak.
Tip: Record leak locations with photos for reference during repair or when getting quotes. - 4
Test electrical controls and compressor clutch
Use a digital multimeter to check fuses, relays, and the compressor clutch coil for proper operation. A faulty clutch prevents the compressor from engaging and cooling the system.
Tip: If the clutch shows signs of wear or scorching, replace the affected part rather than attempting a quick fix. - 5
Measure system pressures with gauges
Attach the AC gauge set and compare readings to the vehicle's specifications. Abnormal pressures indicate overcharge, undercharge, or blockages that require correction. Do not exceed the recommended pressure values.
Tip: If you are unsure of the spec, consult the service manual or a professional. - 6
Decide on recharge vs component replacement
If leaks are repaired and pressures normalize, a controlled recharge may be appropriate. If you observe recurrent leaks or unusual noises, consider component replacement rather than repeated recharges.
Tip: Document every repair and advise on the expected lifespan of replaced parts. - 7
Test cooling performance after service
Run the vehicle in a controlled environment and check whether cabin temperature drops to the expected level within a few minutes. Listen for abnormal noises and recheck belts and electrical connections.
Tip: Allow the system to cycle a few times to ensure stable operation before driving.
Common Questions
Can I fix the car air conditioner myself, or is professional service required?
Basic troubleshooting such as checking fuses, belts, and obvious leaks can be done by a confident DIYer. However, more advanced tasks like refrigerant recovery, leak sealing, and compressor replacement require specialized tools and training. When in doubt, consult a certified technician.
You can handle basic checks, but major refrigerant work should be done by a pro.
Is it safe to recharge refrigerant at home?
Recharging refrigerant without proper equipment and knowledge is unsafe and often illegal. It can also damage the system. It is best to have the leak located and repaired and have a professional perform a controlled recharge if needed.
Recharge should be done by a professional after leak repair.
What are the signs of a failing car A/C compressor?
Signs include no cooling despite a running system, unusual grinding noises, clutch not engaging, or visible belt wear. A burned odor can indicate internal damage. Diagnostics often confirm compressor issues through pressure readings and electrical tests.
Look for no cooling, noises, or clutch failure to indicate a compressor problem.
How often should I service my car A/C system?
Regular inspection every 1-2 years or when performance declines is recommended. Service may include belt checks, refrigerant level assessment, leak testing, and cabin filter replacement. Your vehicle manual provides model-specific guidance.
Plan a routine check every 1-2 years or if cooling worsens.
What should I do if I smell a sweet or syrupy odor from the vents?
A sweet smell usually points to mold growth or refrigerant contamination in the evaporator. Clean the evaporator and cabin ducts and consider a sanitizing treatment. If the odor persists, seek professional cleaning.
A sweet odor may mean mold or contamination—get it checked.
What costs should I expect for car A/C repairs?
Costs vary depending on the issue, parts replaced, and labor. Prompt leak repair and conservative maintenance can reduce total costs. Compare quotes from reputable shops and ask for a written diagnostic before authorizing work.
Costs vary; get a clear quote after diagnostics.
Watch Video
The Essentials
- Diagnose before replacing parts to save money.
- Leaks and electrical faults are common car A/C culprits.
- Do not vent refrigerant; use proper recovery and recharge procedures.
- Professional help is recommended for refrigerant recharge.
- Regular maintenance prevents future failures.