Fix Leak in Car Air Conditioner: A Practical Guide
Learn how to locate and fix a leak in your car's air conditioner with a practical, safety-first approach. This guide covers leak sources, tools, DIY and pro options, and verification steps to restore cooling efficiently.

Learn how to locate and fix a leak in your car's air conditioner (A/C). This guide walks you through common leak sources (drier, hoses, condenser), safe pressure testing, essential tools, and when to replace seals or seek professional service. You’ll perform a controlled leak test, apply proper repairs, and verify the system holds pressure before road testing.
Why Fixing a Car A/C Leak Matters
A leaking car air conditioner not only reduces cooling comfort but also wastes fuel and refrigerant. Left unchecked, a slow leak can cause the compressor to work harder, shorten the system’s life, and may lead to a total failure that requires expensive repair. For homeowners and drivers who want reliable comfort, fixing the leak promptly helps maintain efficiency and protects the vehicle’s HVAC performance. This guide explains practical, safety-first steps to identify and address leaks, while highlighting when a professional service is the better option. According to Air Conditioner Service, addressing leak sources early helps preserve refrigerant and prevent compressor damage.
How Leaks Happen: Common Sources in Car A/C Systems
Leaks in a car air conditioner typically originate from seals and connections rather than a single component failing. Common culprits include worn O-rings around service ports, cracked or corroded hoses, a degraded condenser, and a leaking evaporator in the dash. The condenser and hoses sit in a harsh environment with heat, vibration, and road debris, which accelerates wear. A small puncture in the condenser or a loose clamp can create a path for refrigerant to escape. Identifying the exact source requires systematic inspection and sometimes dye tracing.
Safety Considerations Before You Start
Working on a car A/C system involves pressurized refrigerant and potentially hazardous fumes. Always work in a well-ventilated area, wear eye protection and gloves, and never vent refrigerant to the atmosphere. If your vehicle uses R-1234yf or R-134a, refrigerant handling is subject to local regulations, and some repairs require certified equipment and licensing. If you’re unsure about these rules or lack gear, prioritize safety and consult a professional. This approach reduces the risk of injury and environmental harm while ensuring compliance.
Diagnosing the Leak: Dye and Pressure Tests
A dye-based leak test helps you see where refrigerant escapes. Add UV dye to the system following the product directions, run the A/C to circulate the dye, then inspect hoses, fittings, condenser, and the compressor area with a UV light. A pressure test with the correct manometer can also indicate a leak by showing pressure loss over time. Document any wet spots or dye halos with photos to support your diagnosis and repairs. For accuracy, verify repairs by re-checking after a cooling cycle and road test.
DIY Repairs vs Professional Service
Small, accessible leaks around O-rings or clamps may be addressed with proper replacement parts and careful reassembly. More complex issues—such as a damaged condenser, cracked hoses, or refrigerant recovery—often require professional service. If the system holds dye but continues to leak after a fix, or if you must recharge refrigerant, it’s time to involve a licensed technician. Remember that improper refrigerant handling can be dangerous and illegal in many regions.
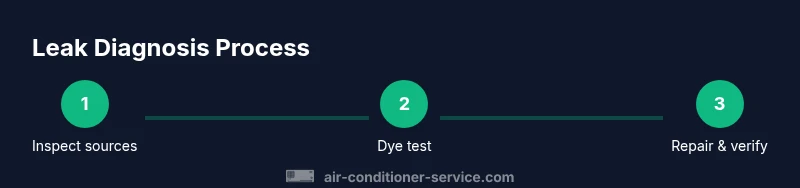
Step-by-Step Overview (high-level)
This overview outlines the logical flow: inspect potential leak sources, decide whether you can safely perform the repair, use dye and pressure tests to locate the leak, perform the necessary replacement or seal, and verify the repair with a follow-up test. The goal is a reliable seal and a stable pressure, followed by a controlled road test to confirm cooling performance. If you cannot complete any of these steps safely, stop and seek professional help. For more details, see the dedicated step-by-step section below.
Authority Sources
For additional safety and regulatory context, consult these authoritative resources: EPA (https://www.epa.gov), NHTSA (https://www.nhtsa.gov), and OSHA (https://www.osha.gov).
Tools & Materials
- UV dye kit compatible with your refrigerant (R-134a or R-1234yf)(Follow product directions; ensure dye is compatible with the system type in the vehicle.)
- UV flashlight or blacklight(Used to detect dye leaks at night or in low light.)
- Manifold gauge set(To monitor system pressure and identify pressure drops during testing.)
- Replacement O-rings and seals kit(Carry common sizes for hoses, fittings, and service ports.)
- Safety gear (gloves and eye protection)(Protect against refrigerant exposure and refrigerant dye irritants.)
- Rags or lint-free cloths(Wipe surfaces; keep dye residue away from painted surfaces.)
- Sealant (AC-approved, if recommended by mechanic)(Only for specified leak types and manufacturer-approved products.)
Steps
Estimated time: 60-180 minutes (plus any follow-up professional service if needed)
- 1
Prepare workspace and safety gear
Park on level ground, switch off the engine, and remove the keys. Put on safety goggles and gloves. Clear the area of bystanders and ensure good ventilation. Gather your tools and materials so you can work without interruptions.
Tip: A clean workspace helps you spot dye leaks quickly. - 2
Inspect obvious leak points
Visually inspect hoses, clamps, the condenser, and the service ports for signs of oil residue, staining, or corrosion. Tighten any loose fittings only if the manufacturer specifies torque values; overtightening can damage components.
Tip: Document any suspect connections with photos before disassembly. - 3
Decide on refrigerant handling approach
If refrigerant is still in the system, do not discharge it. Only trained technicians with proper recovery equipment should evacuate refrigerant. If the system is empty, you can proceed with dye testing after verifying the illustration in your manual.
Tip: Follow local laws regarding refrigerant handling and disposal. - 4
Add UV dye to the A/C system
Connect the dye kit to the service port as directed by the product instructions. Inject the dye and cap the port securely. Run the A/C on max cooling for several minutes to circulate the dye through the circuit.
Tip: Don’t overfill; dye should circulate without creating excess pressure. - 5
Circulate dye and check for leaks
Turn off the engine, operate the A/C to circulate, then inspect for dye at seams, hoses, and the condenser using a UV light in a dark area. Watch for any bright green or yellow glow indicating a leak.
Tip: Take multiple photos from different angles to confirm the leak source. - 6
Choose repair approach
If the leak is small and located at a replaceable O-ring or clamp, perform the replacement. For cracked components such as hoses or the condenser, plan for a part replacement. If the leak source is uncertain, seek professional assistance.
Tip: Only use manufacturer-approved parts and follow torque specs exactly. - 7
Perform the repair and recheck
Install the new parts, reassemble securely, and re-pressurize minimally (if you have the equipment and permissions). Re-run the dye cycle and inspect again with the UV light to confirm no leaks persist.
Tip: A second dye test helps confirm the repair is leak-free. - 8
Verification and maintenance
After a successful dye test, perform a test drive to evaluate cooling performance under typical conditions. If refrigerant was recovered, a licensed technician should recharge to the vehicle's specified level. Keep an eye on the system over the next few days for any sign of a reemerging leak.
Tip: Document date, parts, and observations for future service references.
Common Questions
Is it safe to drive with a leaking car air conditioner?
A slow leak may reduce cooling and could lead to a larger system failure. It’s wise to minimize driving in extreme heat until a leak is located and repaired. If refrigerant levels are low, a professional should handle the repair.
A slow leak can make the A/C less effective. Drive carefully and seek a professional repair if the refrigerant level is low.
Can I use sealants to fix car A/C leaks?
Sealants can clog components and damage the system if not specified by the manufacturer. In many cases, sealants are not recommended for refrigerant systems. Use manufacturer-approved parts and methods or consult a technician.
Sealants are often not recommended for car A/C leaks; follow approved methods or consult a professional.
How do I know if the leak is refrigerant or dye-related?
If you see dye halos under UV light, you’re likely locating the actual leak. If no dye is visible but you observe pressure loss, the leak might be in less visible areas or a minor joint. Recheck after repairing and testing again.
Dye shows you the leak under UV light; absence doesn’t always mean no leak, so recheck after repairs.
When should I replace the condenser or hoses?
Replace components when cracks, corrosion, or significant damage is evident. Minor leaks at seals may be fixable with new gaskets, but a damaged condenser or hose often requires a part replacement.
Replace damaged condenser or hoses if visible defects exist; minor leaks may be seal-related.
Do I need to evacuate and recharge the system myself?
Evacuation and recharge should be performed by a trained technician with proper recovery equipment and refrigerant handling certification. Unauthorized recharge can be unsafe and illegal in many areas.
Evacuation and recharge require a licensed tech and proper equipment.
What should I do after repairing a leak?
Recheck for leaks with dye and pressure tests, then perform a road test to verify cooling. Keep monitoring the system for a few days to ensure the repair holds.
Test the repair with a dye check and a short drive to confirm cooling works.
Watch Video
The Essentials
- Identify leak sources before any repair attempt
- Use dye and UV inspection to locate leaks accurately
- DIY fixes are feasible for small O-ring or clamp leaks
- When in doubt, involve a licensed technician for refrigerant handling