How to Fix Air Conditioner Not Heating: A Practical Guide
Learn practical, step-by-step methods to diagnose and fix an air conditioner that won't heat. Safe homeowner tips, common causes, and when to call a pro for reliable heating performance.

In this guide you’ll learn how to diagnose and fix an air conditioner that’s not heating. We cover safe homeowner checks, thermostat verification, airflow and filter considerations, and essential electrical checks. Follow the steps to restore heat or determine if professional service is needed—Air Conditioner Service provides practical, non-technical guidance you can trust.
Why your air conditioner isn't heating
According to Air Conditioner Service, a heating shortfall is usually caused by a simple setting error, a clogged air filter, airflow restrictions, thermostat problems, or a failed heat sequence in the system. Understanding the difference between a heating problem and a cooling one helps you target the right component without wasting time. This section will map out common culprits and how to spot them through careful observation and safe checks.
Common causes of heating failures you can check
Several common issues can prevent heating from occurring. Misconfigured thermostat settings, a dirty air filter, blocked ductwork, and outdoor unit obstructions can silently rob heat from your home. Electrical problems, like a blown fuse or a tripped breaker, may also interrupt heating. By evaluating these areas first, you rule out the most frequent offenders before considering more complex repairs.
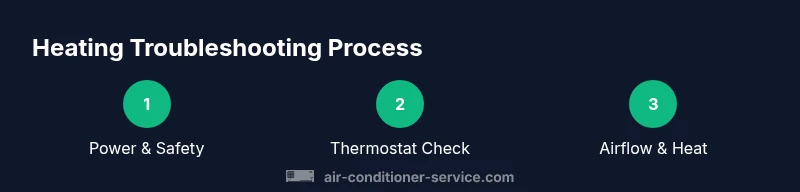
Safety-first: power, safety, and initial checks
Before touching any components, switch off power to the AC at the service disconnect or breaker panel. Do not bypass safety devices or probe live circuits. Wear dry, insulated gloves if you handle exposed wiring and keep a clear workspace to avoid trips or accidental starts. These precautions protect you while you diagnose the problem.
Thermostat and control settings you should verify
Many heating problems start at the thermostat. Ensure it is set to Heat, the mode is appropriate (auto vs. constantly on), and the temperature setting is higher than the current room temperature. If your thermostat is old or programmable, consider testing with a basic non-programmable unit to confirm operation. A tiny mis-set horsepower—so to speak—can explain most no-heat cases.
Airflow and filtration: check filters, ducts, and vents
A clogged filter or blocked supply vents reduce airflow, making the system struggle to deliver warm air. Replace disposable filters or clean reusable ones according to manufacturer guidance. Check that vents are open and ducts are not obstructed by furniture or debris. Improved airflow often yields noticeable heat restoration.
Heat source components: heat pump and furnace considerations
If your home uses a heat pump, the reversing valve or low refrigerant charge can prevent heating. For furnaces, inspect the burner and flame sensor; a dirty flame or a clogged burner can halt heat. In either case, refer to the manufacturer’s service manual for safe component checks and avoid attempting gas-related fixes beyond basic inspection.
Electrical components and safe inspection tips
Loose connections, worn contactors, or a faulty capacitor can cut heating even when power is present. Only test voltage and continuity if you’re comfortable with basic electrical work, and turn off power first. If you smell burnt insulation or see melted components, stop immediately and call a pro.
Special cases: heat pumps vs conventional systems
Heat pumps require different checks than traditional furnaces. Defrost cycles, outdoor unit performance in cold weather, and refrigerant health are unique concerns. If you’re unsure which system you have, identify the outdoor unit and wiring diagram to determine the correct troubleshooting path.
When to call a professional and what to expect
If you’ve completed safe checks and still have no heat, it’s time to contact a licensed HVAC technician. A pro will test electrical circuits, refrigerant pressures, and heat sequencing with specialized tools. Expect a written diagnosis, a scope of work, and transparent pricing guidance.
Tools & Materials
- Multimeter(Test voltage at thermostat terminals and electrical connections; identify open circuits safely.)
- Screwdriver set(Flat and Phillips screwdrivers for service panels.)
- Non-contact voltage tester(Quickly verify live circuits before touching wiring.)
- Shop vacuum or brush(Clean debris from the outdoor condenser and internal components.)
- Microfiber cloths(Wipe down coils and sensor areas to improve readings.)
- Replacement air filter(Keep on hand for immediate replacement during checks.)
- Electrical tape and wire nuts(Secure minor splices and connections as needed.)
Steps
Estimated time: 60-90 minutes
- 1
Power down and verify safety
Turn off the system at the breaker and disconnect the outdoor unit if applicable. Confirm you have no power available to any internal electronics before touching components. This prevents shock and accidental startups.
Tip: Always lock out the breaker if others might re-energize the circuit. - 2
Check thermostat settings
Ensure the thermostat is set to Heat, not Cool, and that the target temperature is above room temperature. If possible, temporarily bypass the thermostat by using a known-good unit.
Tip: If the thermostat is hardwired, consider a quick test using a portable thermostat to confirm operation. - 3
Inspect and replace the air filter
Remove the air filter and hold it up to the light. If you can’t see light through it, replace it with a new one to restore airflow and heating efficiency.
Tip: Even if not visibly dirty, replace after 90 days in high-use seasons. - 4
Examine the outdoor condenser and coils
Clear any debris around the condenser and gently brush the fins to improve airflow. A dirty condenser reduces heat output and increases strain on the system.
Tip: Do not bend fins with heavy tools; use a fin comb if available. - 5
Check heat source components
For heat pumps, verify the reversing valve operation and defrost cycle. For furnaces, inspect the burner flame and heat exchanger for signs of wear or soot buildup.
Tip: If you see soot or flame irregularities, halt and call a pro. - 6
Review electrical connections
Tighten or reseat service panel connections and inspect contactors and capacitors for signs of wear. Replace visibly damaged components only with proper substitutes.
Tip: Do not touch live terminals; replace only with the system powered off. - 7
Run a controlled test cycle
Power the unit back on and run a heating cycle while observing for warm air and normal fan operation. Listen for unusual sounds that could indicate mechanical issues.
Tip: Record temperatures at return and supply to gauge performance. - 8
Decide on next steps
If heat remains weak or absent after these checks, document findings and call a licensed HVAC technician for a detailed inspection.
Tip: Provide the technician with your test results to speed up diagnosis.
Common Questions
Why is my air conditioner cooling but not heating?
Cooling progress does not guarantee heating will work. Check thermostat settings, airflow, and heat-sequence components. A mis-set control or airflow restriction commonly causes this behavior.
Cooling doesn't guarantee heating works. Check the thermostat, airflow, and heat sequence to identify the issue.
Could a thermostat be the cause of no heat?
Yes. A misconfigured thermostat, dead batteries, or a faulty sensor can prevent heating from engaging. Test with a known-good unit to confirm.
A bad thermostat can stop heating; test with a reliable unit to confirm.
Can a dirty filter affect heating performance?
A clogged filter reduces airflow and can make the system feel like it isn’t heating effectively. Replace or clean the filter to restore airflow.
A dirty filter cuts airflow and can make heating seem weak; replace it to restore performance.
What should I check on a heat pump that won’t heat?
Check the reversing valve, defrost cycle, and outdoor unit performance. Low refrigerant or valve issues can prevent heating.
If you have a heat pump, check the valve and defrost cycle; refrigerant issues may require a pro.
Is it safe to inspect electrical components myself?
Basic visual inspection is okay, but testing live circuits should be left to a trained technician. Turn off power before any check.
You can look for obvious damage, but avoid testing live circuits yourself.
When should I call a professional?
If basic checks don’t restore heat, or you notice burning smells, flickering breakers, or refrigerant issues, call a licensed HVAC technician for a full diagnostic.
Call a pro if heat is not restored after safe checks or if you smell burning.
Watch Video
The Essentials
- Verify thermostat settings before deeper checks
- Improve airflow by replacing filters and clearing vents
- Inspect heat source components for misalignment or wear
- Safely test electrical connections with the power off
- Call a pro if heating issues persist after basic checks