How to Deal with No Air Conditioning: Practical Troubleshooting
When your AC stops cooling, act fast with a safe, methodical approach. This Air Conditioner Service guide guides homeowners through practical quick fixes and a step-by-step diagnostic to restore comfort.

If your AC won’t turn on or isn’t cooling, start with the basics: check for a tripped breaker, verify the thermostat is set correctly, and replace a dirty air filter. According to Air Conditioner Service, most no-cool outages come from simple, fixable issues. If power and settings are fine, proceed to the diagnostic flow and step-by-step fixes.
Why No AC Happens: Common Causes
No-cooling situations happen for a few quick-to-fix reasons. The most common are power issues (a tripped breaker or blown fuse), thermostat misconfigurations, and a clogged air filter. Outdoor unit obstructions, such as tall grass or debris, can also prevent heat exchange. Less common but important are refrigerant leaks or a faulty contactor in the outdoor unit. Understanding these causes helps you prioritize checks and avoid unnecessary repairs.
Air Conditioner Service notes that many outages originate from easy-to-address issues, so a calm, systematic approach yields faster relief and fewer unnecessary service calls.
Quick Checks You Can Do Right Now
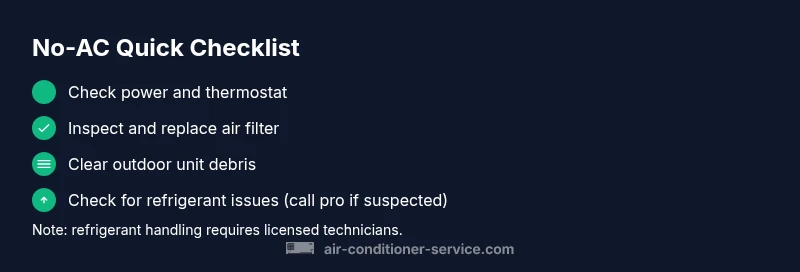
Before you dive into deeper troubleshooting, perform a few safe, simple checks. Confirm the thermostat is set to cooling and the temperature is lower than room temperature. Look for any tripped breakers or blown fuses in the main panel. Inspect the air filter and replace it if it’s dirty or clogged. Clear around the outdoor condenser and remove any debris that blocks airflow from the grille. If you have a smart thermostat, verify the HVAC mode is active and connected to the correct zone.
Air Conditioner Service emphasizes safety and documenting what you observe, so note any strange sounds, odors, or icing on the indoor coil.
Diagnostic Flow: From Symptom to Solution
Use a logical flow to identify the root cause. Start with power and basic settings, then rule out airflow issues, and finally inspect for refrigerant or compressor problems. At each step, test the system after changes. If the symptom persists after safe checks, it’s time to escalate to the STEP-BY-STEP guide or contact a professional.
Air Conditioner Service recommends keeping a simple troubleshooting log to track what you tested and the results. This helps when you call for help and prevents repeated checks of the same items.
Step-by-Step Fixes for the Most Common Causes
This section expands on the common fixes you can perform safely. Follow the steps in order and stop if you encounter a problem you are not qualified to handle. Remember: if you are ever unsure about electrical work or refrigerant, call a licensed HVAC technician.
Safety, Precautions, and Common Mistakes
Safety always comes first. Never bypass safety devices or ignore unusual smells or smoke. Wear protective gear as needed and avoid working on live electrical components. Do not attempt refrigerant handling or repairs beyond your training.
Common missteps include skipping regular maintenance, using the wrong filter size, or attempting to clean the condenser with high-pressure water. These can lead to damage or personal injury.
Prevention and Long-Term Maintenance
Preventive care reduces the chance of future outages. Schedule annual professional checkups, replace filters regularly, clean the outdoor unit, and protect vulnerable components from weather. Track performance so you can notice trends like gradual cooling loss. This proactive approach minimizes emergency repairs and extends equipment life.
Steps
Estimated time: 45-75 minutes
- 1
Power and Thermostat Check
Start by ensuring the system is getting power. Check the main breaker or fuse box for trips and reset if safe. Verify the thermostat is set to cooling and the setpoint is well below room temperature. If you have a programmable thermostat, confirm schedules align with occupancy.
Tip: Use a non-contact voltage tester to confirm power at the thermostat location before touching wiring. - 2
Inspect and Replace Air Filter
A dirty filter can block airflow and defeat cooling. Remove the filter, inspect for discoloration or debris, and replace it with a correctly sized filter. If you’re unsure of the size, check the unit label or owner’s manual.
Tip: Mark the new filter with the current date to track replacement intervals. - 3
Inspect Outdoor Unit and Clearance
Go outside and visually inspect the condenser unit. Remove leaves, grass, or other debris. Ensure there’s at least 2 feet of clearance around the unit and that the grille isn’t blocked by furniture or vegetation.
Tip: Be careful around sharp fins and avoid using metal tools that could bend coils. - 4
Check Circuit Breakers and Fuses
Locate the electrical panel and look for breakers labeled for the AC. If a breaker is tripped, switch it fully off and then back on. If the breaker trips again, stop and call a professional.
Tip: If you hear buzzing or smell burning, stop immediately—shut off power and contact a pro. - 5
Verify Airflow at Vents
Check interior supply vents and return grills for obstructions. Remove furniture or drapes that block airflow and ensure rooms have proper air return paths.
Tip: Even small obstructions can significantly impact cooling effectiveness. - 6
Assess for Signs of Refrigerant Issues
Look for ice buildup on the indoor coil, hissing sounds, or oily residues near connections. Refrigerant leaks require a licensed technician and cannot be safely repaired by homeowners.
Tip: Do not attempt to recharge refrigerant yourself; this requires specialized equipment and licensing. - 7
Test Cooling Differential
Turn the system on and measure supply air temperature with a thermometer. A small temperature difference indicates airflow problems; a persistent lack of cooling suggests a refrigerant or compressor issue that needs a pro.
Tip: Document temperature readings to share with your technician.
Diagnosis: Air conditioner won't start or won't cool
Possible Causes
- highPower issue (outlet, breaker, fuse)
- mediumThermostat misconfiguration or failure
- highClogged or dirty air filter
- mediumBlocked condenser unit or outdoor coil
- lowLow refrigerant or leak (not common in single-family homes)
Fixes
- easyCheck the main service panel for trip breakers and reset if safe
- easyTest the thermostat settings and replace batteries if needed; calibrate or replace unit if faulty
- easyReplace or clean the air filter; check outdoor unit clearance
- easyClear debris around outdoor unit and gently clean coils
- hardIf refrigerant leak suspected, contact a licensed pro immediately
Common Questions
What should I check first if my AC won't turn on?
Begin with power and thermostat checks, then inspect the air filter. If these basics don’t fix it, reset the circuit breaker and review the outdoor unit for obstructions. If the problem persists, consult a professional.
First check power and thermostat settings, then the filter. If it still won’t start, reset the breaker and examine the outdoor unit; if needed, call a pro.
Why is my AC running but not cooling?
This usually points to airflow or refrigerant issues. Check the air filter, ensure adequate airflow to and from the return and supply vents, and inspect the outdoor unit for debris. If airflow is good but cooling remains weak, refrigerant problems may exist and require a licensed technician.
When it runs but doesn’t cool, check airflow first, then consider refrigerant issues and call a pro if needed.
How often should I replace the air filter?
Most homes benefit from a 1-3 month replacement schedule, depending on usage, pets, and dust levels. Inspect filters monthly and replace when they look dirty to maintain proper airflow.
Typically every 1-3 months, but check monthly and replace as needed.
Is it safe to reset the thermostat or breaker myself?
Resetting basic systems is generally safe if you follow safety steps: turn off power before touching wiring, and use manufacturer instructions for thermostat resets. If you’re unsure, contact a professional.
You can reset safely by following safety steps; if you’re unsure, call a technician.
What signs suggest a refrigerant leak?
Look for reduced cooling power, hissing sounds, ice on coils, or oily spots near connections. Refrigerant leaks require a licensed technician to repair and recharge.
Watch for weak cooling, hissing, or ice; leaks need a licensed pro to fix.
When should I call a professional?
If basic checks don’t restore cooling, or you notice electrical smells, unusual noises, or refrigerant signs, contact a licensed HVAC technician promptly.
If simple checks fail or you see signs of a leak or electrical issue, call a pro right away.
Watch Video
The Essentials
- Start with safe, simple checks: power, thermostat, filter
- Clear airflow obstructions and maintain clean outdoor units
- Follow a step-by-step flow before calling a pro
- If in doubt, prioritize professional help for electrical or refrigerant issues