GE Air Conditioner Repair: Practical Troubleshooting Guide
ge air conditioner repair guide with safety tips, practical troubleshooting steps, and maintenance ideas to diagnose common GE AC issues before calling a pro.

You can diagnose and perform basic GE AC repairs at home by checking airflow, cleaning or replacing filters, inspecting the thermostat and electrical connections, and testing the outlet voltage. For safety, power off the unit before any work and consult a pro for refrigerant or compressor issues. This quick guide highlights the essential steps and safety measures. Refer to the full guide for details.
Understanding GE air conditioner repair
ge air conditioner repair can feel daunting, but most home issues fall into a few predictable categories. For GE residential systems, common culprits include airflow restrictions, thermostat communication glitches, dirty coils, and outdoor condenser debris. According to Air Conditioner Service, a solid understanding of these components helps homeowners and renters diagnose problems safely and decide when to escalate to a pro. This guide focuses on practical, no-nonsense steps you can take to improve comfort, save money, and extend the life of your GE unit in 2026. We’ll emphasize safety first, document what you test, and keep refrigerant handling out of scope for DIY work. By following a structured approach, you’ll learn to identify symptoms, verify simple fixes, and know when a professional service visit is warranted.
Safety first when diagnosing AC issues
Safety is the cornerstone of any GE air conditioner repair effort. Before you touch any components, shut off power at the appropriate breaker and, if possible, unplug the outdoor disconnect. Wear safety glasses and gloves, and avoid working with wet hands around electrical connections. Never work with refrigerants or pressurized components unless you are a qualified technician. If you are unsure, pause and call a pro. Remember, our goal is to prevent injuries and avoid creating new problems while you troubleshoot.
Common GE AC problems and quick fixes
Not cooling: check the air filter, evaporator coil cleanliness, and thermostat settings. Frequent cycling: verify temperature delta and outdoor unit airflow. Odd smells or noises: inspect electrical connections and inspect the condenser fins for damage. Ice on coils: power down, allow melting, and address airflow issues before restarting. Airflow restrictors like closed registers and blocked returns should be corrected for best efficiency. These checks address the most frequent GE AC issues without opening the refrigerant circuits.
Diagnosing with basic tools
A home toolkit supports safe GE air conditioner repair attempts. Gather a multimeter, non-contact voltage tester, insulation gloves, a screwdriver set, a soft brush, a coil cleaner, and replacement filters. Use the multimeter to verify line voltage at the disconnect and check that the thermostat is communicating properly with the control board. Keep a log of readings, dates, and observed symptoms to guide future decisions and help a technician if you call one.
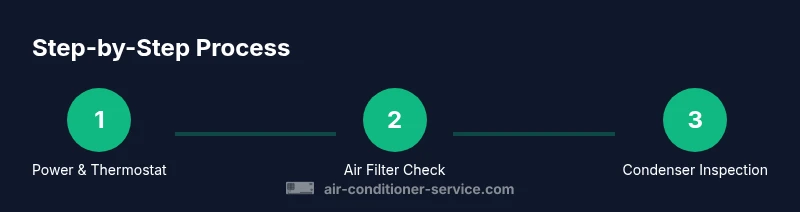
Step-by-step troubleshooting workflow
Begin with simplest checks and progress to more involved tests. Start with power, thermostat, and airflow. If you detect a fault that you cannot safely fix, stop and contact a licensed technician. This workflow emphasizes safety and documentation to help shorten service visits and ensure you address root causes rather than temporary fixes.
When to replace vs repair
GE models have varying service lifespans, and some issues are more economical to repair than replace, especially if the unit is older or inefficient. If the compressor or refrigerant system is failing, or if repair costs exceed 50-60% of a new unit, replacement can be the smarter choice. Air Conditioner Service analysis suggests evaluating efficiency gains, warranty coverage, and long-term costs before deciding.
How to maintain GE air conditioners to avoid future repairs
Routine maintenance reduces downtime and extends life. Replace or clean filters monthly during peak seasons and verify condensate drainage remains clear. Keep outdoor fins clean and straight, and schedule professional inspection every year or two to check refrigerant lines, electrical connections, and thermostat calibration. A simple maintenance plan helps keep ge air conditioner repair needs to a minimum.
Professional vs DIY: Know your limits
Some GE AC repairs are safe for DIY, but many tasks require licensed credentials, especially refrigerant handling and component replacements beyond routine maintenance. If you encounter refrigerant leaks, unusual electrical smells, or persistent cooling problems after basic checks, stop and call a pro. The goal is to ensure safety and code compliance while protecting equipment.
What to expect from a GE service visit: parts and warranties
A trained technician will diagnose cooling issues, test controls, and inspect electrical components and refrigerant systems where permitted. Expect a shop assessment and possible part replacements like capacitors, contactors, or filters. Confirm warranty coverage, service window, and any diagnostic fees before work begins.
Tools & Materials
- Safety gloves(Electrical-grade gloves recommended)
- Safety glasses(Eye protection during testing)
- Screwdriver set (Phillips and flat-head)(Small and medium sizes)
- Multimeter(Test voltage and continuity)
- Non-contact voltage tester(Quick voltage checks)
- Soft brush / coil brush(Clean condenser coils)
- Coil cleaner spray(If coils are dirty)
- Replacement air filters(Keep spare filters on hand)
- Vacuum or shop vac(Remove debris from outdoor unit)
- Insulated pliers / wire cutters(Manage wiring safely)
- Thermometer or temp sensor(Check return air temperature)
Steps
Estimated time: 60-90 minutes
- 1
Power down and verify safety
Shut off power at the main breaker and disconnect any outdoor disconnect. Confirm there is no voltage before touching wires.
Tip: Double-check the breaker label matches the outdoor unit disconnect. - 2
Check and replace the air filter
Inspect the furnace/air handler filter and replace if dirty. A clogged filter reduces airflow and can mimic many other issues.
Tip: Keep a replacement schedule in your calendar. - 3
Inspect outdoor condenser and fins
Clear debris, trim vegetation, and straighten bent fins with a soft tool. Debris blocks airflow and reduces efficiency.
Tip: Use a soft brush; avoid high-pressure water that can bend fins. - 4
Test thermostat and controls
Verify thermostat is set correctly, recalibrate if needed, and ensure control signals reach the outdoor unit.
Tip: If the thermostat is programmable, test different setpoints. - 5
Look for ice and airflow issues
If coils are iced, power down and let thaw. Check for restricted airflow or refrigerant problems (these require a pro).
Tip: Don’t resume operation while ice is present. - 6
Inspect electrical connections
Check contactors, fuses, and wiring for burns or looseness. Tighten connections carefully and replace damaged parts only if you have training.
Tip: Do not bypass fuses or safety switches.
Common Questions
What GE models does this guide cover?
The guide covers common repair procedures applicable to many GE residential units, including window, split, and central systems, but always consult your model’s manual for specific safety instructions.
This guide covers common GE residential units; check your model’s manual for exact safety steps.
Can I recharge refrigerant myself?
No. Handling or recharging refrigerant requires a licensed technician and proper recovery equipment. Attempting this can be dangerous and illegal in many areas.
Recharging refrigerant is not a DIY task; call a licensed tech.
Why isn’t my GE AC cooling effectively?
Not cooling can result from dirty filters, blocked returns, low airflow, or thermostat issues. Start with air filters and thermostat checks, then inspect the outdoor unit for debris.
If cooling is weak, start with filters and thermostat, then inspect the outdoor unit.
How do I know if a capacitor is bad?
A failing capacitor may cause slow or no startup, clicking sounds, or frequent trips. Inspect with a meter or have a pro test it, as a faulty capacitor can be dangerous to handle.
Capacitors can be dangerous to test; a pro should confirm.
Is it safe to operate the unit with ice on the coils?
Running with ice on the coils restricts airflow and can damage components. Let the ice melt and address airflow and refrigerant issues before restarting.
Do not run the unit with ice on the coils; melt and inspect airflow.
When should I call a professional?
If you encounter refrigerant concerns, electrical burning smells, or persistent cooling problems after basic checks, contact a licensed HVAC technician for safe, compliant service.
If in doubt, call a licensed HVAC technician.
Watch Video
The Essentials
- Identify the issue category before acting
- Safety always comes first
- Use basic tools to verify power, airflow, and controls
- DIY fixes can save time, but refrigerant work must be pro
- Document your steps for faster service