How to Air Con: A Practical Troubleshooting Guide
Learn practical, safe steps to diagnose and troubleshoot common air conditioner problems at home. From cleaning filters to checking the outdoor unit, this guide helps you save time and avoid costly service calls.

This guide shows you how to diagnose and fix common air conditioner problems yourself, with safe, practical steps you can perform without specialized training. You’ll learn a practical troubleshooting flow, from basic checks and cleaning to simple component tests, plus clear safety reminders and when to seek professional help. This article also highlights common mistakes to avoid.
What to know before you air con
According to Air Conditioner Service, learning how to air con safely reduces risk and helps you address many common issues. This guide focuses on practical, at-home troubleshooting and routine maintenance you can perform with basic tools. You’ll get a clear, repeatable flow: verify basic power and settings, clean components that affect airflow, inspect the outdoor unit for obstructions, and test the system to confirm results. We’ll also explain limits: refrigerant handling requires licensed technicians, and electrical work carries risk. Before you begin, make sure you have a comfortable workspace, a flashlight, a stable ladder if you must access the outdoor unit, and a working thermostat. With the right approach, you can improve comfort while avoiding unnecessary service visits.
Common symptoms and quick fixes
Warm air, short cycling, unusual noises, or rising energy bills are common signs your AC needs attention. Start with basic checks: clean or replace the filter, confirm the thermostat is set to cool, and ensure outdoor unit has clear airflow. Inspect the condensate drain for clogs, and look for ice on coils, which signals airflow or refrigerant issues. If symptoms persist, progress to more advanced checks or call a pro.
Safety first: essential precautions
Electrical work and refrigerant handling carry real risk. Always disconnect power at the breaker before you touch any components. Do not bypass safety switches, and never use water or wet hands near live electrical parts. If you feel unsure at any point, stop and consult a qualified technician.
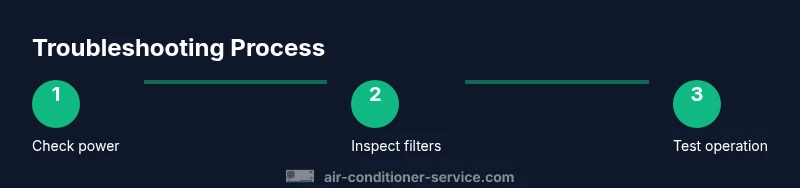
Troubleshooting flow at a glance
This section outlines a practical decision tree: verify power and thermostat settings; inspect filters and airflow; check outdoor unit and drainage; test the system; and escalate to a professional if problems persist. Use this flow to stay organized and avoid skipping critical steps.
Maintenance routines to extend life
Regular maintenance pays off. Replace or clean filters every 1-3 months, depending on usage and household conditions. Keep outdoor condenser clear of leaves and debris, and schedule an annual professional tune-up to inspect refrigerant levels, electrical connections, and airflow. Simple upkeep can improve efficiency and comfort year-round.
When to call a professional
If you notice persistent cooling issues after a full at-home check, refrigerant leaks, ice on the evaporator coil that recurs, or buzzing noises near electrical components, contact a licensed technician promptly. Refrigerant work and major electrical repairs require specialized training and permits. Use this as a guideline for timely, safe decisions.
Authority sources
- U.S. Department of Energy: energy.gov
- Environmental Protection Agency: epa.gov
- ENERGY STAR: energystar.gov
Tools & Materials
- Phillips screwdriver(for accessing panels)
- Flat-head screwdriver(for prying loose covers gently)
- Owner's manual or model number(helps find part locations)
- Microfiber cloths(for coil and filter cleaning)
- Vacuum with brush attachment(remove dust from coils and fins)
- Non-contact voltage tester(verify no live voltage)
- Temperature meter or thermometer(measure air temperature drop (ΔT))
- Safety gloves(protect hands)
Steps
Estimated time: 60-90 minutes
- 1
Power off and safety check
Shut off power to the air conditioner at the main breaker and unplug if available. This prevents electrical shock and accidental startup while you inspect components. Double-check that the outdoor unit is not energized before touching wiring.
Tip: Use a non-contact voltage tester to confirm no energy before handling parts. - 2
Inspect and clean the air filter
Remove the return air filter and inspect its condition. If dirty or discolored, replace with the same size. A clean filter improves airflow and reduces strain on the blower.
Tip: Note the filter size stamped on the frame; buy an exact match to ensure a proper seal. - 3
Clear debris around the outdoor unit
Check the outdoor condenser for leaves, grass, or other obstructions. Gently remove debris and trim back vegetation to maintain adequate airflow.
Tip: Maintain at least 2 feet of clearance around the unit for optimal operation. - 4
Check thermostat settings and batteries
Verify the thermostat is set to Cool and the temperature is at least 3-5 degrees below room temperature. If the thermostat uses batteries, replace them to ensure proper communication with the system.
Tip: If the display is blank or unresponsive, try cycling power at the thermostat. - 5
Inspect the condensate drain line
Look for visible clogs or slow drainage on the condensate line. If you see signs of buildup, clear the line using a safe method such as a wet-dry vacuum from the outdoor access point. Avoid chemical cleaners that can damage components.
Tip: Never use chemical drain cleaners inside the condensate line. - 6
Check electrical connections and capacitors
Look for loose wires or scorched marks around the control cabinet and contactor. Do not replace capacitors unless you have proper training and equipment; request a licensed technician for capacitor issues.
Tip: Take a photo of wiring before adjusting anything to aid professional service. - 7
Run a test cycle and observe performance
Restore power, set to Cool, and run the system for 10-15 minutes. Measure the air temperature difference (ΔT) and listen for unusual noises or vibrations. If cooling improves, document results for future reference.
Tip: If the system still struggles, proceed to the next level of diagnostics or call a pro.
Common Questions
Is it safe to troubleshoot my AC unit myself?
You can safely perform basic checks like filter cleaning and thermostat verification. Do not handle refrigerant or high-voltage components.
Yes, start with basic checks, but avoid refrigerant work and live electrical parts.
Why isn't my AC cooling even after these steps?
Potential causes include refrigerant issues, restricted airflow, or thermostat malfunctions. If symptoms persist, professional inspection may be needed.
If cooling doesn't improve, schedule a professional inspection.
How often should I replace the air filter?
Typically every 1-3 months, depending on usage, pets, and indoor air quality. Check the filter monthly.
Change filters regularly, at least every few months.
What causes the evaporator coil to ice up?
Ice forms when airflow is restricted or refrigerant pressure is off. Address airflow first and call a pro if it recurs.
Ice on coils usually means airflow or refrigerant issues; call a pro if it keeps happening.
When should I replace my AC instead of repairing it?
If repairs exceed a significant portion of the system’s value or you’re facing frequent breakdowns, replacement may be wiser.
If repairs add up or energy bills rise, consider replacement.
Can a programmable thermostat improve efficiency?
Yes—programming can reduce runtime and temperature swings, improving comfort and energy savings.
A programmable thermostat helps save energy and keep your home comfortable.
Watch Video
The Essentials
- Start with safe power-off checks.
- Clean or replace filters for best airflow.
- Maintain clear outdoor unit surroundings.
- Avoid refrigerant work unless licensed.
- Call a professional for persistent or complex issues.