Central Air Conditioner Fix: A Practical Troubleshooting Guide
A comprehensive, step-by-step guide to diagnose and perform a safe central air conditioner fix. Learn common symptoms, safety checks, DIY fixes, and when to call a professional, with practical tips from Air Conditioner Service.

Learn how to diagnose and perform a safe central air conditioner fix for common issues like reduced cooling, odd noises, or frozen coils. This guide covers the essential steps, safety checks, and when to call a professional. By the end you’ll know what you can fix yourself and what requires a tech.
Symptoms and Root Causes of a Central Air Conditioner Fix
According to Air Conditioner Service, many central air conditioner issues begin with observable signals. When cooling is weak or warm air blows from vents, the root causes are often a mix of airflow restrictions and electrical faults. This section lays out the most common symptoms and the typical culprits so you can quickly decide if a DIY fix is feasible or if a professional is needed. Understanding these signals helps homeowners document problems for technicians and reduces unnecessary service calls.
Key symptoms to watch for include not cooling at all or only warm air, frozen evaporator coils, unusual noises from the outdoor condenser or indoor blower, short cycling, reduced airflow through registers, leaks around the unit, or water puddles near the condensate line. While some issues are simple and safe to handle, others involve electrical components or refrigerant handling, which require caution and, in some cases, a licensed technician. The goal is to empower you to handle safe, straightforward fixes and to know when to escalate.
Safety First: Prepare for a DIY Central Air Conditioner Fix
Before touching any electrical components, set the expectation that safety comes first. Power must be shut off to both the indoor air handler and the outdoor condenser. Use the main disconnect and the circuit breaker to ensure there is no live current. Wear protective gloves and eye protection, and avoid working on wet surfaces. If you are unsure about any step, stop and consult a professional. According to Air Conditioner Service, many homeowner fixes are within reach when safety protocols are followed, reducing risk and giving you confidence to troubleshoot the issue. The goal is to minimize risk while documenting symptoms for later professional guidance.
Quick Diagnostic Checklist Before You Work
Start with a calm, methodical checklist to avoid missed issues. Confirm that the thermostat is set correctly and communicating with the system; ensure the indoor air filter is clean and unobstructed; inspect the outdoor condenser for debris, leaves, or mower clippings; and check for obvious electrical concerns like a tripped breaker or corroded wiring. Air Conditioner Service analysis shows that many DIY fixes begin with these basics: filters, airflow, and thermostat settings. If you observe ice on the evaporator coil or a persistent ice line on refrigerant pipes, stop and proceed with caution. Not all problems can be solved safely without professional assistance, but knowing the symptoms helps you decide when to proceed with a home fix or call in a tech.
Common DIY Fixes for Not-Cooling Air
When the system isn’t cooling, start with the simplest possibilities: replace or clean the air filter, clear debris from the outdoor unit, and verify that all registers are open and unblocked. Clean the condenser coils with a gentle spray from the inside out and ensure there is at least a couple of feet of clearance around the outdoor unit for proper airflow. If the thermostat is misreading or incorrectly set, correct the configuration and run a quick test cycle. Remember to reset the circuit after any electrical work and observe safety precautions throughout. Air Conditioner Service’s guidance emphasizes starting with basic airflow and thermostat checks before moving to electrical components.
Step-by-Step Troubleshooting Path (Overview)
A robust approach blends quick checks with deeper diagnostics. Begin with safety, then assess thermostat and filter, inspect the outdoor unit for debris, and evaluate electrical controls such as capacitors and contactors. If the refrigerant system is implicated, a licensed professional is required. This overview sets the stage for the detailed, step-by-step instructions that follow in the dedicated STEP-BY-STEP block and ensures you’re equipped to distinguish DIY-friendly fixes from problems that demand pro input.
Common Pitfalls and How to Avoid Them
Rushing through a fix can mask the real issue or create new problems. Avoid bypassing safety switches, never work inside an electrical panel with wet hands, and don’t operate the system with ice on the evaporator coil. Don’t ignore refrigerant-related symptoms or attempts to top off refrigerant yourself; leaks require licensed service and proper recovery equipment. Keep a simple log of what you inspect, the readings you take, and the actions you perform so you can share precise information with a technician. Finally, don’t forget to reassemble and test after each step to verify whether the issue improves.
When to Replace vs Repair: Making the Call
Some failures are more cost-effective to replace than repair, especially if multiple components show wear or a major refrigerant issue is detected. In these cases, assess long-term performance, energy efficiency, and the expected lifespan of your central air conditioner. Air Conditioner Service notes that many households benefit from a proactive replacement plan when the current system becomes unreliable or inefficient, rather than repeatedly paying for repairs. Use a conservative cost-benefit approach and consult a professional for an informed judgment.
Maintenance to Extend the Life of Your Central AC
Preventive maintenance is the best defense against sudden breakdowns. Schedule seasonal inspections, replace filters regularly, keep outdoor space clean and free of debris, and monitor refrigerant lines for signs of leaks (such as oil staining along connections). Clear and seal ductwork when you notice uneven cooling or excessive dust in rooms. By building a simple maintenance routine, you can extend the life of your central air conditioner and reduce the frequency of urgent central air conditioner fix needs.
Quick Recap: What You Can Do Today
- Check and replace the air filter if dirty; ensure unobstructed airflow.
- Verify thermostat settings and test the system briefly.
- Clean the outdoor condenser area and remove debris.
- Inspect for ice on coils and address safely; refrigerant issues require a pro.
- Document symptoms to guide future maintenance or professional visits.
Tools & Materials
- Main power shutoff (breaker and exterior disconnect)(Turn off power to both indoor and outdoor units before inspection.)
- Non-contact voltage tester and/or multimeter(Use to verify no live circuits before touching components.)
- Screwdrivers (Phillips and flat-head)(For panel access and component checks.)
- Replacement air filter(Choose the correct size and MERV rating for your system.)
- Soft brush or coil cleaning tool(Used to gently remove debris from coils.)
- Garden hose with gentle spray(Rinse coils from the inside out; avoid high pressure.)
- Insulated gloves(Protection when handling electrical components and hot surfaces.)
- Flashlight or headlamp(Illumination for deep access panels and wiring areas.)
Steps
Estimated time: 60-90 minutes
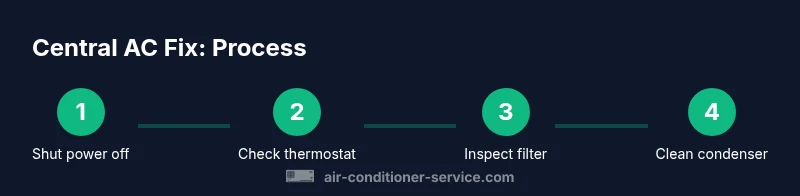
- 1
Shut off power to the system
Cut power at the main breaker and the outdoor disconnect to ensure there is no live electrical current while you inspect wiring and components. This minimizes the risk of shock or short circuits.
Tip: Use a non-contact tester to confirm no voltage before touching any wires. - 2
Verify thermostat settings
Ensure the thermostat is in cooling mode and set to a comfortable temperature. If it communicates with the system, confirm the control circuit is functional and the thermostat wiring is intact.
Tip: Set a baseline temp and listen for the outdoor unit engaging when the cycle starts. - 3
Check the air filter
Inspect the return air filter for dirt and debris. A clogged filter can reduce airflow and cause the evaporator coil to freeze or the system to run inefficiently.
Tip: If the filter is dirty, replace it with a new one of the correct size before testing cooling performance. - 4
Inspect the outdoor condenser
Clear leaves, dust, and debris from the condenser fins. Ensure there is at least 2 feet of clearance on all sides to allow proper airflow. Gently clean the fins with a soft brush and rinse with a hose from the inside out.
Tip: Do not use high-pressure water; it can bend fins and reduce efficiency. - 5
Test electrical controls (capacitor and contactor)
With power still off, visually inspect capacitors for bulging or leaking and test contactor operation. If you suspect a faulty component, replace it only after verifying with proper testing methods and caution against stored charge.
Tip: Capacitors store dangerous charges; discharge carefully or consult a professional if unsure. - 6
Check for ice on the evaporator coil
If ice is present, turn off the system to thaw gradually and investigate possible airflow restrictions or refrigerant issues after the ice melts. Running when iced can damage the compressor.
Tip: Once melted, recheck airflow and filter condition before re-starting. - 7
Inspect the condensate drain and airflow
Ensure the condensate drain is clear and flowing. Poor drainage can cause humidity issues and result in water damage if the line overflows.
Tip: Use a wet/dry vac if the line is partially blocked; never force a blockage through with a metal object. - 8
Assess refrigerant-related symptoms
Low refrigerant or leaks require professional service and recovery equipment. Do not attempt to top off refrigerant yourself. Document any signs of oil around connections or hissing sounds for the technician.
Tip: If you suspect a leak, schedule a pro inspection rather than attempting a DIY recharge.
Common Questions
What is the most common cause of a central air conditioner not cooling?
Many not-cooling issues start with a dirty filter or blocked condenser coils, which reduce airflow and efficiency. Thermostat misconfigurations and simple electrical faults are also frequent culprits that homeowners can check safely.
The most common causes are a dirty filter, blocked condenser, or thermostat settings. Check those first before calling a technician.
Can I fix a refrigerant leak myself?
No. Refrigerant leaks require trained technicians with the right equipment and safety precautions. Attempting a DIY recharge can be dangerous and illegal in some regions.
No—refrigerant leaks require a licensed professional with proper equipment.
How long should a DIY central air conditioner troubleshooting take?
A simple, safe DIY check can take 30-60 minutes. More in-depth inspections or electrical work may take longer and should be scheduled with caution.
Most quick checks take about 30 to 60 minutes; deeper tasks may take longer.
Is it safe to reset the system after cleaning the filter?
Yes, after you’ve replaced the filter and ensured the power is off during maintenance, re-energize the system and observe for normal operation.
Yes, once you’ve completed safety steps and reconnected power, test the system to confirm normal operation.
When should I replace rather than repair my central AC?
If multiple major components show wear or energy efficiency is poor, replacement may be more cost-effective in the long term. An expert can help you assess the right choice based on age and performance.
If several major parts are worn or efficiency is low, replacing the unit is often better than repairing.
What basic tools do I need for a DIY fix?
Essential tools include a power shutoff, testers (voltage or multimeter), screwdrivers, a replacement filter, gloves, and a flashlight. These cover the common checks without specialized equipment.
A shutoff, testers, screwdrivers, a replacement filter, gloves, and a flashlight will cover basic DIY checks.
Watch Video
The Essentials
- Check basics first: thermostat, filters, and airflow.
- Always power off before touching electrical parts.
- Use a methodical plan to distinguish DIY fixes from professional needs.
- refrigerant leaks require licensed technicians.
- Maintain a simple maintenance routine to prevent future issues.