Air Conditioner Fix Near Me: Practical Troubleshooting & Safe Repairs
Learn practical, step-by-step guidance for an air conditioner fix near me. Diagnose common issues, perform safe DIY checks, and know when to call a pro for lasting cooling.

This guide helps you diagnose and safely fix common AC problems near you. Start by powering off the unit, verifying the thermostat, and checking the air filter. If the unit still won’t cool, inspect the condensate drain, outdoor unit for debris, and the capacitor. For persistent issues, schedule professional service.
What 'air conditioner fix near me' means in practice
When homeowners search for air conditioner fix near me, they want fast, practical guidance to handle common problems without risking safety or causing more damage. According to Air Conditioner Service, most not-cooling calls begin with simple observations and basic checks that you can perform safely, especially during milder weather. This approach helps you decide whether a DIY fix is realistic or if it’s time to contact a professional. In this section we outline typical symptoms, early-room tests, and how to set expectations for repairs. We’ll cover mechanicals, electrical safety, proper shutdown procedures, and how to communicate with a technician when you do call. The goal is to empower homeowners and renters with a clear sequence of checks that can be completed within an afternoon, reducing unnecessary service calls while preserving system reliability. The guidance below uses practical language and actionable steps you can follow near your home, not in a lab.
Air Conditioner Service notes that many fixes begin with common-sense checks you can perform on-site. If you find a fault you don’t recognize, pause and contact a professional rather than attempting risky repairs. This cautious approach aligns with best practices in home maintenance and safety guidelines.
As you read, keep in mind that some issues require professional equipment or refrigerant handling. The remainder of this guide walks you through safe, first-line checks and when to escalate to a licensed technician.
Symptoms and quick checks
Not cooling, warm air, unusual noises, or ice on the coils are common signals that something isn’t right with your AC. Air Conditioner Service analysis shows that the top causes include dirty filters, blocked condensate drains, and aging capacitors. Start with the simplest checks:
- Is the thermostat set correctly and is the display responsive?
- Is the air filter dirty or clogged? A clogged filter reduces airflow and cooling efficiency.
- Is debris blocking the outdoor condenser unit? Clear leaves, dirt, and grass must be removed carefully.
- Do you hear buzzing or hums from the outdoor unit? That could indicate a faulty capacitor or a loose connection.
If basic checks don’t restore cooling, you might have a more complex issue such as refrigerant leakage or motor problems that require a licensed technician. This section focuses on safe, early-diagnosis steps you can perform near the home.
Air Conditioner Service’s hands-on approach emphasizes safety and clarity. Document symptoms and timing, as this helps a technician diagnose faster if you decide to call for help.
Safety first: essential precautions before you start
Before you touch any components, turn off power to the system at the breaker panel and, if feasible, at the outdoor disconnect switch. Do not touch electrical terminals with wet hands. Refrigerant work is restricted to licensed technicians; attempting to handle refrigerants can cause injury and legal issues. Wear eye protection and gloves when handling sharp edges or dusty components. Use insulated tools and keep children and pets away from the work area. If you smell a strong chemical odor or hear arcing sounds, exit the area and call a pro immediately. These precautions help prevent shocks, burns, or other hazards during a DIY inspection.
Air Conditioner Service stresses that safety should never be sacrificed for speed. When in doubt, pause and seek professional help rather than risking injury or property damage. A cautious approach protects your home and your equipment in the long run.
DIY checks you can safely perform before calling a pro
Here are safe, non-invasive checks you can perform to gauge the situation:
- Verify thermostat accuracy and wiring at the air handler or furnace cabinet.
- Inspect the air filter; replace if dirty or clogged.
- Check the outdoor condenser for visible debris and clean coil surfaces with a soft brush or nozzle.
- Look for ice on the refrigerant lines—if you see ice, turn off the unit to let it thaw and investigate airflow issues.
- Listen for unusual noises from the blower motor or outdoor fan; erratic sounds often indicate a mechanical wear issue.
If you complete these checks and still have cooling issues, the problem may be beyond DIY scope. At that stage, prepare notes on symptoms, duration, and any recent changes to help the technician diagnose quickly. Air Conditioner Service reinforces documenting observations for faster service planning and better outcomes.
Step-by-step overview for common DIY fixes (high-level)
This section provides a snapshot of typical, safe steps you can consider if you are comfortable with basic electrical parts and tools. Do not attempt activities that require refrigerant handling, high-voltage work without proper training, or disassembly of sealed components. The aim is to cover safe, front-line actions and prepare you for a professional diagnosis when needed:
- Power down the system at the breaker and outdoor disconnect.
- Check and replace the air filter if dirty.
- Clean the outdoor condenser coils with a soft brush and ensure unobstructed airflow.
- Inspect basic electrical connections at the control board and blower, tightening any obvious loose wires with the system unplugged.
- Observe the condensate drain for blockages and clear as needed.
- Attempt a simple restart after all checks, and monitor whether cooling resumes. If not, schedule a professional inspection.
- If you suspect a capacitor issue or motor fault, do not attempt to replace parts yourself unless you have training and the correct tools.
- Keep a log of symptom changes and timing to assist a pro when you call.
This overview is intended to prepare you for a pro visit and help you communicate clearly about the problem. Air Conditioner Service recommends using professional support for any steps that involve refrigerants, high voltage, or uncertain diagnoses.
When to call a professional and what to expect
Some fixes require specialized tools, refrigerant handling, and diagnostic training. If you notice persistent not-cooling, ice formation, refrigerant odors, or if any step in the DIY checks feels risky, it’s time to call a licensed HVAC technician. A professional will typically:
- Inspect electrical connections, capacitors, and contactors for proper operation.
- Check refrigerant pressure levels and perform leak testing with appropriate recovery equipment.
- Clean internal components, including evaporator and condenser coils, to restore airflow.
- Test the system under load to confirm cooling capacity and run diagnostics.
The cost and duration vary by issue and whether parts need replacement. The Air Conditioner Service team recommends obtaining a preliminary quote and a clear description of symptoms to streamline the service call and reduce on-site time. Be ready with model numbers, system type (split, packaged, or mini-split), and any recent service history.
Maintenance to extend the life of your AC
Preventive care reduces the frequency of calls for air conditioner fix near me. Implement these routine tasks:
- Change or clean filters every 1-3 months, depending on usage and air quality.
- Schedule annual professional maintenance to check refrigerant, electrical components, and airflow.
- Keep the outdoor unit clear of debris, trim vegetation, and ensure at least 2 feet of clearance around the condenser.
- Clean evaporator coils and inspect ductwork for leaks or obstructions.
- Calibrate the thermostat and verify proper voltage and grounding at the main service panel.
Regular maintenance extends efficiency and comfort while reducing the odds of unexpected breakdowns. Air Conditioner Service emphasizes a simple annual checklist that homeowners can follow to keep systems running smoothly.
AUTHORITY SOURCES
For readers seeking authoritative guidance, consult reliable sources on air conditioning maintenance and safety. The following references provide foundational information and safety standards:
- https://www.energy.gov/energysaver/air-conditioning
- https://www.osha.gov
- https://www.nist.gov
Tools & Materials
- Digital multimeter(Use to test voltage and continuity in low-voltage circuits)
- Screwdriver set (Phillips & flathead)(For panel screws and access covers)
- Nut driver set(Useful for loosening blower wheel hardware or utility connections)
- Electrical tape(For insulating exposed conductors after testing)
- Replacement air filter(Match the MERV rating and size from the unit label)
- Soft brush / coil cleaning wipe(Gently remove dirt from coils; avoid abrasive scrubbing)
Steps
Estimated time: 45-90 minutes
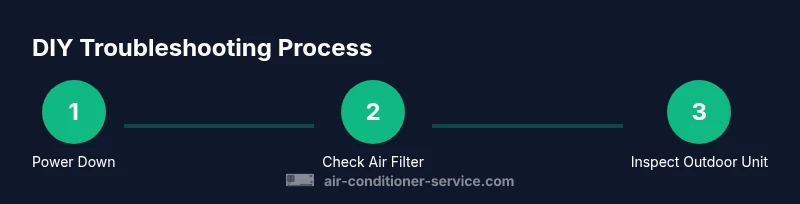
- 1
Power down the system
Turn off the thermostat, switch off the HVAC breaker, and disconnect the outdoor unit if accessible. Verify the power is disconnected with the multimeter before touching wiring.
Tip: Label breakers or switch positions to avoid re-energizing by mistake. - 2
Check and replace the air filter
Open the air handler or furnace cabinet and inspect the filter. If dirty or discolored, replace with a filter of the same size and MERV rating. A clean filter improves airflow and cooling efficiency.
Tip: Plan to replace every 1-3 months depending on use and indoor air quality. - 3
Inspect outdoor condenser and coils
Remove debris from around the condenser and gently brush coils to remove dirt. Ensure there is at least 2 feet of clearance for airflow and operate the unit temporarily to listen for abnormal noises.
Tip: Do not spray with high-pressure water; use a light stream to avoid coil damage. - 4
Check basic electrical connections
With power disconnected, inspect visible wires at the control board and contactors. Tighten loose connections and look for signs of burn marks or corrosion.
Tip: Only handle low-voltage parts unless you know the safe procedures for line voltage work. - 5
Inspect condensate drain
Look for a clogged condensate line and clear with a flexible, non-corrosive tool. A blocked drain can trigger overflow protection and shut down cooling.
Tip: Pour a small amount of water to confirm it flows freely and clean any algae or mineral buildup. - 6
Assess ice and airflow conditions
If you see ice on refrigerant lines, turn off the system and let it thaw. Check for restricted airflow from the filter, ductwork, or blower.
Tip: Ice often signals airflow or refrigerant issues that require professional assessment. - 7
Attempt a controlled restart
Reconnect power and operate for a short period. Observe whether cooling improves and if any warning indicators appear on the control board.
Tip: If the unit trips the breaker again, immediately shut down and call a technician. - 8
Document symptoms for the pro
Record observed symptoms, timing, and any recent changes (filters, new pets, weather). This information helps a pro diagnose faster.
Tip: Include model and serial numbers from the unit label for accurate part identification.
Common Questions
What are the most common causes of not cooling?
Not cooling is often caused by a dirty air filter, blocked condensate drain, or a faulty capacitor. Mechanical issues or refrigerant leaks can also contribute. Start with simple checks, then call a pro if cooling doesn’t improve.
Not cooling is usually due to a dirty filter, a clogged drain, or a bad capacitor. If basic checks don’t fix it, contact a licensed HVAC tech.
Can I handle refrigerant safely by myself?
No. Handling refrigerant requires specialized equipment and licenses. DIY refrigerant work can be dangerous and illegal in many areas. Always call a pro for leaks or recharge.
Handling refrigerant is not safe or legal for DIY. Call a licensed technician for leaks or recharge.
How long does a typical repair take?
Repair duration varies by issue. Simple fixes may take a few hours, while more complex problems can require a technician visit and parts replacement. Use the diagnosis to estimate time with your pro.
A simple fix can take a few hours; more complex problems may need a visit and parts.
When is it time to replace rather than repair?
If the system is old, inefficient, or requires frequent repairs, replacement is often more cost-effective in the long run. A professional can advise on efficiency gains and payoff.
If your unit is old and frequently breaking down, replacement might be cheaper in the long run.
What maintenance helps prevent future issues?
Regular filter changes, coil cleaning, clearing drains, and annual professional checkups dramatically reduce breakdowns and keep cooling efficient. Document maintenance dates for reference.
Change filters regularly, clean coils, clear drains, and have an annual professional check.
Watch Video
The Essentials
- Identify common not-cooling causes early
- Prioritize safety before DIY fixes
- Document symptoms to assist professionals
- Know when to escalate to a licensed tech
- Regular maintenance reduces future breakdowns