Broken Air Conditioner Troubleshooting: Quick Guide
Practical, step-by-step troubleshooting for a broken air conditioner, with safe checks, a diagnostic flow, and expert tips to restore cooling quickly.

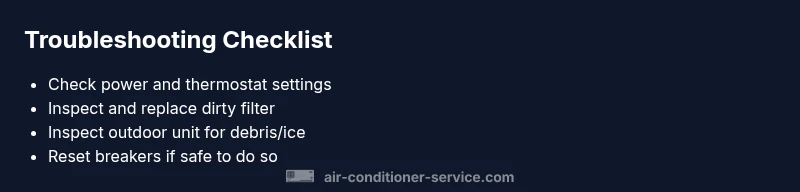
Most likely cause: a simple power issue or dirty filter. Quick fix: verify the thermostat is set correctly, confirm the unit has power (check the outlet, circuit breaker, and outdoor disconnect if applicable), and replace or clean a clogged filter. If it still won't start, unplug, wait a minute, and call a pro.
Why a broken air conditioner won't start
When your air conditioner refuses to respond, the cause is almost always one of a handful of practical, easily checked issues rather than a major mechanical failure. According to Air Conditioner Service, startup problems most often trace to power supply quirks or a dirty air filter that trips safety features and halts operation. This means that with calm, methodical checks you can often restore cooling without costly service calls. Begin with the simplest checks and work your way toward more involved steps—and document what you find in case you need to explain the issue to a technician later. Keeping your cool mentally will help you maintain control and avoid mistakes. The goal is to verify basic functionality first, then validate each subsystem in order. If you stay organized, you’ll usually pinpoint the problem quickly and safely.
In many homes, the problem is a missed step rather than a mechanical breakdown. A thermostat left in heat mode, a dim or dead outlet, or a dusty filter can all trigger a no-cool condition. The Air Conditioner Service team emphasizes that most failures at startup are preventable with regular maintenance and simple battery or wiring checks. By treating the system like a sequence of safety checks, you reduce risk and gain confidence as you progress. If you encounter a live wire, a buzzing contactor, or signs of refrigerant handling, stop and call a licensed professional immediately.
Quick checks to run before calling a pro
Starting with the easiest, fastest checks saves time and money. First, confirm the thermostat is set to cooling and not emergency heat, and that it’s calling for the temperature you actually want. Next, inspect the indoor air filter and replace or clean it if you see dust buildup or restricted airflow. A clogged filter reduces airflow and can trigger safety shutoffs that mimic a system outage. Then, visually inspect the outdoor unit for loose debris, weeds, or ice buildup. If the outdoor coil is covered in ice, turn the system off and let it thaw before testing again. Check the power supply: verify the outlet is live, inspect the indoor disconnect if your unit uses one, and reset any tripped breakers. If the unit still won’t start, check for a blinking status light or fault code in the user manual and jot down what you see. Air Conditioner Service analysis shows that thermostat faults and airflow restrictions are among the most common causes after power issues.
If you’re comfortable, you can perform a quick reset by turning off the circuit breaker for 60 seconds and then restoring power. This can clear minor electronics glitches that sometimes prevent startups. Do not bypass safety devices or disable protective covers while performing these checks. Remember to reassemble any panels and ensure the area around the outdoor unit is clear of plants and objects that could obstruct airflow.
Safety first: what not to do
Electrical systems carry real hazards. Never poke around live wiring, capacitors, or refrigerant lines with the power on. Do not jump-start a non-responsive thermostat by bypassing safety features or defeating the disconnect switch. If you hear buzzing, see smoke, or detect a strong chemical smell, stop immediately and contact a licensed technician. The risk of electric shock or refrigerant exposure is not worth attempting a DIY fix beyond basic consumer steps. When in doubt, pause and call for professional help. By prioritizing safety, you protect yourself, your home, and your equipment while still making meaningful progress toward a diagnosis.
Diagnostic flow overview
A structured diagnostic flow helps you move from symptom to solution without guessing. Start with the most likely and least invasive checks, then progress to targeted tests. Symptoms like 'not turning on' or 'not cooling' map to common causes such as power issues, thermostat settings, airflow problems, or safety shutoffs. After verifying basic power and airflow, examine the control board, contactors, and wiring only if you have the proper tools and training. If at any point you identify a refrigerant issue, a professional must handle it. This flow keeps you organized, reduces risk, and makes it easier to escalate when necessary. Air Conditioner Service emphasizes documenting each step for reference and for the technician who may service the unit later.
Common fixes and what to expect
Many startup problems arise from simple malfunctions. The most common fixes involve resetting a tripped breaker, correcting thermostat settings, and replacing a dirty filter. If the unit starts after these steps, listen for odd noises or weak airflow, which may indicate a fan motor issue or a clogged coil. A reboot of the system sometimes resolves electronics glitches that prevent startup. If none of these steps restore cooling, you’ll want a professional assessment to avoid causing further damage. The goal is to narrow the problem to a component or control loop so the technician can bring back reliable cooling with safety in mind.
Steps
Estimated time: 30-60 minutes
- 1
Power check and thermostat confirm
Turn off the circuit breaker for the outdoor unit, wait 30 seconds, and restore power. Check the thermostat is set to cooling and at a reasonable temperature. If the unit still won’t respond, proceed to the next step.
Tip: Safety: always cut power before touching electrical components. - 2
Inspect and replace the air filter
Open the indoor air handler and remove the filter. If it looks clogged or dirty, replace it with a filter that matches the unit’s MERV rating and size. Reinstall securely and run the system briefly to see if airflow improves.
Tip: Filter changes are a quick win; mark a calendar reminder for a monthly check during peak season. - 3
Check breakers and disconnects
Locate the main breaker panel and the outdoor disconnect. Ensure the switch is in the ON position and that there are no tripped breakers. If a breaker trips again, do not keep resetting it; this indicates a deeper electrical issue.
Tip: A tripping breaker can signal a short or overload; call a pro if it repeats. - 4
Assess for ice or debris
Inspect the outdoor coil for ice buildup or excessive debris. If ice is present, power down, let it thaw, and then restart the unit. Clear any leaves or yard debris around the outdoor condenser to ensure adequate airflow.
Tip: Never poke at ice with tools; let it melt naturally to prevent coil damage. - 5
Call a professional if unresolved
If basics are checked and the unit still won’t start or you notice unusual noises, call a licensed HVAC tech. Provide symptom details and any fault codes you observed to speed up diagnosis.
Tip: Document steps you’ve taken so the tech doesn’t duplicate checks.
Diagnosis: Broken air conditioner won't start or respond to thermostat
Possible Causes
- highPower issue (tripped breaker, blown fuse, outage)
- mediumThermostat misconfiguration or dead device
- mediumAirflow restriction from dirty filter or coil ice buildup
- lowElectrical fault in control board or contactor
Fixes
- easyCheck outlet and reset breaker; verify a live supply to the unit
- easyVerify thermostat settings and replace batteries if needed
- easyReplace dirty filter or clean clogged components; ensure proper airflow
- mediumInspect outdoor disconnect and contactors; replace faulty parts if identified
Common Questions
What is the first thing I should check if my broken air conditioner won't start?
Begin with power, thermostat, and filter checks. Ensure the thermostat is in cooling mode, the unit has power, and the filter isn’t clogged. These simple steps fix many startup issues without a service call.
Check power, thermostat, and filter first. Those steps fix most startup problems quickly.
Can a dirty filter cause an AC to stop cooling even if it turns on?
Yes. A dirty filter reduces airflow, causing the system to overheat and shut down or perform poorly. Replace or clean the filter and see if cooling improves.
A dirty filter can cause poor cooling; replace it and test again.
What if the circuit breaker keeps tripping?
A repeatedly tripping breaker suggests an electrical or overload issue. Do not keep resetting; instead, turn off the breaker and consult a licensed technician to diagnose the load and wiring safely.
If breakers trip repeatedly, stop and contact a professional.
Is it safe to attempt refrigerant repairs myself?
No. Refrigerant handling requires certification and specialized equipment. A leak or improper refrigerant charge can be dangerous and illegal in many areas.
Refrigerant work is for licensed pros only.
When should I consider replacing rather than repairing?
If the unit is old, inefficient, or requires frequent repairs, replacement may be more cost-effective in the long run. A pro can help evaluate age, efficiency, and total cost.
If repairs add up or the unit is old, replacement may be best.
What maintenance steps prevent future breakdowns?
Regular filter changes, annual professional tune-ups, cleaning of coils, and ensuring proper airflow can significantly extend the life of the system and reduce surprises.
Keep up with filters and yearly tune-ups to prevent issues.
The Essentials
- Check power and thermostat first.
- Replace or clean the filter to restore airflow.
- If unresolved, contact a professional.
- Schedule routine maintenance to prevent failures.