Air Conditioner Repair NYC: Practical DIY Guide 2026
Learn to diagnose and fix common air conditioner issues in NYC with this practical, safety-first guide. Tools, step-by-step instructions, and guidance on when to call a pro.

By following these steps, you'll be able to diagnose common AC issues in NYC and perform basic fixes safely. You’ll learn to identify not-turning-on symptoms, airflow problems, unusual noises, and minor thermostat or capacitor faults. This guide emphasizes safety, required tools, and when to call Air Conditioner Service for professional repair.
NYC-specific considerations for AC repair
In New York City, dense housing, aging HVAC systems, and tight living spaces complicate air conditioner repair nyc. The Air Conditioner Service team notes that urban units often contend with restricted airflow from cluttered outdoor spaces and limited clearance around condensers. Building policies, permit requirements, and noise restrictions can shape how you approach maintenance and repairs. When planning work, verify your model and local building rules, and set expectations for noise, debris, and access. The goal is safe, effective troubleshooting that minimizes disruption to neighbors while preserving comfort. Incorporating urban realities helps you avoid costly missteps and unnecessary service calls. According to Air Conditioner Service, start with a safety-first mindset, then methodically work through diagnosable issues that you can handle without specialized tools.
Throughout this guide, we’ll use the keyword air conditioner repair nyc to anchor practical steps for apartment living and small-gear diagnostics. You’ll learn why common urban problems—dust, humidity, limited airflow, and outdoor debris—show up differently here than in suburban homes. The approach is measured, not rushed, and designed for homeowners and renters who want to fix straightforward problems themselves while knowing when professional help is warranted.
Safety first: power, accessibility, and environment
Safety is non-negotiable for any air conditioner repair nyc task. Begin by shutting off power at the main breaker and at the outdoor disconnect to prevent shock or compressor restart during inspection. If the unit shares a living space with others, inform household members about the work window and potential noise. Wear safety goggles and gloves, remove loose jewelry, and keep pets away from the work zone. Clear a path to the outdoor unit and indoor air handler; check for damp surfaces, exposed wiring, and overheating components before touching anything. In NYC, you may also need to consider building access times and the potential need for a permit when opening wall plates or accessing roof-mounted equipment. Always use a non-contact voltage tester to confirm that circuits are dead before handling.
Diagnostic approach: from thermostat to refrigerant
A structured diagnostic approach helps you quickly identify air conditioner repair nyc issues without guesswork. Start with the thermostat: confirm it’s set to cool, and verify the display is functioning. Next, inspect the air filter; a dirty filter reduces airflow and cooling efficiency. Inspect the outdoor condenser for debris, leaves, or plants encroaching on the unit, which can block airflow and suppress performance. Check for tripped breakers or blown fuses in the service panel. If you’re comfortable, test voltage at the contactor and inspect wiring connections for looseness or corrosion. For refrigerant-related concerns, note that handling refrigerant requires certification and specialized equipment; never attempt a DIY refrigerant charge. When in doubt, move to safer checks first and document findings to discuss with a professional.
Basic fixes you can perform in an apartment setting
Some fixes are well within reach for air conditioner repair nyc, especially for simple, non-technical problems. Replace a clogged or dirty filter with a clean one of the correct size. Straighten bent fins on the condenser with a fin comb, ensuring you don’t bend fins inwards and restrict airflow. Clean the outdoor unit’s surrounding area to maintain airflow; trim vegetation and remove any objects leaning against the unit. Ensure window units, if used, are sealed properly and not blocked by curtains or furniture. If your thermostat is old or unresponsive, replace it with a modern programmable model. Finally, reseat any loose panel screws and recheck the power connection. Save time by labeling wires before removal and taking photos for reference.
When to call a pro and what NYC-specific regulations may apply
Not all air conditioner repair nyc tasks are appropriate for DIY. If you hear hissing, smell unusual odors, or suspect refrigerant issues, stop and call a licensed HVAC technician. In dense urban settings, some repairs require building permission or licensed professionals for safety and compliance. NYC has specific noise restrictions and energy codes that can affect repair timelines and equipment replacements. If a general inspection reveals a failing capacitor, compressor, or refrigerant leak, a pro’s intervention is the best path to avoid further damage and ensure code-compliant installation. Remember, a professional evaluation can prevent dangerous mistakes and protect indoor air quality.
Maintenance habits that prevent NYC-specific problems
Prevention is the best strategy for air conditioner repair nyc. Schedule seasonal inspections and switch to a high-quality filter suited to your space. Keep outdoor clearance around the condenser, especially on balconies or rooftops where windborne debris accumulates. Regularly clean the condensate drain to prevent algae growth and water damage. In humid cities, consider a mild, preventive refrigerant check by a qualified technician and ensure proper thermostat calibration. Lastly, document maintenance activities and any changes you notice, because a clear history helps technicians diagnose recurring issues more quickly and accurately.
Tools & Materials
- Safety goggles(ANSI-rated; splash protection)
- Work gloves(Cut-resistant preferred)
- Insulated screwdriver set(Phillips and flathead)
- Non-contact voltage tester(Verify circuits are dead)
- Multimeter(DC/AC voltage and resistance tests)
- Fin comb / coil cleaner(Clear fins without bending)
- Vacuum with narrow nozzle(Clean debris from around coils)
- Replacement air filters(Match the correct size for your unit)
- Thermometer or infrared thermometer(Check return air temperature if available)
- Camera or notebook for notes(Document wiring and settings)
Steps
Estimated time: 1 hour 30 minutes – 2 hours
- 1
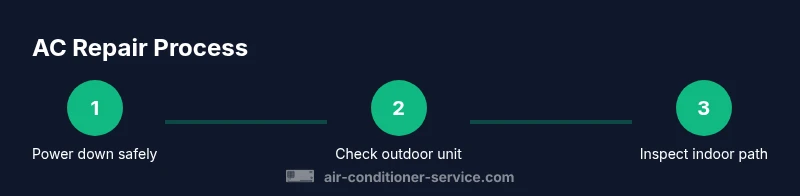
Power down and secure the area
Shut off power to the entire AC system at the main breaker and the outdoor disconnect if accessible. Confirm with a voltage tester that circuits are de-energized. This step prevents shock and protects sensitive components during inspection.
Tip: Label the circuit breaker and outdoor disconnect for future reference. - 2
Inspect the outdoor unit
Clear debris and ensure at least 12 inches of clearance around all sides of the condenser. Remove leaves, sticks, and overgrown vegetation. A clean environment restores airflow and cooling efficiency.
Tip: Work from the top down to avoid recirculating debris into the unit. - 3
Check the indoor air path
Open the return air path and inspect the filter; replace if dirty. Ensure vents are unobstructed and that duct connections are sealed. Poor airflow is a common cause of low cooling performance.
Tip: If you’re unsure of filter size, measure the slot or bring the old filter to a hardware store. - 4
Test the thermostat and wiring
Set the thermostat to cool and check that the compressor engages when the unit runs. Inspect visible wiring for looseness or signs of wear; tighten terminals if you’re trained and comfortable doing so.
Tip: Do not force connectors; if a wire feels brittle, stop and consult a pro. - 5
Inspect the thermostat wiring and capacitor safety
If you’re comfortable, test the capacitor with a multimeter and visually inspect for bulges or leaks. Do not touch the capacitor’s terminals directly. A failing capacitor is a common DIY-friendly fault, but handling it carries risks.
Tip: Only perform capacitor tests if you have proper training. - 6
Check drain and refrigerant indicators
Inspect the condensate drain line for blockages. Clear any algae with a flexible brush or small-diameter air. If you suspect refrigerant issues or obvious leaks, stop and call a professional.
Tip: Never attempt to recharge refrigerant yourself. - 7
Reassemble and test
Reconnect any panels, restore power, and run the system for a test cycle. Observe for abnormal sounds, vibrations, or icing on the coils. If the unit still underperforms, document symptoms for your technician.
Tip: Keep a record of sounds, timings, and condition after reactivation. - 8
Evaluate performance and safety
Assess if indoor temperature stabilizes within expected ranges and whether humidity feels comfortable. If issues persist, schedule a professional service to prevent further damage.
Tip: A proactive service plan can extend equipment life and improve efficiency.
Common Questions
What can I safely diagnose and fix on my own for air conditioner repair nyc?
You can safely diagnose and fix issues such as a dirty filter, improper thermostat settings, tripped breakers, and obvious debris around the outdoor unit. Always power down before inspecting wiring. For anything involving refrigerant or the compressor, call a licensed technician.
You can check the filter, thermostat, and outdoor unit safely, but refrigerant or compressor work should be handled by a pro.
When should I replace instead of repair?
If repairs recur frequently, or the unit is significantly less efficient than modern standards, replacement may be more cost-effective in the long run. A professional can help assess efficiency losses and lifecycle expectancy.
If frequent repairs pile up or efficiency drops noticeably, replacement is worth considering.
Is refrigerant handling safe for DIY?
No. Refrigerant work requires certification and specialized equipment due to safety and environmental regulations. Always use a licensed HVAC technician for refrigerant-related tasks.
Refrigerant should only be handled by licensed professionals.
Can I install a window unit in a NYC apartment as a workaround?
Window units can be a temporary solution in some NYC apartments, but building codes and window configurations vary. Check with building management before installation and monitor energy use.
Window units may be allowed in some buildings, but confirm with management first.
What NYC-specific regulations affect home AC repair?
NYC has safety codes and permitting requirements that can govern repair work, especially for opening walls or roofs and for unit replacements. Always verify local requirements before major work.
City rules may require permits for certain repairs; check before you start.
How often should I service my AC in a humid city?
Seasonal checks before summer and fall help maintain efficiency and prevent breakdowns. Replace filters regularly and inspect drainage and airflow for best results.
Do a yearly check in spring and fall, with filter changes every 1-3 months as needed.
Watch Video
The Essentials
- Power down before touching any components.
- Urban settings require attention to clearance and building rules.
- DIY fixes cover basics like filters, airflow, and wiring checks.
- Call a pro for refrigerant, compressor, or suspected electrical faults.