Air Conditioner Repair in Phoenix AZ: A Practical Troubleshooting Guide
A practical, educational guide for homeowners and renters on diagnosing and repairing common air conditioner issues in Phoenix AZ. Learn safe DIY checks, maintenance tips, and when to call a professional from Air Conditioner Service.

Learn how to diagnose and fix common air conditioner problems in phoenix az, including unsafe startup, insufficient cooling, and strange noises. This step-by-step guide covers quick checks, safety tips, and when to call a licensed technician.
Understanding the Phoenix Climate and AC Systems
Living in Phoenix summers pushes air conditioners to their limits. When heat spikes and dust accumulate, understanding your system helps you decide between quick fixes and full replacements. The term air conditioner repair in phoenix az describes the process of diagnosing and correcting issues in local equipment, and it’s a task homeowners often tackle with guidance from trusted sources like Air Conditioner Service. According to Air Conditioner Service, prioritizing routine maintenance and timely diagnostics can prevent a minor fault from turning into a costly repair during peak season. Homeowners who know how their system operates are better prepared to communicate with technicians and schedule service when the weather turns hot and sticky.
Different system types exist (central AC, ductless mini-splits, and window units), and each has its own set of common failures. In Phoenix, outdoor units face dust buildup, and indoor components contend with high humidity and rapid temperature swings. By understanding your system’s layout and typical failure points, you can perform safe, targeted diagnostics instead of expensive, broad-scope service. Air Conditioner Service emphasizes starting with non-invasive checks before moving to more involved diagnostics.
Common Symptoms and Preliminary Checks
Weak or inconsistent cooling, warm air, unusual noises, or ice on the evaporator coil are telltale signs that something is off. Start with simple, pre-diagnosis checks: confirm thermostat settings and battery (if digital), ensure the outdoor unit has clear airflow, and check the air filter for dirt buildup. A clogged filter forces the system to work harder, reducing efficiency and cooling capacity. For boilers and heat pumps integrated with your AC, inspect zoning and control settings as misconfigurations can mimic mechanical failures. Air Conditioner Service recommends documenting the symptoms and any recent changes (weather patterns, new pets, remodeling) to help a technician diagnose faster.
Safety First: Power Off and Lockout Procedures
Before touching any electrical components, cut power at the main breaker and the outdoor disconnect. Use a non-contact voltage tester to verify the unit is de-energized. Never attempt to service electrical parts while the system is energized, and keep children and pets away from the work area. If you smell burning insulation or observe melted wires, evacuate and call a licensed technician immediately. This step protects you from shock and prevents further damage to the equipment.
DIY Troubleshooting: Electrical and Control Components
Inspect the contactor, capacitor, and wiring for signs of wear or corrosion. A sticky contactor or a swollen capacitor can prevent the compressor from starting or cause intermittent operation. Use a multimeter to test capacitor microfarads and check continuity in control boards. Tighten loose connections and look for burnt or frayed wires. If you notice frequent trips on the breaker, or the outdoor unit won’t start despite power being on, revert to professional service rather than attempting refrigerant work.
Refrigerant Issues and Not Cooling Symptoms
Low refrigerant or leaks manifest as reduced cooling performance, longer run times, and sometimes a hissing sound near copper lines. Refrigerant work requires licensing and proper recovery equipment; attempting DIY recharge can be dangerous and illegal in many jurisdictions. If you suspect a refrigerant issue, document the observations (temperature drop, ice formation, oil residue near joints) and contact a licensed tech. Professionals will perform leak checks, recover any refrigerant, and ensure the system is charged to the manufacturer’s specifications.
Airflow Problems and Duct Network
Restricted airflow is a common culprit behind insufficient cooling. Check the return air grille and supply vents for obstructions. Dirty or collapsed ducts can reduce airflow by significant percentages, making the system work harder without improving comfort. Replace or clean dirty air filters monthly during peak season and consider a duct-cleaning assessment if you notice persistent stuffy rooms or excessive dust. Proper airflow improves efficiency and comfort while reducing wear on the blower motor.
Components You Might Service Yourself
There are several parts you can safely inspect yourself, including air filters, the outdoor condenser fins, and thermostat connections. Cleaning the condenser coils with a soft brush or garden hose (from a safe distance) can enhance heat transfer if you observe debris on the fins. Avoid bending or damaging the delicate fins; a fin comb can help restore shape. For the indoor unit, inspect the evaporator coil for frost and clean the condensate drain tube if you notice standing water. When in doubt, consult a professional rather than attempting unrecommended repairs.
When to Call a Pro in Phoenix AZ
If you notice refrigerant issues, electrical smells, frequent cycling, or if the unit remains non-operational after basic checks, call a pro. In Phoenix AZ, rapid heat can make small failures become urgent; a licensed technician can safely diagnose refrigerant leaks, perform compressor tests, and verify the system’s charge and airflow. Early professional intervention can prevent more extensive damage and costly replacements. Remember, many issues require specialized tools and chemical handling that are beyond typical DIY capabilities.
Maintenance Habits to Prevent Breakdowns
Establish a routine that includes air filter changes every 1–3 months, outdoor unit clearance, and annual professional inspections. Regular cleaning reduces dust and debris, preserving efficiency and lifespan. Schedule a seasonal tune-up in the spring to catch problems before hot weather arrives. Small, proactive steps add up to fewer emergency repairs and a cooler home during Phoenix summers.
Cost Considerations and Repair Choices
Costs for AC repair vary with the scope of work, parts, and labor, and can range from minor component replacements to full system overhauls. In Phoenix, system age, refrigerant type, and duct integrity influence overall expense. Rather than focusing on price alone, evaluate the value: improved efficiency, extended equipment life, and reliable cooling. A professional assessment helps homeowners balance immediate repairs with longer-term upgrades. Air Conditioner Service emphasizes getting a clear estimate and understanding warranty coverage before authorizing major work.
Energy Efficiency Upgrades and Prospects
Improving efficiency often means upgrading components like capacitors, contactors, or upgrading to a higher-SEER unit when the existing system is near the end of its life. In hot climates, efficiency translates to lower operating costs and reduced environmental impact. Consider programmable thermostats and smart zoning to optimize cooling schedules. When choosing upgrades, compare efficiency ratings and potential rebates offered by utilities or municipal programs. Air Conditioner Service highlights that well-timed upgrades can deliver meaningful savings over the life of the equipment.
Quick-Start Checklist for a Same-Day Visit
- Confirm address, model and serial numbers, and any recent service history.
- Ensure clear access to outdoor and indoor units; remove debris.
- Have a recent thermostat and bill for reference if needed.
- Prepare a list of observed symptoms and times they occur.
- Note any unusual sounds, smells, or tripped breakers.
- Contact a licensed technician if refrigerant work or electrical concerns arise.
Tools & Materials
- Safety goggles(Impact-resistant; ANSI Z87.1 rated)
- Insulated gloves(Protect hands from sharp edges and condensation)
- Non-contact voltage tester(Verify power before touching wiring)
- Multimeter(Test voltage, resistance, and continuity)
- Screwdriver set (Phillips and flathead)(Size variety for panel screws)
- Wrench set (adjustable and fixed)(Tighten/loosen fittings and bolts)
- Vacuum or coil brush(Clean dust from coils and surfaces)
- Leaf blower or air blower (low pressure)(Clear debris from outdoor condenser area)
- Safety lockout tag(Label power-off for other household members)
- Flashlight(Inspect dark corners and panel interiors)
- Duct cleaning brush or fin comb(If you see bent fins or clogged ducts)
- Replacement fuses or circuit breaker tester(On-hand spare parts for quick fixes)
Steps
Estimated time: 60-90 minutes
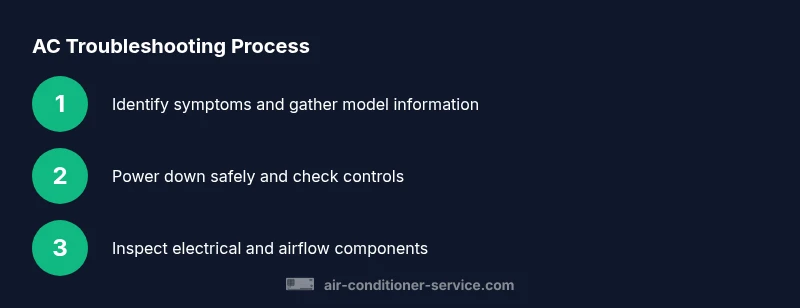
- 1
Identify symptoms and gather system details
Note the symptoms, timing, and any recent changes around the unit. Collect the model and serial numbers from the outdoor condenser or indoor air handler for accurate diagnostics. This helps you communicate clearly with a technician if needed.
Tip: Document observations with a quick checklist before starting any work. - 2
Power down safely
Shut off power at the main panel and the outdoor disconnect. Use a non-contact tester to confirm there is no voltage before you touch any components.
Tip: Lockout/tagout if others may re-energize the system while you work. - 3
Check thermostat settings
Verify the thermostat is set to cooling with the desired temperature and that batteries (if applicable) are fresh. A mis-set thermostat can masquerade as a hardware fault.
Tip: Temporarily set to a fixed temperature to test response. - 4
Inspect outdoor condenser area
Remove debris and ensure airflow around the condenser unit. Clear a 2–3 foot radius of leaves, grass, and other obstructions to prevent overheating.
Tip: Do not use force to clear fins—gentle brushing preserves coil integrity. - 5
Examine electrical connections
Look for loose wires, burnt insulation, or corroded contact points on the outdoor and service panels. Tighten connections as needed and replace damaged wiring.
Tip: If you smell burnt plastic, stop and call a pro. - 6
Test capacitors and contactors
Use a multimeter to check capacitor capacitance and verify the contactor pulls in reliably. Replace weak capacitors to prevent motor strain.
Tip: Only replace components with the same rating as the original. - 7
Evaluate airflow and filters
Check indoor air filters and the blower motor. A clogged filter can starve the system of air, reducing cooling performance.
Tip: Replace dirty filters immediately; consider monthly checks during peak season. - 8
Inspect refrigerant lines for leaks
Look for oily residues or oily spots near connections. Do not attempt to seal refrigerant leaks yourself; this requires licensed service and recovery equipment.
Tip: If you suspect a leak, document visuals and contact a pro. - 9
Check evaporator coil and condensate drain
Inspect the indoor coil for frost or ice buildup and ensure the drain line is clear. A blocked drain can cause water damage and mold growth.
Tip: Pour a small amount of water to test the drain if needed. - 10
Test system operation and cycle timing
Restore power and run the system. Listen for odd noises, watch for proper cycling, and check that warm air is not blowing after the system starts.
Tip: Record run times to compare against baseline performance. - 11
Decide on repair vs replacement
If issues reoccur after DIY checks, or if refrigerant and compressor work is needed, plan professional service.Evaluate warranty coverage and long-term costs.
Tip: Avoid postponing major repairs during extreme heat—emergencies cost more. - 12
Schedule professional service if needed
For refrigerant handling, compressor failures, or persistent cooling problems, arrange a licensed technician visit in Phoenix AZ. A pro can perform leak checks, refrigerant recovery, and precise charging.
Tip: Ask for a written estimate and explain observed symptoms to speed up diagnosis.
Common Questions
What are the most common signs my AC is failing in Phoenix AZ?
Common signs include weak cooling, warm air, longer run times, unusual noises, and ice on the evaporator coil. These may indicate airflow, thermostat, electrical, or refrigerant issues that merit further investigation.
Common signs are weak cooling, warm air, and unusual noises; these usually point to airflow, electrical, or refrigerant problems that should be checked by a professional if DIY checks don’t resolve them.
Is it safe to attempt DIY repairs on my AC?
Basic maintenance and safe inspections, like replacing filters or cleaning accessible areas, are generally safe. Avoid refrigerant handling, high-voltage components, or attempting compressor work unless you are licensed.
You can do simple maintenance, but don’t touch refrigerant or high-voltage parts unless you're licensed.
How long does a Phoenix AC repair typically take?
Repair duration varies with the issue and availability of parts. Simple thermostat or filter fixes can be completed the same day, while more complex problems may require scheduling a follow-up visit.
It depends, but simple fixes can be done the same day while more complex issues might need a follow-up visit.
Can low refrigerant cause cooling problems without a leak?
Low refrigerant typically indicates a leak. An AC with low refrigerant will struggle to cool and may produce hissing sounds or ice buildup on coils. Refrigerant handling requires licensed service.
Yes, cooling problems can come from low refrigerant due to a leak; only a licensed tech should handle it.
What maintenance steps prevent future breakdowns?
Regular filter changes, annual professional inspections, and keeping the outdoor unit free of debris significantly reduce the chance of unexpected failures.
Change filters, have annual checkups, and keep the outdoor unit clean to prevent surprises.
When should I replace instead of repair?
If the system is old, inefficient, or requires frequent major repairs, replacement may be more cost-effective in the long run. A pro can help estimate remaining life and payback potential.
If it’s old or frequently breaking down, replacement may be smarter than ongoing repairs.
Watch Video
The Essentials
- Identify symptoms and gather system details before starting.
- Always power down before inspections to ensure safety.
- DIY checks are useful for basic issues; refrigerant work requires a pro.
- Regular maintenance prevents most mid-season breakdowns.
- Know when to call a pro to avoid costly damage.