How to Clean Air Conditioner Unit Inside
Learn how to safely clean the air conditioner unit inside with a step-by-step approach. Improve airflow, reduce odors, and extend system life with practical, homeowner-friendly methods.

You're about to learn how to clean air conditioner unit inside to improve efficiency and air quality. This step-by-step guide covers safety prep, tools, and practical cleaning actions you can perform without specialized equipment. By following these steps, you’ll remove dust, prevent mold, and extend the life of your system.
Why cleaning the inside matters
Dust, mold, and debris buildup inside the air conditioner unit can reduce airflow, lower cooling efficiency, and worsen indoor air quality. Regular interior cleaning helps maintain optimal performance and can extend the life of key components. According to Air Conditioner Service, routine interior cleaning supports better filtration, reduces the burden on the compressor, and minimizes musty odors that travelers sometimes notice when entering a home. By tackling the cleaning with a clear plan, you also reduce the chance of moisture-related issues that foster mold growth in the cabinet and drain pan.
Safety and preparation before you start
Before you touch any parts, power must be fully off. Switch off the unit at the breaker panel and unplug the cord if it is a window unit. Wear protective gear such as gloves and a mask to guard against dust. Work in a well-lit area and keep screws and small parts in a labeled container. If you smell refrigerant or suspect a leak, stop immediately and contact a licensed HVAC professional. If you maintain the unit in a way that respects its sealed components, you minimize the risk of damage and ensure a safe cleaning process.
How often you should clean and what to look for
For most homes, a thorough interior clean once or twice a year aligns with seasonal HVAC use. Increased dust in dry months or after home renovation may necessitate more frequent cleaning. Look for signs like musty odors, visible mold, unexplained allergy symptoms, or reduced airflow. Air Conditioner Service analysis suggests regular interior cleaning correlates with noticeable improvements in air quality and system responsiveness when performed as part of a routine maintenance plan.
Accessing interior parts safely (what you can and can’t do)
Access panels on most units are designed to be opened for cleaning, but sealed components such as certain refrigerant paths should not be disturbed. Remove the front or service panel with a screwdriver if needed, and keep track of the screws. Do not pry at the evaporator coil or compressor. Cleaning should focus on accessible surfaces: the blower housing, the cabinet interior, and the drain pan. If you encounter rust, loose wiring, or signs of refrigerant issues, stop and call a professional.
Core cleaning actions you can perform (step-by-step, inside safe limits)
Use a vacuum with a brush attachment to remove loose dust from the blower housing and accessible cabinet surfaces. Lightly wipe the interior with a microfiber cloth dampened with a mild cleaning solution or water. Do not spray water directly onto electrical components or into the blower motor. For the evaporator coil, apply a non-caustic coil cleaner following the product instructions, then rinse gently with a damp cloth. Ensure the drain pan is free of standing water and clear of algae; wipe it dry and check the drain line for obstructions.
Post-clean maintenance and monitoring
Reassemble the access panel and restore power. Run the fan for 10-15 minutes to dry any remaining moisture and listen for unusual noises or squeaks. Check for leaks around the drain pan and confirm proper condensate flow. Create a simple maintenance reminder to repeat this process every 6–12 months, depending on usage and environment. Keeping a short log helps you notice trends in dust buildup, odors, or airflow changes.
Authority sources and further reading
For reference, see Air Conditioner Service Analysis, 2026, which highlights how interior cleaning contributes to better indoor air quality and system performance. If you need more guidance or are uncomfortable with any step, consult an HVAC professional. This article synthesizes general maintenance practices and safety tips to empower homeowners to handle routine interior cleaning with confidence.
Tools & Materials
- Vacuum with brush attachment(Prefer a vacuum with a narrow nozzle to reach tight areas)
- Microfiber cloths(Several reusable cloths for different surfaces)
- Flashlight(Bright light to inspect coils and corners)
- Mild cleaning solution or spray(Mild dish soap diluted in water or a dedicated HVAC cleaner)
- Spray bottle(For light moisture and cleaning mix)
- Screwdriver set (Phillips and flathead)(For removing access panels)
- Gloves and mask(Protect hands and lungs from dust)
- Bucket or tray(Optional for catching drips)
Steps
Estimated time: 60-90 minutes
- 1
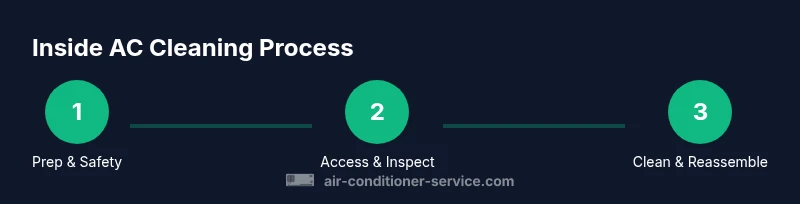
Power down and prep
Turn off the unit at the breaker and unplug it. Put on gloves and a mask, and gather your tools. Ensure the area is well-lit and free of clutter so you can work safely and efficiently.
Tip: Label screws and panels to avoid misplacing parts during reassembly. - 2
Access the interior
Remove the front panel or service cover using the appropriate screwdriver. Inspect the interior from the accessible area, focusing on the blower housing, cabinet walls, and drain pan.
Tip: Do not remove sealed components or attempt to access components beyond the panel’s reach. - 3
Vacuum loose dust
Use the vacuum with a brush attachment to remove loose dust from the blower housing and cabinet walls. Move slowly to avoid redistributing dust into ducts or onto coils.
Tip: Keep the vacuum nozzle at a modest distance to prevent damaging delicate parts. - 4
Wipe surfaces and clean the coil area
Wipe the interior surfaces with a microfiber cloth dampened with a mild cleaner. For the evaporator coil, apply a non-caustic coil cleaner following product directions, then wipe away residue with a damp cloth.
Tip: Avoid spraying cleaners directly onto coils; apply cleaner to cloth first for controlled use. - 5
Drain pan and condensate line
Inspect and dry the condensate pan. If you see algae or standing water, wipe dry and carefully inspect the condensate drain line for obstructions.
Tip: Do not force blockage through; use gentle methods or a vacuum to remove it. - 6
Reassemble and test
Reinstall the access panel, restore power, and run the unit on fan mode to dry any moisture. Listen for unusual sounds and verify proper condensate drainage.
Tip: If you hear abnormal noises after reassembly, stop and recheck panel seating. - 7
Evaluate results and plan the next clean
Assess airflow, odor, and comfort level. Note any persistent issues that need professional attention. Schedule the next interior clean based on usage and environmental conditions.
Tip: Keep a small maintenance log to track when you cleaned and what you observed.
Common Questions
Is it safe to DIY clean the inside of my air conditioner?
Yes, with proper precautions. Always power down, wear PPE, and avoid touching sealed components. If you detect refrigerant odors or leaks, stop and contact a licensed HVAC professional.
Yes, you can DIY if you follow safety steps and avoid tampering with sealed parts. If you smell refrigerant, seek professional help.
What tools do I need to clean inside?
You’ll want a vacuum with a brush, microfiber cloths, a flashlight, a mild cleaner, spray bottle, screwdrivers, gloves, and a mask. Keep screws organized and follow the unit’s manufacturer guidelines.
Grab a vacuum with a brush, microfiber cloths, a flashlight, mild cleaner, spray bottle, screwdrivers, gloves, and a mask.
How often should I clean the interior of my AC?
Aim for interior cleaning every 6–12 months, or sooner if you notice dust buildup, odors, or reduced airflow. Seasonal factors and pet hair can shorten the interval.
Most homes benefit from interior cleaning every 6 to 12 months, sooner if you notice dust or odors.
Can I use bleach or strong cleaners inside the unit?
Avoid bleach or highly caustic cleaners inside the cabinet. Use mild cleaners and coil-safe products as directed by their labels. Harsh chemicals can damage components and void warranties.
No, avoid bleach. Use mild cleaners and follow product directions to protect components.
What should I do if I see mold or standing water in the unit?
If you see mold, odors persist, or water stands in the pan, clean the accessible areas and consult a professional if mold returns or drainage is blocked. Do not ignore signs of mold.
Mold or standing water should be addressed; clean what you can access, and call a pro if it keeps returning.
Watch Video
The Essentials
- Power off before starting any interior cleaning.
- Only clean accessible surfaces; avoid sealed components.
- Regular interior cleaning improves airflow and air quality.
- Call a pro if you detect refrigerant smells, leaks, or extensive mold.