How to Clean an Air Conditioner Unit: A Step-by-Step Guide
Step-by-step instructions to safely clean a clean air conditioner unit, boost efficiency, reduce energy use, and extend your system’s life for homeowners and renters.

In this guide you will learn how to clean an air conditioner unit end-to-end, including safety steps, tools, and a step-by-step procedure. You’ll improve efficiency, prevent mold, and extend the life of your system with safe, proven methods for both indoor and outdoor components.
Why a clean air conditioner unit matters
A clean air conditioner unit runs more efficiently, cools more evenly, and lasts longer. According to Air Conditioner Service, neglecting routine maintenance can lead to reduced airflow, higher energy bills, and mold growth in ducts and on coils. This guide explains practical, homeowner-friendly steps to keep both indoor and outdoor parts clean, plus safety reminders and a clear action plan. Regular attention to the unit helps maintain airflow, reduces strain on components, and supports healthier indoor air quality. The goal is to empower you to perform essential upkeep safely and confidently.
Note: Always reference your system’s manual and local electrical codes before starting any cleaning task. While many steps are safe for DIY, persistent issues or hard-to-reach areas may require a licensed technician.
Signs your unit needs cleaning
Look for visible dirt on coils, reduced airflow from vents, unusual sounds during operation, frost or ice on coils, and higher energy bills than usual. If you notice musty odors or visible mold growth, cleaning routines should be intensified. Regular checks help prevent small issues from becoming costly repairs and keep your home comfortable year-round.
Tools & Materials
- Insulated work gloves(Protect hands from sharp edges and hot surfaces while handling panels and coils.)
- Safety goggles(Shield eyes from splashes when using cleaners and debris from the outdoor unit.)
- Screwdriver set (Phillips and flat-head)(Remove access panels safely; pre-check for hidden screws.)
- Soft-bristled brush(Gently loosen dirt from coils without bending fins.)
- Vacuum with a brush attachment(Suck loose debris from indoor housing and filters.)
- Garden hose with spray nozzle(Rinse outdoor coils from top to bottom without high pressure.)
- Mild dish soap or gentle coil cleaner(Dissolve grime without damaging metal or coatings.)
- Fin comb (optional)(Realign bent fins for better airflow.)
- Microfiber cloth(Wipe surfaces and dry components after cleaning.)
- Bucket and towel(Contain rinse water and catch drips during indoor cleaning.)
Steps
Estimated time: 60-90 minutes
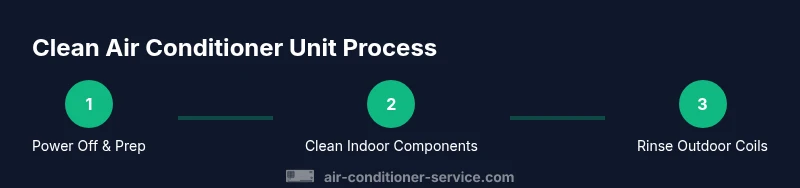
- 1
Power off and prep
Begin by turning off the thermostat and shutting off the circuit breaker for the outdoor and indoor units. This is critical to prevent shocks or fan movement during disassembly. Gather your tools and wear gloves and goggles so you’re ready for the entire process.
Tip: If the outdoor unit is in direct sun, plan to work in the early morning or late afternoon to avoid heat stress. - 2
Remove or clean the indoor filter
Open the indoor air-handling unit and remove the filter. If it’s disposable, replace it; if it’s reusable, clean it with warm water and a mild detergent, then let it dry completely before reinstalling. Dirty filters reduce airflow and raise energy use.
Tip: Inspect the filter housing for gaps that allow unfiltered air to bypass the filter. - 3
Clean the indoor evaporator coils
Access the evaporator coils and gently brush away loose dust. Use a vacuum to remove debris from between fins, then wipe surfaces with a damp microfiber cloth. If you see stubborn grime, apply a mild detergent solution and rinse carefully with a damp cloth.
Tip: Avoid applying excessive liquid directly onto the coil to prevent mold growth inside the cabinet. - 4
Rinse and clean the outdoor condenser
Remove loose debris from the condenser with a brush or gloved hand. Rinse coils from the top downward using a garden hose with a spray nozzle. Do not use high-pressure streams that could bend fins or damage the coil.
Tip: If fins are bent, use a fin comb to restore proper airflow. - 5
Inspect and realign fins
Check the condenser fins for dents; straighten them gently with a fin comb. This improves heat transfer and efficiency. While you’re cleaning, look for any signs of corrosion or damage that may require professional attention.
Tip: Bent fins reduce airflow and energy efficiency even after cleaning. - 6
Reassemble, test, and observe
Reinstall the filter and panels, restore power, and run the system briefly to ensure airflow is steady and the outdoor fan operates smoothly. Listen for unusual noises and check for leaks around the connections.
Tip: Allow the unit to run for 10-15 minutes to verify normal operation before leaving it to run unattended.
Common Questions
Do I need to power off the unit before cleaning?
Yes. Always shut off the power at the breaker and thermostat before touching any internal components to prevent shocks and moving parts from starting unexpectedly.
Yes. Power off at the breaker before you touch anything safely.
How often should I clean the air conditioner unit?
Clean the outdoor coils and check the filter every season. Replace or wash filters monthly during heavy use and at least twice a year for milder climates. Regular checks help maintain efficiency.
Clean it at least seasonally, and check filters every month during heavy use.
Can cleaning the AC improve energy efficiency?
Yes. Removing dirt from coils and maintaining clean filters reduces air resistance, helping the system move air more efficiently and use less electricity.
Yes—cleaning can boost efficiency and reduce energy use.
Is it safe to wash the coils with a hose?
Gently rinse outdoor coils with a spray nozzle on a low setting. Avoid harsh sprays that can bend fins or push debris into the compressor area.
Lightly rinse the outdoor coils; avoid strong jets.
What should I do about mold or musty odors?
If you smell mold, clean with a mild detergent on coils and check for moisture buildup. Consider professional inspection if odors persist after cleaning.
Mold odors mean you should clean more thoroughly or call a pro.
Do I always need a professional for cleaning?
Many routine tasks can be DIY, but complex issues, refrigerant handling, or damaged components require a licensed technician.
You can DIY most cleanings, but call a pro for serious problems.
Watch Video
The Essentials
- Clean the indoor filter and outdoor coils to restore airflow
- Use gentle cleaning methods to avoid damage to coils and fins
- Power off before starting and wear PPE for safety
- Regular maintenance prevents mold and reduces energy bills
- If issues persist after cleaning, consult a professional