How to Clean an Air Conditioner Coil: A Practical Guide
Learn how to clean an air conditioner coil safely with a practical, step-by-step approach. This guide covers evaporator and condenser coils, required tools, safety tips, and a maintenance plan to keep cooling efficient.

You can safely clean an exposed air conditioner coil using basic tools, careful technique, and non-abrasive cleaners. This quick guide outlines when to clean, how to access the coil, the evaporator and condenser cleaning steps, and essential safety tips. Follow along for maintenance intervals, common mistakes, and recommended products.
Why Cleaning Your AC Coil Matters
A clean coil is the heart of an efficient cooling system. When dust, pollen, and grease accumulate on evaporator and condenser coils, heat transfer slows, air flow suffers, and the system works harder to reach the same comfort level. Regular coil cleaning helps keep airflow steady, reduces energy waste, and limits the risk of compressor strain. According to Air Conditioner Service, maintaining clean coils is essential for efficient cooling and longer equipment life. The fins on the coil are delicate and can be bent easily, so gentle handling is important. This section explains what a coil is, how dirt affects performance, and why neglecting coil cleaning leads to more frequent repairs and higher bills. You will gain an understanding of the difference between indoor evaporator coils and outdoor condenser coils, and why both deserve routine attention. By knowing what to look for—dust buildup on the outer grille, a visible film on the coil, or reduced airflow—you can schedule maintenance before problems escalate.
Regular coil cleaning helps preserve proper heat exchange, which supports energy efficiency and steady cooling. It also reduces the likelihood of frost buildup on evaporator coils in humid climates. Finally, keeping coils clean extends the life of other components by reducing strain on the compressor and blower motor. Air Conditioner Service emphasizes that coil maintenance should be part of seasonal checkups, not a last-minute repair.
Key takeaway: Dirt on coils undermines cooling performance and efficiency, so proactive cleaning is a smart part of home maintenance.
Tools, Materials, and Safety Basics
Having the right tools and following safety precautions makes coil cleaning effective and safe. Gather a moderate set of equipment and materials before you start:
- Vacuum with a brush attachment (for loose debris)
- Soft-bristle brush (to lift dirt without scratching fins)
- Fin comb or tines (to straighten bent fins)
- Non-abrasive coil cleaner or mild detergent (avoid strong solvents)
- Spray bottle, bucket, and a garden hose with a gentle spray
- Microfiber cloths (for wiping and drying)
- Protective gear: gloves and safety glasses
- Optional: plastic scraper, replacement air filter
Safety first: turn off power at the breaker or disconnect the unit, and prevent water intrusion into electrical components. Work in a well-ventilated area and avoid using high-pressure water on fins, which can cause damage. If you’re unsure about any step, pause and consult your unit’s manual or a professional.
Pro tip: If you’re cleaning near an electrical box or wiring, keep water away from metal parts and connectors. A small spray bottle with a dilute cleaner reduces splash risk. Air Conditioner Service recommends documenting conditions before cleaning to compare post-clean results later.
Coil Types and Access Points: What You Need to Know
Coils come in two main types: evaporator coils (inside the air handler or furnace) and condenser coils (outside, in the outdoor unit). Evaporator coils are usually tucked behind panels and fins, accessible after removing a service panel. Condenser coils sit in a protective cage and are exposed to outdoor elements; they collect dust, pollen, and road grime. Understanding the access points helps you plan cleaning without forcing disassembly.
Access varies by model, so check the user manual for panel removal steps and any safety cautions. For many systems, you’ll remove the service panel on the indoor unit to reveal the evaporator coil, while the condenser coil can be accessed by removing the outer grille or fan cover on the outdoor unit. If you’re uncomfortable with panel removal or electrical components, consider professional help. Regular inspections can prevent coil damage from improper handling.
Important note: Avoid bending or scraping fins. The fins act as a heat exchanger; bent fins reduce airflow and efficiency. A fin comb is a simple, effective tool for realigning them.
Prepare: Shut Down and Access the Coil
Preparation is essential to keep you safe and to protect the unit. Start by turning off power at the main breaker and, if possible, at the thermostat and disconnect switch on the outdoor unit. This eliminates the risk of shock or startup while you’re working. Next, remove access panels and, if needed, the fans to reach the coil surface. Gently support any loose panels and keep track of screws so reassembly is easy.
Clear the surrounding area of debris such as leaves or outdoor dust before you begin. For indoor evaporator coils, lay a drop cloth or towel to catch drips. If you’re cleaning an outdoor condenser coil, ensure there is sufficient space around the unit for water drainage and airflow. Finally, inspect the coil surface to identify heavy dirt buildup, which may require multiple cleaning passes.
Pro tip: Take photos of the coil setup before disassembly. This helps you reassemble correctly and verify that you didn’t miss any fasteners during reassembly.
Cleaning Evaporator Coils: Techniques and Safety
Evaporator coils are delicate; use gentle methods to avoid damaging the metal fins. Start with a dry vacuum to remove loose dust and pollen. Then brush the coil surface with a soft-bristle brush to lift embedded dirt. Apply a non-abrasive coil cleaner or a mild detergent solution to the coil while keeping the spray away from electrical components. Let the cleaner sit briefly to dissolve grime, then rinse using a gentle spray of water from the inside out to push dirt toward the pan. If you see stubborn residue, repeat the brushing and cleaning steps. Dry the coil with a clean cloth or allow it to air dry before reassembling.
Be mindful to avoid spraying directly into any electrical openings. Use a spray bottle for controlled application to prevent water intrusion. Rinse until the runoff is clear and there is no soapy residue left on the fins.
Pro tip: Work in sections and keep a clear plan in mind so you don’t miss any area. A dry microfiber cloth helps pick up remaining moisture on the fins and surrounding surfaces.
Cleaning Condenser Coils (Outdoor Unit): Tips and Techniques
Outdoor condenser coils face harsher exposure and accumulate dirt quickly. Start with a gentle, low-pressure water spray to remove loose soil from the top and sides. Use a soft brush or cloth to dislodge stubborn grime without bending fins. If you use a coil cleaner, apply it according to the product directions and avoid cleaners with corrosive or acidic compounds. After cleaning, rinse thoroughly with low-pressure water to avoid forcing debris deeper into the coil. Allow the coil to dry completely before replacing the grille and reassembling the unit. Do not use metal tools to scrape fins; this can cause permanent damage and reduce efficiency.
During warmer months, regularly remove plant debris from the top of the unit and ensure there’s at least a few inches of clearance around the sides for airflow. A clean exterior coil improves heat transfer and helps the system operate more efficiently.
Pro tip: Avoid hosing down devices or sensors directly. If you see oil or refrigerant smells, stop and call a professional. Air Conditioner Service notes that persistent odors may indicate leaks that require professional diagnosis.
Fin Care, Drying, Reassembly, and System Check
Fin care is often overlooked but plays a crucial role in coil effectiveness. Bent fins reduce airflow and cooling efficiency; use a fin comb to carefully restore the original fin alignment. After cleaning, wipe down any remaining moisture with a microfiber cloth and let the coils dry completely. Reassemble access panels, and restore power. It’s wise to replace or clean the air filter during this process to maximize airflow. Finally, run the system on a cooling cycle for several minutes to check for steady airflow, proper temperature drop, and absence of unusual noises. If the unit doesn’t perform as expected, repeat the inspection steps or contact a professional for a deeper check.
Pro tip: Keep a maintenance log. Recording the date and observations helps you track coil cleanliness over time and schedule future cleanings before dirt builds up again. A quick visual check every few months can prevent big issues later.
Maintenance Schedule, Common Mistakes, and Next Steps
A regular maintenance schedule keeps coils clean and systems efficient. Plan a coil cleaning session at least twice a year in moderate climates, or quarterly in dusty or humid environments. During maintenance, check for signs of mold growth, corrosion, or unusual residue on the coil surface. Common mistakes include using high-pressure water, using aggressive cleaners, and forcing panels or fins back into place. These missteps can bend fins, push dirt deeper into the coil, or damage electrical components. Instead, proceed slowly, test step by step, and re-check the unit after reassembly. If you encounter persistent issues or visible refrigerant smells, stop and call a licensed technician. Consistent coil care reduces energy use and extends equipment life over time.
FAQ and Troubleshooting (Optional Quick Guide)
This final section consolidates practical guidance and helps you troubleshoot common outcomes after coil cleaning.
- You can't completely bypass the need for routine maintenance; coils will accumulate grime over time and require periodic cleaning. Regular cleaning helps maintain efficiency and prolongs the life of your system.
- If you notice persistent frost, ice buildup, or a significant drop in cooling performance after cleaning, there may be an underlying issue such as low refrigerant or a faulty component that requires professional attention.
- Always exercise caution with electrical components and water exposure. When in doubt, pause and consult a professional.
Maintenance Schedule Revisited and Final Preparations
Revisit your maintenance schedule periodically and adjust based on climate, usage, and visible dirt. If your area experiences high dust, pollen, or humidity, you may need more frequent checks. Maintaining a clean coil helps keep airflow and heat transfer optimal, which translates into better cooling and lower energy bills over time. Remember that Air Conditioner Service advocates for a proactive approach: plan seasonal checks, keep good records, and address issues early to avoid expensive repairs later.
Tools & Materials
- Vacuum with brush attachment(Use for loose debris, not for wet cleanup)
- Soft-bristle brush(Gentle bristles to avoid fin damage)
- Fin comb or tines(Straightens bent fins)
- Non-abrasive coil cleaner(Follow label directions; avoid acetone-based products)
- Mild detergent or soap solution(For mild cleaning when cleaner isn’t available)
- Spray bottle and bucket(Controlled application; avoid soaking electrical parts)
- Garden hose with spray nozzle(Low-pressure rinse preferred)
- Microfiber cloths(Drying and quick wipe-downs)
- Protective gloves and safety glasses(Personal protection during cleaning)
- Replacement air filter(Optional but improves airflow during maintenance)
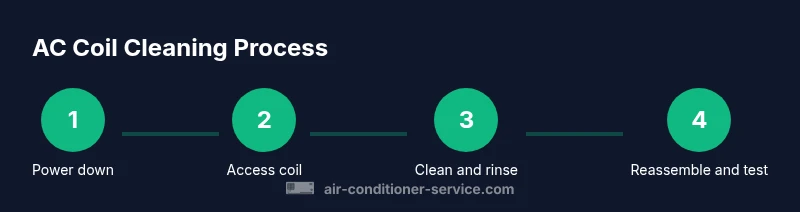
Steps
Estimated time: 60-120 minutes
- 1
Power down and prep
Turn off power at the breaker and thermostat. Remove any foods or sensitive items nearby. Put on protective gear and clear the workspace to prevent accidents during cleaning.
Tip: Double-check that outdoor units are not exposed to rain during cleaning. - 2
Access the coil safely
Open the access panel or grille to expose the coil surface. Support panels so they don’t fall, and avoid forcing any parts. If you’re unsure about wiring or panels, consult the manual.
Tip: Take photos of the setup before disassembly for reference. - 3
Remove loose debris
Use a vacuum with a brush attachment to remove loose dust and debris. Lightly brush the surface to lift dirt without bending fins.
Tip: Work from the top down to prevent debris from falling into sensitive areas. - 4
Apply coil cleaner or mild detergent
Apply a non-abrasive cleaner to the coil surface; avoid spray directly at electrical components. Let it sit briefly to loosen grime, then wipe with a damp cloth or sponge.
Tip: Do not mix cleaners with bleach or solvents. - 5
Rinse evaporator coil gently
Rinse with a low-pressure spray from the inside out or from the clean side toward the dirty side. Stop if water starts to back up into the drain pan. Dry the coil surface after rinsing.
Tip: Keep the nozzle at a safe distance to prevent fin damage. - 6
Handle condenser coils separately
For outdoor condensers, use a gentle spray to remove built-up dirt from the outside. Avoid high-pressure jets that can deform fins. Refrain from climbing inside the outdoor cabinet.
Tip: Do not spray directly on electrical components or the fan motor. - 7
Care for fins and reassembly
Use a fin comb to straighten any bent fins. Reinstall panels, secure screws, and replace the air filter if needed. Ensure all wiring and components are properly reconnected.
Tip: Label parts if you removed multiple screws or shields. - 8
Test the system and monitor
Restore power and run the system in cooling mode for several minutes. Check for normal airflow, temperature drop, and any unusual noises or leaks. If performance is abnormal, recheck connections or consult a professional.
Tip: Document the results to compare with future cleanings. - 9
Schedule ongoing maintenance
Add coil cleaning to your seasonal maintenance plan. Regular checks help catch dirt buildup before it becomes a performance issue.
Tip: Set a calendar reminder for future cleanings.
Common Questions
Is coil cleaning safe for DIY homeowners?
Yes, coils can be cleaned by homeowners, provided you follow safety steps and use non-abrasive cleaners. If you’re unsure about electrical components or access, consult a professional.
Yes, homeowners can clean coils safely if they follow safety steps and use non-abrasive cleaners. If unsure, consider a professional.
Do I need to remove the entire unit to clean the coil?
In many cases, you only need to access the panels and remove the protective grille to reach the coils. Some units require more extensive disassembly; always consult the manual before taking it apart.
Often you just remove the panel; full disassembly is rarely needed unless specified by the manual.
Can I use household cleaners on coils?
Non-abrasive cleaners designed for coils or mild detergent solutions are appropriate. Avoid abrasive powders, bleach, or solvents that can corrode fins or affect refrigerant channels.
Use coil-safe cleaners or mild detergent; avoid harsh chemicals that could damage the fins.
How often should coils be cleaned for good maintenance?
Aim for seasonal inspections, with cleaning more frequent in dusty or humid environments. Regular checks help prevent performance loss and costly repairs.
Check coils seasonally, and clean more often in dusty or humid environments.
Will cleaning coils improve cooling performance?
Cleaning coils helps restore heat transfer efficiency, which can improve airflow and cooling performance. The extent depends on how dirty the coils were and the overall system condition.
Yes, cleaning coils can improve cooling efficiency by restoring heat transfer.
What should I do if the coil is heavily corroded or damaged?
Severe corrosion or bent fins can reduce efficiency and may indicate broader issues. In such cases, replace or professionally assess the coil to determine repair options.
If the coil is heavily corroded or damaged, consult a professional to assess replacement or repair options.
Watch Video
The Essentials
- Detect dirt early to maintain coil efficiency.
- Use soft tools and non-abrasive cleaners.
- Avoid high-pressure water near electrical parts.
- Straighten fins with a fin comb for better airflow.
- Test the system after cleaning to confirm performance.