How to Clean Air Conditioner Coils: A Step-by-Step Guide
Practical, DIY-friendly steps to safely clean evaporator and condenser coils. Learn tools, techniques, safety tips, and maintenance strategies to improve efficiency and extend your AC’s life.

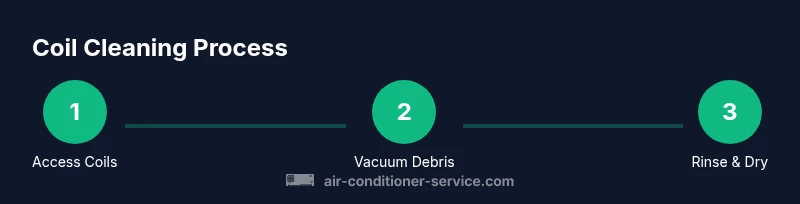
By following these steps, you will safely clean both evaporator and condenser coils, restore airflow, and improve efficiency. Start by powering down the system, then access the coils, vacuum away debris, apply a coil cleaner, rinse, and dry before reassembly. This DIY approach is suitable for homeowners and renters with basic tools, and requires caution around electrical components. According to Air Conditioner Service, regular coil cleaning helps maintain cooling performance.
Why Clean Air Conditioner Coils Matter
Coils are the heat exchange surfaces that enable your AC to transfer heat from indoors to the outside environment. When dust, pollen, and grime accumulate on evaporator and condenser coils, air can't flow freely and heat transfer slows down. This reduces cooling efficiency, increases energy use, and can shorten the system's life. The Air Conditioner Service team notes that keeping coils clean helps sustain airflow and better refrigerant performance. In homes with dusty or humid climates, coils tend to collect debris faster, making regular maintenance more important. A clean coil also reduces the likelihood of mold growth on damp surfaces and improves indoor air quality. Establish a simple cleaning cadence to keep coils in good condition and avoid emergency repairs later.
Where coils live: evaporator vs condenser
Residential air conditioning systems have two main coil sets. The evaporator coil sits inside the air handler, absorbing indoor heat as air passes over it. The condenser coil lives in the outdoor unit, releasing absorbed heat to the outdoors. Both coils collect dust, grass clippings, and leaves, but cleaning approaches differ. Evaporator coils are more delicate and are best cleaned with gentle cleaners and careful brushing. Outdoor condenser coils tolerate a light rinse but require care around wiring and components. Regular cleaning helps maintain airflow, prevent ice buildup on the evaporator in cool months, and improve overall efficiency.
Safety and planning before you start
Safety comes first. Power off the unit at the main breaker and at the thermostat before you touch any components. Remove access panels and inspect for loose wiring or damaged insulation. Keep pets and children away while you work. Use protective gloves and safety goggles, and work in a well-lit area. If your coil area is damp or you see any signs of refrigerant leaks, stop and call a licensed technician. Never spray water directly into electrical compartments or onto exposed motors; moisture can cause shorts or corrosion.
Cleaning options and products (what to use and avoid)
Choose a coil cleaner labeled safe for aluminum coils and your specific unit. Avoid acids, strong solvents, or bleach, which can damage metal fins and coatings. Non-acid foaming cleaners are typically safe and effective for evaporator and condenser coils. A broad brush, soft-bristle toothbrush for stubborn grime, a microfiber cloth for wiping, and a fin comb for bent fins are useful. A garden hose with a gentle spray can help rinse outdoor coils, but keep water away from electrical connections. For a dusty buildup, start with vacuuming to remove loose debris before applying cleaners.
How to protect your system during cleaning
Protect the surrounding area with old towels or rags to catch drips and spills. If you must disconnect wiring, label wires and take photos before removal. Never force panels or fasteners; if screws are stuck, pause and seek assistance. After cleaning, allow coils to dry fully to prevent mold; ensure condensate drain is clear and functional. Reconnect panels, restore power, and run a brief cooling cycle to verify proper operation. Note any unusual noises or leaks and address them promptly.
Maintenance cadence and signs you need cleaning
Most homes benefit from a coil check at least once per season or when you notice reduced cooling performance or higher energy use. Visible dirt and reduced airflow are clear signals that coils need attention. If the outdoor unit is surrounded by vegetation or debris, more frequent cleaning may be required. Keep an eye on the condensate drain; a clogged drain can lead to water damage and mold growth.
Common mistakes and how to avoid them
Rushing through the job, using the wrong cleaner, or applying aggressive water pressure can bend fins or damage coatings. Not drying coils thoroughly invites mold and mildew. Forgetting to reassemble panels or reconnect wiring can cause electrical issues or reduced airflow. If you feel uncertain about any step, pause and consult a professional or reference your unit's manual for model-specific guidance.
Tools & Materials
- Non-acid coil cleaner spray(Choose a formulation safe for aluminum fins)
- Vacuum with brush attachment(HEPA preferred; use on dry surfaces)
- Soft-bristle brush(For gentle brushing between fins)
- Fin comb(To straighten bent fins if needed)
- Garden hose with adjustable nozzle(Only for outdoor condenser coils; low pressure)
- Protective gloves(Nitrile or latex)
- Safety goggles(Splash protection)
- Old towels or rags(To catch drips and protect surfaces)
- Trash bag or bucket(For disposing of debris and used cleaners)
- Screwdriver or screwdriver bit(To access panels)
Steps
Estimated time: 60-90 minutes
- 1
Power down and access the coils
Shut off power at the main breaker and the thermostat, then remove access panels to reach evaporator coils inside the air handler and condenser coils in the outdoor unit. Ensure you have a clear working area and note any disconnections before touching components.
Tip: Confirm power is off with a multimeter before touching wires. - 2
Vacuum loose debris from coils
Using a low-suction vacuum with a brush attachment, gently remove loose dust and debris from both coil faces without forcing debris deeper into the fins. Work in sections and keep the nozzle parallel to the coil surface.
Tip: Work from top to bottom to prevent debris from falling back onto cleaned areas. - 3
Apply coil cleaner and dwell
Apply a non-acid coil cleaner evenly across the coil surface, following the product label. Allow the cleaner to dwell for the recommended time to loosen grime while avoiding contact with electrical components.
Tip: Never mix cleaners or use bleach on coils. - 4
Rinse coils and dry thoroughly
Rinse the coils with a gentle, low-pressure spray, avoiding strong jets that can bend fins. Allow coils to dry completely before reassembling and powering the system back on.
Tip: Use towels to absorb residual moisture and ensure no standing water near electrical parts. - 5
Reassemble and test
Reattach access panels, restore power, and run a cooling cycle to verify airflow and cooling performance. Listen for unusual sounds and check for leaks or condensation issues.
Tip: If performance remains poor, consult a professional for a full diagnostic.
Common Questions
Can I clean air conditioner coils myself, or should I hire a pro?
Coils that are easily accessible can often be cleaned by homeowners with proper precautions. If you encounter tight spaces, electrical components, or outdoor unit exposure to hazardous conditions, consider a professional.
Coil cleaning can be DIY for accessible coils, but call a pro if you see electrical issues.
How often should coils be cleaned?
Frequency depends on environment; dusty or vegetated surroundings require more frequent cleaning, while mild environments can be seasonal. Monitor cooling performance and airflow.
In dusty areas you may clean more often; otherwise plan regular seasonal checks.
Is it safe to use a power washer on coils?
No. High-pressure water can bend fins and damage coatings. Use a gentle spray or brush and low-pressure rinse.
Don't use a power washer on coils; it can bend fins and cause damage.
What’s the difference between evaporator and condenser coil cleaning?
Evaporator coils are indoors and delicate; condenser coils are outdoors and can tolerate light rinsing near the outdoor unit. Handle with care around electrical components.
Evaporator coils inside; condenser outside; handle differently.
Do dirty coils always cause not cooling?
Dirty coils reduce heat transfer efficiency and may lead to reduced cooling and higher energy use. Cleaning can restore airflow and performance.
Dirty coils can reduce cooling efficiency; cleaning often helps restore performance.
When should I call a professional for coil cleaning?
If you can’t reach the coils safely, hear odd noises, or see damage or refrigerant concerns, contact a licensed HVAC technician.
If you’re unsure or see damage, call a pro.
Watch Video
The Essentials
- Power down safely before touching coils
- Use the right cleaners and avoid acids or bleach
- Rinse gently and dry thoroughly to prevent mold
- Regular coil cleaning improves airflow and efficiency
- Air Conditioner Service recommends seasonal coil maintenance