Cleaning the Air Conditioner Filter: Step-by-Step Guide
Learn how to clean the air conditioner filter safely, identify filter types, and decide when to replace. This practical guide helps homeowners and renters improve airflow, efficiency, and indoor air quality.

You will learn how to safely clean or replace your air conditioner filter, restoring airflow and cooling efficiency. This guide covers washable vs disposable options, safe cleaning steps, drying times, and when to replace filters. It’s suitable for homeowners and renters, and aligns with best practices from Air Conditioner Service. Follow the steps below to complete the task in about 30-60 minutes.
Understanding the role of the filter in your air conditioner
Air filters in air conditioners serve two primary jobs: trap particulates and protect the cooling system. By catching dust, pollen, pet dander, and other debris, the filter prevents them from accumulating on coils and reducing heat transfer. This keeps the system from overworking and helps maintain comfortable indoor air. According to Air Conditioner Service, a clean filter is the linchpin of efficient cooling. When the filter is dirty, airflow is restricted, forcing the blower to work harder and increasing energy use. In homes with high allergen loads, a fresh filter also contributes to better air quality by limiting circulating particles.
There are several common setups. Central air systems typically use a replaceable or washable panel-style filter located in the return air duct, often behind a grille or in a cabinet. Window units and portable systems have front-facing or top-access filters. In some mini-split systems, the filters live behind a front panel or in the indoor unit itself. The key idea is to identify where air enters the system so you know where to check and service the filter. This guide will walk you through both washable and disposable filters, explain when to replace, and outline steps for safe cleaning and reinstallation.
Before you start, note the unit's power must be off and you should wear gloves if you will handle the filter or the surrounding cover. Keep the area dry and avoid bending the filter frame; a warped filter may not seal properly after reinstallation. The steps provided are designed for typical residential equipment, and you should consult your system's manual if you have a specialized or commercial unit.
Identify filter type and housing
Identifying the filter type and housing location is the first critical step. For most central AC systems, the filter sits in the return air duct, often behind a grille in a closet or utility space. Some units use a disposable pleated panel; others employ a reusable, permanent frame that can be washed. Window and portable AC units typically have a front-access filter behind the grille. The exact location and method vary by model, so check the owner’s manual if you’re unsure. Air Conditioner Service analysis shows a dirty filter is a common reason for reduced airflow and inefficient cooling. Knowing where to look keeps the process safe and efficient. If you can’t locate the filter after a quick search, power down the unit and inspect accessible panels on the blower housing—filters often hid in those areas.
Once you locate the filter, remove it carefully to avoid pushing dust into the return duct. If the filter is attached with screws, keep them safe for reinstallation. Examine the frame for cracks or warping; a damaged filter may need to be replaced rather than cleaned. Keep a small tray to catch loose dust, and plan to do the cleaning in a well-ventilated area or outdoors if possible.
Washable vs disposable: what to know
Washable filters are designed to be cleaned and reused. They can be rinsed with cool water and mild soap, then air-dried completely before reinstall. Disposable filters are meant to be replaced when dirty; washing them can damage the fibers, compromise filtration, and reduce efficiency. When deciding which type you have, look for the label on the frame or check the manual: washable filters are often labeled as such and have a sturdier frame. If you don’t see a label, inspect the filter media: dense, pleated media that resists water is commonly disposable. Regardless of type, never force a filter back into place if it’s damp, warped, or shows signs of mold.
Air Conditioner Service analysis shows that dirtier filters tend to restrict airflow more quickly in high-humidity environments. If you’re unsure, err on the side of caution and replace a questionable disposable filter rather than attempting to wash it. Always verify that a filter is completely dry before reinstalling a washable one; moisture can encourage mold growth and reduce filtration efficiency.
Safety and prep before you touch the unit
Safety comes first. Start by turning off the thermostat and then cutting power at the main breaker to the HVAC system. This prevents the blower from starting unexpectedly while you’re handling the filter. Wear gloves to protect your hands from sharp edges on the housing and to minimize contact with accumulated dust. If you have allergies or sensitive skin, consider a lightweight mask. Work in a well-ventilated area and keep pets away during cleaning to reduce exposure to dust. Avoid using harsh chemicals on filters; mild soap and water are sufficient for washable filters.
Document the date on the filter housing after cleaning or replacement so you can track maintenance. Never operate the unit with a missing or severely damaged filter, as this can injure the blower and coils and may void warranties. If you encounter mold or a persistent musty odor, stop and consult a professional rather than attempting DIY cleaning.
Step-by-step cleaning and drying process
For washable filters: remove the filter and rinse under cool running water to remove loose dust. Use a mild dish soap if the filter looks heavily soiled; gently agitate and rinse until the water runs clear. Shake out excess water and then lay the filter flat on a clean surface or drying rack in a dust-free area. Allow it to dry completely—this may take several hours depending on humidity. Do not reinstall a damp filter, as this can promote mold growth and damage the unit. For disposable filters: inspect for tears or deformation; if damaged, replace with a new one of the same size and type. If the filter is simply dirty but intact, you can wipe away loose dust with a dry cloth before replacing it with a fresh unit.
When a filter is washed or replaced, ensure airflow arrows on the filter frame point toward the blower, aligning with the system’s design. A clean filter promotes better airflow, reduces energy consumption, and enhances indoor air quality by limiting pollutant recirculation. After reinstalling, run the system for a short cycle to verify that the airflow sound is normal and that no unusual noises occur. If you hear whistling or buzzing, reseat the filter or consult a professional.
Pro tip: keep a small stash of replacement filters on hand so you aren’t caught mid-season with a dirty or damaged filter. Remember, the best practice is to schedule regular checks, especially during peak cooling months.
Replacing the filter: when and how
If you determine that your filter is disposable, replace it with a new one of the same size and thickness. When choosing a replacement, consider the environment: homes with pets, smokers, or high dust levels may benefit from a filter with higher efficiency and a slightly tighter pore structure, while keeping airflow adequate for your system. Do not force a filter into a too-tight slot; if it won’t slide in smoothly, you may have the wrong size or the frame is bent. After installation, gently run the system for a few minutes and feel for steady airflow at the intake grille. A snug fit helps prevent unfiltered air from bypassing the filter.
If you have a washable filter, recheck that it is completely dry before reinstallation. A damp filter can harbor mold and degrade performance. In both cases, dispose of or store used filters according to local waste management guidelines, and label the filter with the date of service for future reference. If you notice ongoing dust in your home after cleaning, consider inspecting other air leaks or changing other filters in your duct system.
Reinstall, test, and monitor performance
Once the filter is clean and dry or a new one is installed, reinsert it securely into the housing with the correct orientation. Replace any grille covers or access panels and power the system back on. Run the unit for a short cycle to ensure the air is flowing smoothly and there are no unusual sounds. Check for improved airflow at the return and supply vents and monitor indoor comfort levels. If you have a smart thermostat, you may notice more consistent temperature readings and faster cooling times after a filter change.
Keep an eye on performance over the next few days: if you still notice reduced airflow, icy coils, or increased energy usage, there may be an underlying issue beyond the filter. In such cases, consult a professional to diagnose blower problems, duct leaks, or condenser coil cleaning needs. Routine maintenance, including filter care, helps extend the life of your system and maintain healthy indoor air.
Maintenance schedule and tips for a healthier home
Create a simple maintenance routine that fits your lifestyle. Check the filter every month during heavy use or in homes with higher dust and pet dander loads. For disposable filters, plan replacements every few months or sooner if you notice reduced airflow or visible dirt. For washable filters, wash and dry on a set schedule—after heavy use periods like pollen seasons or dusty months. Keep spare filters in the same area where the unit is located so replacements are quick and easy. Maintain clean coils and a clear area around outdoor components to maximize efficiency. If you haven’t touched the filter in a year, it’s time to inspect the entire air handling system for dust buildup and consider a professional maintenance service.
To stay aligned with best practices, Air Conditioner Service recommends documenting maintenance dates and keeping a simple log for each filter type. This helps prevent missed cleanings or replacements and preserves indoor air quality for family members with allergies or respiratory sensitivities.
Authority sources and troubleshooting
When in doubt, consult reputable sources and your equipment manual for filter specifics. For general guidance on air conditioning maintenance and filter care, you can refer to:
- https://www.energy.gov/energysaver/maintaining-your-air-conditioner
- https://www.epa.gov/iaq/indoor-air-quality-iaq
- https://www.osha.gov/ventilation
If you notice persistent odors, moisture buildup, or Mold growth around the filter area, stop using the unit and seek expert assistance. Regular filter maintenance is a cornerstone of a healthy HVAC system and a comfortable home.
Final note on safety and ongoing care
Cleaning and replacing filters is a straightforward task when approached safely and with the right materials. Always ensure the unit is powered down, dry the filter completely, and use the correct replacement type for your model. Over time, regular filter care dramatically improves airflow, reduces energy consumption, and supports better indoor air quality. With a consistent routine, your air conditioner will perform more reliably and last longer.
Authority-friendly wrap-up
Remember that filter maintenance is a key element of HVAC health. By following these steps and staying proactive, you’ll maintain efficient cooling and healthier indoor air. The Air Conditioner Service team recommends keeping your maintenance log up to date and performing a filter check before peak seasons to avoid surprises.
Tools & Materials
- Gloves (nitrile or rubber)(Protect hands and avoid skin contact with sharp edges)
- Microfiber cloth(For wipe-down and drying)
- Bucket or basin(For washing filters when applicable)
- Mild dish soap(Gentle soap for washable filters)
- Warm water (not hot)(Rinsing and cleaning of washable filters)
- Replacement disposable filter(Stock up if your system uses disposables)
- Vacuum with brush attachment(Optional for removing loose dust)
- Drying rack or clean towel(Dry washable filters completely)
- Flathead screwdriver(May be needed to access some housings)
- Mask (optional)(Reduces inhalation of dust during cleaning)
Steps
Estimated time: 30-60 minutes
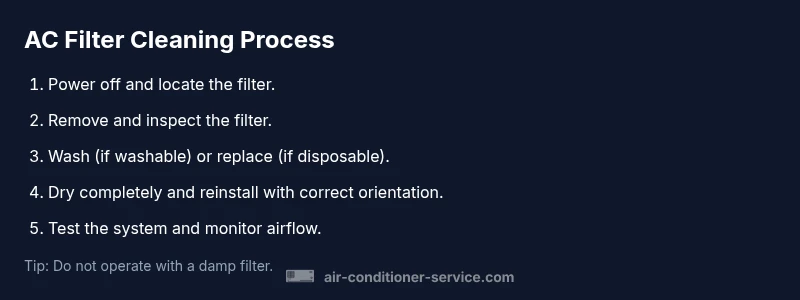
- 1
Power down and locate the filter
Turn off the thermostat and cut power at the breaker. Locate the filter housing by the return air duct or within the indoor unit, and confirm the filter type. If you’re unsure, consult the manual.
Tip: Label the housing or take a quick photo before removal. - 2
Remove the filter safely
Carefully loosen any covers and slide the filter out without shaking loose dust into the room. Do not bend or twist the frame.
Tip: Work over a tray to catch dust. - 3
Inspect the filter
Check for tears, warping, or intense discoloration. If damaged, replace the filter immediately; otherwise, decide whether to wash or reuse.
Tip: If mold is present, do not attempt DIY cleaning. - 4
Wash the filter if washable
Rinse with cool water, mild soap as needed, gently scrub with your hands, then rinse until clear. Do not use hot water.
Tip: Avoid wringing; let it air-dry flat. - 5
Dry the filter completely
Place the filter on a drying rack in a well-ventilated area. Ensure no moisture remains before reinstalling.
Tip: Drying can take several hours in humid environments. - 6
Reinstall the filter
Insert the filter with the airflow arrows pointing toward the blower. Reattach any covers and ensure a snug seal.
Tip: Double-check that the filter sits flat and fully covers the opening. - 7
Power up and test
Restore power and run the system for a short cycle to confirm proper airflow and operation. Listen for unusual noises or vibrations.
Tip: Check the return vents for improved airflow within minutes. - 8
Document and plan next check
Record the date of cleaning or replacement and plan the next inspection based on usage and environment.
Tip: Annual or seasonal reminders help maintain performance. - 9
If in doubt, call a pro
If the unit still underperforms after filter maintenance or you notice mold or damage, seek professional service.
Tip: Professional service can prevent costly repairs later.
Common Questions
How often should I clean or replace the air conditioner filter?
Most home systems benefit from checking the filter monthly and cleaning or replacing as needed, especially during peak cooling seasons. Your environment and filter type influence the schedule.
Check the filter monthly and replace or clean as needed, especially in peak season.
Can I wash a disposable filter?
Disposable filters are not designed to be washed. Washing can damage the fibers and reduce filtration efficiency. Replace instead with a new one of the same size.
No, disposable filters should not be washed. Replace instead.
What are signs that the filter needs cleaning?
Reduced airflow, longer cooling cycles, visible dirt on the filter, or a musty odor are signs it needs cleaning or replacement.
Weak airflow or musty smells usually mean the filter needs attention.
Is it safe to operate without a filter while cleaning?
No. Running the unit without a filter can damage the blower and coils. Wait and reinstall a clean or new filter before use.
Do not run the unit without a filter; reinstall one after cleaning.
Should I call a professional for filter maintenance?
For complex systems, mold concerns, or persistent performance issues, a professional inspection is wise. Routine cleaning is usually DIY.
If you’re unsure or have a bigger system, consider a pro.
Can a dirty filter cause odors?
Yes, a dirty filter can trap odors; replacing or cleaning the filter often resolves this issue.
A dirty filter can cause musty smells; replace or clean it.
Watch Video
The Essentials
- Identify filter type and housing location.
- Washable filters require complete drying before reuse.
- Replace disposable filters rather than washing when advised.
- Regular checks improve airflow and energy efficiency.