Replacing Air Conditioner Filter: A Practical Home Guide
Learn how to replace your air conditioner filter safely with practical steps, tools, and tips for homeowners and renters from Air Conditioner Service. Keep your system efficient and indoor air clean.

Replacing the air conditioner filter is a quick, essential maintenance task that improves airflow, reduces energy use, and extends system life. This guide shows how to identify the right filter, gather basic tools, and perform a safe replacement step by step. You’ll learn when to change it, how to install correctly, and how to avoid common mistakes.
Why replacing the air conditioner filter matters
A clean filter is the first line of defense for any central AC or window unit. When dust and debris accumulate, airflow is restricted, the coil can freeze, and the blower works harder — all of which raise energy costs and shorten equipment life. According to Air Conditioner Service, routine filter changes are among the most practical, cost-effective maintenance tasks homeowners and renters can perform. This is especially important in dusty climates, during allergy seasons, or when you share your space with pets. You’ll notice improved indoor air quality and more consistent cooling once the filter is in good shape.
Common myths to debunk: replacing filters is optional if the air feels cold enough; not true — performance suffers long before you notice a decline in comfort. Another misconception is that all filters are the same. Size, type, and MERV rating matter for your system. Start by locating the filter compartment; many systems have a panel that slides out or drops down from the return air duct. If you removed a filter recently, check for water leakage or excessive dirt around the housing, which can indicate a larger airflow problem. This section sets the stage for choosing the right filter and performing the replacement safely.
Types of filters and how to choose the right one
Filters come in several styles, and choosing the correct one depends on your HVAC system, allergies, and budget. The most common residential options are fiberglass (basic protection), pleated paper (better filtration), and electrostatic or hybrid designs (higher efficiency). Filters are rated by MERV values, which indicate their ability to trap particles. For most homes, a MERV 7–12 pleated filter offers a good balance between filtration and airflow. High-MERV filters can improve air quality but may restrict airflow in older or smaller systems, reducing efficiency if not sized properly. Always check your unit’s manual or the existing filter frame to confirm the exact size and recommended MERV rating.
When shopping, note the thickness (1", 2", or 4") and the frame size printed on the filter itself. If you are replacing a 1" filter, prefer a compatible 1" design with similar dimensions. If you’re unsure, start with a mid-range option and monitor performance over 2–4 weeks. A properly chosen filter should fit snugly without gaps and be easy to remove for replacement.
Tools and safety before you start
Before you start replacing the filter, gather a few simple tools and create a clean workspace. You typically need no special tools, but a flashlight can help you see inside the housing, and a microfiber cloth keeps the area tidy. Wear gloves if you want to protect your hands from dust. Ensure you can access the filter compartment safely—use a step stool if the unit is in a cabinet or high on a wall. Always turn off the HVAC equipment before touching any components; for added safety, switch off power at the thermostat and the dedicated circuit breaker. If you have pets or children, plan the replacement for a time when the space is quiet and easily supervised. Finally, have the replacement filter ready in the same size as the old one to minimize friction during installation.
Accessing and removing the old filter
Most filters live behind a small panel or through the return-air grille. Open the panel slowly, taking care not to bend the frame. Remove the old filter by pulling straight out, taking note of which side is facing forward. Look for excessive dust, pet hair, or mold on the frame—these indicate it’s time for a replacement. If the filter is difficult to remove, use a clean cloth to grip the edge. Keep the area around the opening clear to prevent debris from falling into the ductwork. Finally, inspect the slot for any signs of damage or warping that could affect fit and filtration.
Installing the new filter
Take the replacement filter and align it with the frame so that the airflow arrows point toward the blower, as indicated on the filter housing. Slide the filter in evenly, ensuring the edges sit flush and there are no gaps at the sides. Close the panel securely, listening for a soft click. If your system uses a door or slot with a gasket, check that the seal is intact. A misaligned filter is easily identified by a light draft or papers fluttering around the opening. After installation, wipe away any dust from the exterior around the panel.
Test run and final checks
Turn the system back on at the thermostat and set a comfortable temperature. Listen for unusual noises or whistling indicating a poor seal, and verify that air is flowing steadily from supply registers. If you notice reduced airflow or a dusty smell, recheck the filter orientation and seating. Check for signs of leaks near the housing. If you replaced a very dirty filter and still observe problems, there may be a larger issue in the ductwork or coils that requires professional service.
Common mistakes and how to avoid them
- Using the wrong size filter creates gaps and reduces filtration.
- Installing with the arrows facing the wrong direction can trap dirt inside the unit.
- Replacing filters too infrequently leads to higher energy costs and worse indoor air quality.
- Not turning off power during replacement risks electric shock or damage.
- Failing to reseal the panel can allow unfiltered air to bypass the filter.
Creating a simple replacement schedule
Most households benefit from changing filters every 30–90 days, depending on usage, pets, and climate. If you have multiple pets or a dusty environment, plan monthly replacements. In homes with HEPA or higher-efficiency filters, you may be able to stretch to 60–120 days, but always verify by checking airflow and comfort. Mark your calendar or set reminders so you don’t miss a replacement. Regular replacement helps maintain airflow, reduces strain on the blower, and supports better indoor air quality.
Tools & Materials
- Correctly sized air filter(Check the filter size printed on the frame (e.g., 16x20x1) and buy the same dimensions and MERV rating recommended by your system's manufacturer.)
- Gloves(Optional to keep hands clean.)
- Flashlight or headlamp(Useful in dim spaces.)
- Soft cloth or microfiber cloth(Wipe the housing edges before inserting.)
- Masking tape or marker(Label the replacement date if you want to track changes.)
Steps
Estimated time: 5-10 minutes
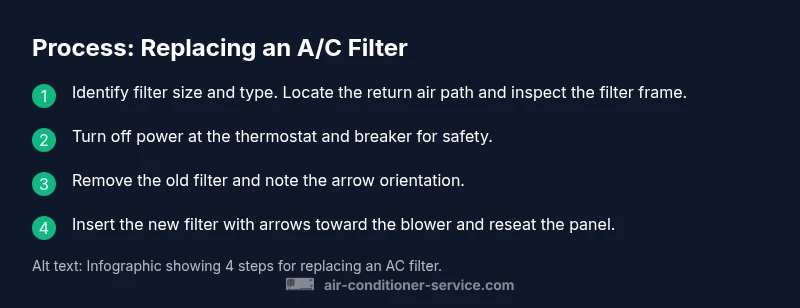
- 1
Identify filter size and type
Locate the filter panel and read the size printed on the existing filter frame. Confirm the MERV rating recommended by your system’s manual. This ensures you buy the correct replacement and maintain proper airflow.
Tip: Double-check dimensions and the correct orientation arrow before removing the old filter. - 2
Power down and prep the area
Turn off the thermostat and switch off the corresponding circuit breaker if accessible. Clear the area around the unit and have the new filter ready within reach to minimize dust spread.
Tip: Avoid working in wet or dusty areas; use a flashlight to inspect the housing. - 3
Remove the old filter
Open the panel and pull the old filter straight out. Note which side is facing forward for correct reinstallation. Dispose of it properly according to local waste guidelines.
Tip: Take a quick look for mold or excessive debris on the frame—these indicate a more thorough cleaning may be needed. - 4
Clean the housing if needed
Wipe the filter slot and surrounding area with a microfiber cloth. Do not saturate with water unless the manual allows it. Let any moisture dry before inserting a new filter.
Tip: A dry, clean slot prevents mold growth and helps the new filter seat properly. - 5
Install the new filter with correct orientation
Insert the new filter with airflow arrows pointing toward the blower. Ensure it sits evenly and the panel closes securely without gaps.
Tip: Gently press around all edges to confirm a snug fit; a loose fit reduces efficiency. - 6
Restore power and test
Close the panel, turn the system back on, and check for steady airflow from registers. Listen for unusual sounds that might indicate a misfit.
Tip: If you notice air escaping around the edges, reseat the filter and check the panel seal.
Common Questions
How often should I replace my air conditioner filter?
Most homes benefit from replacing filters every 30–90 days, depending on usage, pets, and climate. Check your unit’s manual for manufacturer recommendations and adjust based on observed airflow and comfort.
Most homes should replace filters every 30 to 90 days, depending on usage and pets. Check your manual for exact guidance.
Can I wash and reuse disposable filters?
Disposable filters are generally not designed to be reused. Some durable options may be washable if the manufacturer specifies; otherwise, replace with a new filter.
Most disposable filters aren’t reusable. Only washable ones should be reused if the manufacturer says so.
What happens if I install the filter the wrong way?
Installing with the arrows backward blocks airflow and reduces filtration efficiency. Reinstall correctly by aligning arrows toward the blower.
If you install it the wrong way, airflow is blocked. Reinstall with arrows pointing toward the blower.
How do I know what size filter I need?
Check the size printed on the old filter frame or in the unit’s manual. If in doubt, measure the frame opening and match to a filter of the same dimensions.
Look at the old frame or your manual for size; if unsure, measure the opening and match the size.
What if my unit isn’t cooling after replacing the filter?
A dirty filter can affect airflow, but not cooling refrigerant issues. If cooling problems persist after replacement, inspect coils and ducts or call a professional.
If cooling doesn’t improve after changing the filter, there may be other issues like coils or refrigerant needing attention.
Should humid climates require more frequent filter changes?
Yes. Humidity and dust can clog filters faster, so plan more frequent replacements in humid zones or dusty environments.
In humid or dusty climates, replace filters more often to maintain airflow and air quality.
Watch Video
The Essentials
- Identify the correct filter size before purchase.
- Install with arrows facing the blower for proper airflow.
- Replace on a regular schedule to maintain efficiency.
- Ensure a tight seal around the filter frame.
- Record replacement dates to stay on track.